
Planet Python
Real Python: The Real Python Podcast – Episode #226: PySheets: Spreadsheets in the Browser Using PyScript
What goes into building a spreadsheet application in Python that runs in the browser? How do you make it launch quickly, and where do you store the cells of data? This week on the show, we speak with Chris Laffra about his project, PySheets, and his book "Communication for Engineers."
[ Improve Your Python With 🐍 Python Tricks 💌 – Get a short & sweet Python Trick delivered to your inbox every couple of days. >> Click here to learn more and see examples ]
PyCon: Important Changes Ahead: A Commitment to Financial Transparency
PyCon US is the largest and longest-running annual gathering for the community using and developing the open-source Python programming language. It is produced and underwritten by the Python Software Foundation (PSF), the 501(c)(3) nonprofit organization dedicated to advancing and promoting Python and its community.
The PSF is a grant-giving non-profit and the revenue generated by PyCon US is essential to our continued community support and operations. Check out our Mission and our latest Annual Impact Report to get an idea of the scope of work our foundation is responsible for. Many misunderstand or are unaware of this relationship, but the PSF relies on maintaining a strict budget for the operation of PyCon US in order to continue its grants programs and other financial responsibilities.
With this in mind, PyCon US has taken on many expenses in the years following the pandemic, including the losses associated with canceling PyCon US 2020 and the move to PyCon US 2021 online. Additionally, inflation in event costs and lower projected sponsorships have combined to create a significant loss for PyCon US and the PSF in 2024.
Because the PSF is a nonprofit, we keep PyCon US registration costs much lower than comparable technology conferences. Our goal is for PyCon US to remain accessible to the widest group possible. For us to continue to do so and ensure the sustainability of the event, we’ve had to make some changes to the structure of PyCon US. We know that an important piece of making changes to PyCon US is notice and awareness to our wonderful community– and we want to be transparent about the reasons behind them.
Ticket PricesTo continue providing the content, program, and opportunities of PyCon US this year and in the future and to offset these rising costs, we’ve decided to raise ticket prices this year by $50 USD for the Individual and Corporate rates and $25 USD for the Student rate.
New PyCon US 2025 registration prices:
- Corporate: $800 USD
- Individual: $450 USD
- Student: $125 USD
By adjusting ticket prices, we hope to continue delivering a valuable and enriching conference experience while still being financially accessible to our community.
PyCon US OnlinePyCon US moved to online for the first year in 2021 during the pandemic and we’ve been proud to offer the Online attendance option for the past three years since. While we recognize the value that PyCon US Online provides in terms of accessibility, the challenges of delivering a seamless and engaging experience for both in-person and virtual attendees have been significant. From a cost perspective alone, cutting the online event will free up resources that can be put back into the in person and after-conference experience.
PyCon US will record all Talk tracks, Keynotes and Lightning Talks on the main days of the conference (Friday - Sunday) and we plan to publish these recordings very quickly after the sessions take place so those who can’t join us in person can access them while the topics are still current.
We appreciate the enthusiasm and participation of everyone who was part of the PyCon US Online experience and encourage everyone who can to join us in person in Pittsburgh this year. If you are unable to join, we welcome you to subscribe to our PyCon US YouTube channel to receive notifications of new content.
Tutorial RecordingsThe pre-conference tutorials are a valuable part of the PyCon US conference and provide an opportunity for Pythonistas around the world to learn and grow their skills in hands-on sessions.
Tutorial ticket sales are a large source of revenue for PyCon US, but in the past few years, the margin on the tutorials has declined due to rising costs associated with recording these sessions.
Because tutorials are longer than talks and are in an interactive classroom-like setting, they require many resources such as power, better internet connectivity, and catering. Additionally, tutorial instructors are compensated due to the amount of work involved in preparing and providing these sessions.
Since tutorial registration is at an additional cost, we want to prioritize the experience for those attending in person and to do so, we will be removing tutorial recordings this year. The value of the face-to-face learning, discussions, and hands-on engagement that occurs during the tutorials outweighs the benefits of capturing the sessions for later viewing and can’t be replicated in a recorded format. We hope this change will encourage more attendees to participate in the tutorials onsite and engage with the content the instructors work very hard to provide.
Speaker Travel Grant LimitThe support of our community has allowed us to offer generous Travel Grants based on individual needs including travel, accommodation, and conference tickets. The Travel Grant program helps us shape a conference that is diverse on a number of axes from technical to geographic.
However, with decreased Travel Grant funds, PyCon US wants to ensure that we can still spread out our funding to support as many people as possible. Currently, a large part of the Travel Grant budget goes to speakers, and all speakers who are included on the proposal for an accepted talk are automatically eligible for a travel grant. For 2025, there will be a limit of two Travel Grant-funded speakers per accepted proposal across all tracks. We believe this will allow us to spread our funding capacity across our community and welcome as many Pythonistas to PyCon US as we can, while not impacting the quality and diversity of our programming.
Thank you!PyCon US has been around for over 20 years, and we want to ensure it sticks around for many more! We recognize that these changes will impact many folks in a variety of ways, and we hope that our transparency about why these decisions were made will help bring understanding.
By making these changes and being willing to adapt, PyCon US can continue to be a welcoming, community conference, where everyone can meet new people and learn new things, connect with old friends and tell people about their projects. We appreciate our community’s support and understanding regarding these changes. If you have any feedback or questions, please feel free to reach out to the organizing team.
Nick Coghlan: The origin of venvstacks
There has been a longstanding gap in the Python packaging ecosystem that has somewhat annoyed me, but not enough to do anything about it: we haven't really had a good way to compose multiple layers of Python virtual environments together, allowing large dependencies (like AI and machine learning libraries) to be shared across multiple different application environments without having to install them directly into the base runtime environment.
Utilities for collecting up an entire Python runtime, an application, and all its dependencies into a single deployable artifact have existed since before the turn of the century.
We've had standardised virtual environments (allowing multiple applications to share a base Python runtime and its directly installed third party packages) for almost as long.
We've had zip applications for a long time as well (and other utilities which build on that feature).
We've had tools like wagon which allow us to ship a bundle of prebuilt Python wheel archives and install them on a destination system without needing to download anything else from the internet at installation time.
We've had tools like conda (and more recently uv), which make intelligent use of hard links on local systems to avoid making duplicate copies of completely identical versions of packages.
We've technically had platform specific mechanisms like Linux container images, where the contents of an environment can be built up across multiple container image layers, with the lower layers being shared across multiple image definitions, but have lacked a convenient way to handle the dependency management complications involved in using these tools to share large Python libraries.
But we've never had something which specifically took full advantage of the way Python's import system works to enable robust structural decomposition of Python applications into independently updatable subcomponents (with a granularity larger than single packages).
All of this history meant that I was thoroughly intrigued when a mutual acquaintance introduced me to the creators of the LM Studio personal AI desktop application to discuss a Python packaging problem they had looming on their technical road map: it was clear from user demand and the rate of evolution in the Python AI/ML ecosystem that they needed a way to ship Python AI/ML components directly to their users without having to wait for those capabilities to be made available through native interfaces in other languages (such as Swift, C++, or JavaScript), but it didn't seem obvious to them how they could readily integrate that capability into LM Studio without making the application installation process substantially more complicated for their users.
What started as a consulting contract for a technical proof of concept, and has since turned into a permanent position with the organisation, proved fruitful, and the result is the recently published open source venvstacks utility, which is specifically designed to enable the kind of portable deterministic artifact publishing setup that LM Studio needed, including:
- Base runtime layers (based on python-build-standalone)
- Framework layers (for shipping large dependencies, such as Apple MLX or PyTorch)
- Application layers (including additional unpackaged "launch modules" for app execution)
There are certainly still some technical limitations to be addressed (the dynamic linking problem with layering virtual environments like this is notorious amongst Python packaging experts for a reason), but even in its current form, venvstacks is already capable enough to power the recent inclusion of Apple MLX support in LM Studio.
John Cook: How hard is constraint programming?
I’ve been writing code for the Z3 SMT solver for several months now. Here are my findings.
Python is used here as the base language. Python/Z3 feels like a two-layer programming model—declarative code for Z3, imperative code for Python. In this it seems reminiscent of C++/CUDA programming for NVIDIA GPUs—in that case, mixed CPU and GPU imperative code. Either case is a clever combination of methodologies that is surprisingly fluent and versatile, albeit not a perfect blend of seamless conceptual cohesion.
Other comparisons:
- Both have two separate memory spaces (CUDA CPU/GPU memories for one; pure Python variables and Z3 variables for the other).
- Both can be tricky to debug. In earlier days, CUDA had no debugger, so one had to fall back to the trusty “printf” statement (for a while it didn’t even have that!). If the code crashed, you might get no output at all. To my knowledge, Z3 has no dedicated debugger. If the problem being solved comes back as satisfiable, you can print out the discovered model variables, but if satisfiability fails, you get very little information. Like some other novel platforms, something of a “black box.”
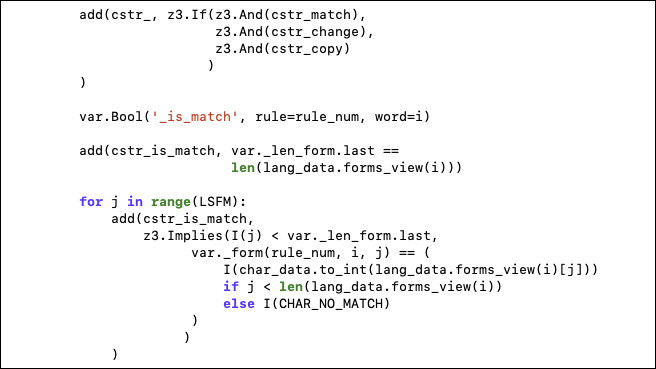
- In both cases, programmer productivity can be well-served by developing custom abstractions. I developed a Python class to manage multidimensional arrays of Z3 variables, this was a huge time saver.
There are differences too, of course.
- In Python, “=” is assignment, but in Z3, one only has “==”, logical or numeric equality, not assignment per se. Variables are set once and can’t be changed—sort of a “write-once variables” programming model—as is natural to logic programming.
- Code speed optimization is challenging. Code modifications for Z3 constraints/variables can have extreme and unpredictable runtime effects, so it’s hard to optimize. Z3 is solving an NP-complete problem after all, so runtimes can theoretically increase massively. Speedups can be massive also; one round of changes I made gave 2000X speedup on a test problem. Runtime of CUDA code can be unpredictable to a lesser degree, depending on the PTX and SASS code generation phases and the aggressive code optimizations of the CUDA compiler. However, it seems easier to “see through” CUDA code, down to the metal, to understand expected performance, at least for smaller code fragments. The Z3 solver can output statistics of the solve, but these are hard to actionably interpret for a non-expert.
- Z3 provides many, many algorithmic tuning parameters (“tactics”), though it’s hard to reason about which ones to pick. Autotuners like FastSMT might help. Also there have been some efforts to develop tools to visualize the solve process, this might be of help.
It would be great to see more modern tooling support and development of community best practices to help support Z3 code developers.
The post How hard is constraint programming? first appeared on John D. Cook.eGenix.com: PyDDF Python Herbst Sprint 2024
The following text is in German, since we're announcing a Python sprint in Düsseldorf, Germany.
Python Meeting Herbst Sprint 2024 in
Düsseldorf
Samstag, 09.11.2024, 10:00-18:00 Uhr
Sonntag, 10.11.2024. 10:00-18:00 Uhr
Eviden / Atos Information Technology GmbH, Am Seestern 1, 40547 Düsseldorf
Informationen Das Python Meeting Düsseldorf (PyDDF) veranstaltet mit freundlicher Unterstützung von Eviden Deutschland ein Python Sprint Wochenende.Der Sprint findet am Wochenende 09./10.11.2024 in der Eviden / Atos Niederlassung, Am Seestern 1, in Düsseldorf statt.Folgende Themengebiete sind als Anregung bereits angedacht:
- AI/ML: Bilderkennung mit Azure Computervision
- AI/ML: Texte und Meta Daten aus Presseseiten extrahieren, mit Hilfe eines lokalen LLMs
- AI/ML: Transkription von Videos/Audiodateien mit Whisper
- Kodi Add-Ons für ARD, ZDF und ARTE
Alles weitere und die Anmeldung findet Ihr auf der Meetup Sprint Seite:
WICHTIG: Ohne Anmeldung können wir den Gebäudezugang nicht vorbereiten. Eine spontane Anmeldung am Sprint Tag wird daher vermutlich nicht funktionieren.
Teilnehmer sollten sich zudem in der PyDDF Telegram Gruppe registrieren, da wir uns dort koordinieren:
Das Python Meeting Düsseldorf ist eine regelmäßige Veranstaltung in Düsseldorf, die sich an Python-Begeisterte aus der Region wendet.
Einen guten Überblick über die Vorträge bietet unser PyDDF YouTube-Kanal, auf dem wir Videos der Vorträge nach den Meetings veröffentlichen.Veranstaltet wird das Meeting von der eGenix.com GmbH, Langenfeld, in Zusammenarbeit mit Clark Consulting & Research, Düsseldorf.
Marc-André Lemburg, eGenix.com
The Python Show: 49 - EdgeDB and Python with Yury Selivanov
In this episode of The Python Show Podcast, we welcome Yury Selivanov as our guest. Yury is a core CPython developer and co-founder of EdgeDB and MagicStack.
We chatted about many different topics, including the following:
Core Python development
EdgeDB and how it differs from relational databases
Python without the GIL
Python subinterpreters
Memhive
and more!
Learn more about our guest and the topics we talked about with the following links:
Yury’s GitHub page
EdgeDB on GitHub
EdgeDB’s website
PyCon 2024 - Yury Selivanov: Overcoming GIL with subinterpreters and immutability
An article about Memhive
Real Python: Python Closures: Common Use Cases and Examples
In Python, a closure is typically a function defined inside another function. This inner function grabs the objects defined in its enclosing scope and associates them with the inner function object itself. The resulting combination is called a closure.
Closures are a common feature in functional programming languages. In Python, closures can be pretty useful because they allow you to create function-based decorators, which are powerful tools.
In this tutorial, you’ll:
- Learn what closures are and how they work in Python
- Get to know common use cases of closures
- Explore alternatives to closures
To get the most out of this tutorial, you should be familiar with several Python topics, including functions, inner functions, decorators, classes, and callable instances.
Get Your Code: Click here to download the free sample code that shows you how to use closures in Python.
Take the Quiz: Test your knowledge with our interactive “Python Closures: Common Use Cases and Examples” quiz. You’ll receive a score upon completion to help you track your learning progress:
Interactive Quiz
Python Closures: Common Use Cases and ExamplesIn this quiz, you'll test your understanding of Python closures. Closures are a common feature in functional programming languages and are particularly popular in Python because they allow you to create function-based decorators.
Getting to Know Closures in PythonA closure is a function that retains access to its lexical scope, even when the function is executed outside that scope. When the enclosing function returns the inner function, then you get a function object with an extended scope.
In other words, closures are functions that capture the objects defined in their enclosing scope, allowing you to use them in their body. This feature allows you to use closures when you need to retain state information between consecutive calls.
Closures are common in programming languages that are focused on functional programming, and Python supports closures as part of its wide variety of features.
In Python, a closure is a function that you define in and return from another function. This inner function can retain the objects defined in the non-local scope right before the inner function’s definition.
To better understand closures in Python, you’ll first look at inner functions because closures are also inner functions.
Inner FunctionsIn Python, an inner function is a function that you define inside another function. This type of function can access and update names in their enclosing function, which is the non-local scope.
Here’s a quick example:
Python >>> def outer_func(): ... name = "Pythonista" ... def inner_func(): ... print(f"Hello, {name}!") ... inner_func() ... >>> outer_func() Hello, Pythonista! >>> greeter = outer_func() >>> print(greeter) None Copied!In this example, you define outer_func() at the module level or global scope. Inside this function, you define the name local variable. Then, you define another function called inner_func(). Because this second function lives in the body of outer_func(), it’s an inner or nested function. Finally, you call the inner function, which uses the name variable defined in the enclosing function.
When you call outer_func(), inner_func() interpolates name into the greeting string and prints the result to your screen.
Note: To learn more about inner functions, check out the Python Inner Functions: What Are They Good For? tutorial.
In the above example, you defined an inner function that can use the names in the enclosing scope. However, when you call the outer function, you don’t get a reference to the inner function. The inner function and the local names won’t be available outside the outer function.
In the following section, you’ll learn how to turn an inner function into a closure, which makes the inner function and the retained variables available to you.
Function ClosuresAll closures are inner functions, but not all inner functions are closures. To turn an inner function into a closure, you must return the inner function object from the outer function. This may sound like a tongue twister, but here’s how you can make outer_func() return a closure object:
Python >>> def outer_func(): ... name = "Pythonista" ... def inner_func(): ... print(f"Hello, {name}!") ... return inner_func ... >>> outer_func() <function outer_func.<locals>.inner_func at 0x1066d16c0> >>> greeter = outer_func() >>> greeter() Hello, Pythonista! Copied! Read the full article at https://realpython.com/python-closure/ »[ Improve Your Python With 🐍 Python Tricks 💌 – Get a short & sweet Python Trick delivered to your inbox every couple of days. >> Click here to learn more and see examples ]
Ned Batchelder: GitHub action security: zizmor
Zizmor is a new tool to check your GitHub action workflows for security concerns. I found it really helpful to lock down actions.
Action workflows can be esoteric, and continuous integration is not everyone’s top concern, so it’s easy for them to have subtle flaws. A tool like zizmor is great for drawing attention to them.
When I ran it, I had a few issues to fix:
- Some data available to actions is manipulable by unknown people, so you have
to avoid interpolating it directly into shell commands. For example, you might
want to add the branch name to the action summary:
- name: "Summarize"
run: |
echo "### From branch ${{ github.ref }}" >> $GITHUB_STEP_SUMMARY
But github.ref is a branch name chosen by the author of the pull request. It could have a shell injection which could let an attacker exfiltrate secrets. Instead, put the value into an environment variable, then use it to interpolate: - name: "Summarize"
env:
REF: ${{ github.ref }}
run: |
echo "### From branch ${REF}" >> $GITHUB_STEP_SUMMARY
- The actions/checkout step should avoid persisting credentials:
- name: "Check out the repo"
uses: actions/checkout@11bd71901bbe5b1630ceea73d27597364c9af683 # v4.2.2
with:
persist-credentials: false
- In steps where I was pushing to GitHub, this meant I needed to explicitly
set a remote URL with credentials:
- name: "Push digests to pages"
env:
GITHUB_TOKEN: ${{ secrets.token }}
run: |
git config user.name nedbat
git config user.email ned@nedbatchelder.com
git remote set-url origin https://x-access-token:${GITHUB_TOKEN}@github.com/${GITHUB_REPOSITORY}.git
There were some other things that were easy to fix, and of course, you might have other issues. One improvement to zizmor: it could link to explanations of how to fix the problems it finds, but it wasn’t hard to find resources, like GitHub’s Security hardening for GitHub Actions.
William Woodruff is zizmor’s author. He was incredibly responsive when I had problems or questions about using zizmor. If you hit a snag, write an issue. It will be a good experience.
If you are like me, you have repos lying around that you don’t think about much. These are a special concern, because their actions could be years old, and not well maintained. These dusty corners could be a good vector for an attack. So I wanted to check all of my repos.
With Claude’s help I wrote a shell script to find all git repos I own and run zizmor on them. It checks the owner of the repo because my drive is littered with git repos I have no control over:
#!/bin/bash# zizmor-repos.sh
echo "Looking for workflows in repos owned by: $*"
# Find all git repositories in current directory and subdirectories
find . \
-type d \( \
-name "Library" \
-o -name "node_modules" \
-o -name "venv" \
-o -name ".venv" \
-o -name "__pycache__" \
\) -prune \
-o -type d -name ".git" -print 2>/dev/null \
| while read gitdir; do
# Get the repository directory (parent of .git)
repo_dir="$(dirname "$gitdir")"
# Check if .github/workflows exists
if [ -d "${repo_dir}/.github/workflows" ]; then
# Get the GitHub remote URL
remote_url=$(git -C "$repo_dir" remote get-url origin)
# Check if it's our repository
# Handle both HTTPS and SSH URL formats
for owner in $*; do
if echo "$remote_url" | grep -q "github.com[/:]$owner/"; then
echo ""
echo "Found workflows in $owner repository: $repo_dir"
~/.cargo/bin/zizmor $repo_dir/.github/workflows
fi
done
fi
done
After fixing issues, it’s very satisfying to see:
% zizmor-repos.sh nedbat BostonPythonLooking for workflows in repos owned by: nedbat BostonPython
Found workflows in nedbat repository: ./web/stellated
🌈 completed ping-nedbat.yml
No findings to report. Good job!
Found workflows in nedbat repository: ./web/nedbat_nedbat
🌈 completed build.yml
No findings to report. Good job!
Found workflows in nedbat repository: ./scriv
🌈 completed tests.yml
No findings to report. Good job!
Found workflows in nedbat repository: ./lab/gh-action-tests
🌈 completed matrix-play.yml
No findings to report. Good job!
Found workflows in nedbat repository: ./aptus/trunk
🌈 completed kit.yml
No findings to report. Good job!
Found workflows in nedbat repository: ./cog
🌈 completed ci.yml
No findings to report. Good job!
Found workflows in nedbat repository: ./dinghy/nedbat
🌈 completed test.yml
🌈 completed daily-digest.yml
🌈 completed docs.yml
No findings to report. Good job!
Found workflows in nedbat repository: ./dinghy/sample
🌈 completed daily-digest.yml
No findings to report. Good job!
Found workflows in nedbat repository: ./coverage/badge-samples
🌈 completed samples.yml
No findings to report. Good job!
Found workflows in nedbat repository: ./coverage/django_coverage_plugin
🌈 completed tests.yml
No findings to report. Good job!
Found workflows in nedbat repository: ./coverage/trunk
🌈 completed dependency-review.yml
🌈 completed publish.yml
🌈 completed codeql-analysis.yml
🌈 completed quality.yml
🌈 completed kit.yml
🌈 completed python-nightly.yml
🌈 completed coverage.yml
🌈 completed testsuite.yml
No findings to report. Good job!
Found workflows in BostonPython repository: ./bospy/about
🌈 completed past-events.yml
No findings to report. Good job!
Nice.
Seth Michael Larson: How to export OPML from Omnivore
Published 2024-10-30 by Seth Larson
Reading time: minutes
Omnivore recently announced they were bought by ElevenLabs, which is an AI company funded by Trump-supporting VC firm Andreessen Horowitz. As a part of this deal, they are shuttering the service on an extremely tight deadline.
This is very disappointing to me, I've previously recommended Omnivore to others and have donated for the past year that I've used the service. It goes without saying that I want nothing to do with Omnivore.
At the recommendation of a few friends I am going to try out Feedbin, which costs $5/month (the same price that I was willing to donate to Omnivore) and has a generous 30-day trial. This service has been around for much longer and appears to not be adding AI garbage to their app (thank you, Feedbin!)
The Omnivore team has unhelpfully given an extremely tight deadline to migrate your content out before they shutter the service: November 15th. Exporting your content (links, tags, rendered HTML pages) worked fine for me but I had to restart the export process once. Please do this ASAP to avoid losing your data.
I will need to write a few scripts to import the content into Feedbin. But your data export doesn't give you your RSS or newsletter subscriptions (again, screw you Omnivore).
So I wrote a short Python script to do that. First install the dependencies (OmnivoreQL and PyOPML):
$ python -m pip install omnivoreql pyopmlYou'll also need to create an Omnivore API token and place the value in the script:
import opml from omnivoreql import OmnivoreQL omnivore_api_token = "<YOUR API TOKEN GOES HERE>" omnivore = OmnivoreQL(api_token=omnivore_api_token) subscriptions = omnivore.get_subscriptions() with open("newsletters.txt", mode="w") as newsletters_fileobj: newsletters_fileobj.truncate() feeds_opml = opml.OpmlDocument( title="Omnivore Feeds Export" ) for subscription in subscriptions["subscriptions"]["subscriptions"]: if subscription["newsletterEmail"] is not None: newsletters_fileobj.write(subscription["name"] + "\n") else: feeds_opml.add_rss( text=subscription["name"], title=subscription["name"], xml_url=subscription["url"], description=subscription["description"], ) with open("feeds.opml", mode="wb") as feeds_fileobj: feeds_fileobj.truncate() feeds_opml.dump(feeds_fileobj, pretty=True)After running the script you'll have two files: feeds.opml and newsletters.txt.
The feeds.opml file can be imported into RSS readers that support the OPML format (Feedbin and many other services do).
The newsletters.txt file is mostly to remind you which newsletters you've subscribed to. Because these readers use custom email addresses to handle newsletters you'll need to manually set these subscriptions up on the new reader service you choose to use.
If there's any issues with the script above, get in contact and I'll try to fix any issues.
Have thoughts or questions? Let's chat over email or social:
sethmichaellarson@gmail.com
@sethmlarson@fosstodon.org
Want more articles like this one? Get notified of new posts by subscribing to the RSS feed or the email newsletter. I won't share your email or send spam, only whatever this is!
Want more content now? This blog's archive has ready-to-read articles. I also curate a list of cool URLs I find on the internet.
Find a typo? This blog is open source, pull requests are appreciated.
Thanks for reading! ♡ This work is licensed under CC BY-SA 4.0
︎Armin Ronacher: Make It Ephemeral: Software Should Decay and Lose Data
Most software that exists today does not forget. Creating software that remembers is easy, but designing software that deliberately “forgets” is a bit more complex. By “forgetting,” I don't mean losing data because it wasn’t saved or losing it randomly due to bugs. I'm referring to making a deliberate design decision to discard data at a later time. This ability to forget can be an incredibly benefitial property for many applications. Most importantly software that forgets enables different user experiences.
I'm willing to bet that your cloud storage or SaaS applications likely serve as dumping grounds for outdated, forgotten files and artifacts. This doesn’t have to be the case.
Older computer software often aimed to replicate physical objects and experiences. This approach (skeuomorphism) was about making digital interfaces feel familiar to older physical objects. They resembled the appearance and behavior even though they didn't need to. Ironically though skeuomorphism despite focusing on look and feel, rarely considers some of the hidden affordances of the physical world. Critically, rarely does digial software feature degradation. Yes, the trash bin was created as an appoximation of this, but the bin seemingly did not make it farther than file or email management software. It also does not go far enough.
In the physical world, much of what we create has a natural tendency to decay and that is really useful information. A sticky note on a monitor gathers dust and fades. A notebook fills with notes and random scribbles, becomes worn, and eventually ends up in a cabinet to finally end its life discarded in a bin. We probably all clear out our desk every couple of months, tossing outdated items to keep the space manageable. When I do that, a key part of this is quickly judging how “old” some paper looks. But even without regular cleaning, things are naturally lost or discarded over time on my desk. Yet software rarely behaves this way. I think that’s a problem.
When data is kept indefinitely by default, it changes our relationship with that software. People sometimes may hesitate to create anything in shared spaces for fear of cluttering them, while others might indiscriminately litter them. In file-based systems, this may be manageable, but in shared SaaS applications, everything created (dashboards, notebooks, diagrams) lingers indefinitely and remains searchable and discoverable. This persistence seems advantageous but can quickly lead to more and more clutter.
Adding new data to software is easy. Scheduling it for automatic deletion is a bit harder. Simulating any kind of “visual decay” to hint at age or relevance is rarely seen in today's software though it wouldn't be all that hard to add. I'm not convinced that the work required to implement any of those things is why it does not exist, I think it's more likely that there is a belief that keeping stuff around forever is a benefit over the limitations of the real world.
The reality is that even though the entities we create are sticking around forever, the information contained within them ages badly. Of the 30 odd "test" dashboards that are in our Datadog installation, most of them don't show data any more. The same is true for hundreds of notebooks. We have a few thousand notebooks and quite a few of them at this point are anchored to data that is past the retention period or are referencing metrics that are gone.
In shared spaces with lots of users, few things are intended to last forever. I hope that it will become more popular for software to take age more intentional into account. For instance one can start fading out old documents that are rarely maintained or refreshed. I want software to hide old documents, dashboards etc. and that includes most critically not showing up in search. I don't want to accidentally navigate to old and unused dashboards in the mids of an incident.
Sorting by frequency of use is insufficient to me. Ideally software embraced an “ephemeral by default” approach. While there’s some risk of data loss, you can make the deletion purely virtual (at least for a while). Imagine dashboard software with built-in “garbage collection”: everything created starts with a short time-to-live (say, 30 days), after which it moves to a “to sort” folder. If it’s not actively sorted and saved within six months, it's moved to a trash and eventually deleted.
This idea extends far beyond dashboards! Wiki and innformation management software like Notion could benefit from decaying notes, as the information they hold often becomes outdated quickly. I routinely encounter more outdated pages than current ones. While outright deletion may not be the solution, irrelevant notes and documents showing up in searches add to the clutter and make finding useful information harder. “But I need my data sometimes years later” I hear you say. What about making it intentional? Archive them in year books. Make me intentionally “dig into the archives” if I really have to. There are many very intentional ways of dealing with this problem.
And even if software does not want to go down that path I would at least wish for scheduled deletion. I will forget to delete, and I'm lazy and given the tools available I rarely clean up. Yet many of the things I create I already know I really only need for a week or to. So give me a button I can press to schedule deletion. Then I don't have to remember to clean up after myself a few months later, but I can make that call already today when I create my thing.
Zero to Mastery: Python Monthly Newsletter 💻🐍
PyCoder’s Weekly: Issue #653 (Oct. 29, 2024)
#653 – OCTOBER 29, 2024
View in Browser »
Simon writes about a Soduku solver written by Konstin that uses the Python packaging mechanisms to do Soduku puzzles. The results are output using a requirements.txt file, where soduku-0-3==5 represents the (0,3) cell’s answer of 5.
SIMON WILLISON
In this tutorial, you’ll learn about the issues that can occur when your code is run in a multithreaded environment. Then you’ll explore the various synchronization primitives available in Python’s threading module, such as locks, which help you make your code safe.
REAL PYTHON
Open-source OpenAPI generators are great for experimentation and hobby projects but lack the reliability, performance, and intuitive developer experience required for critical applications. Speakeasy creates idiomatic SDKs that meet the bar for enterprise use. Check out this comparison guide →
SPEAKEASY sponsor
PEP 761 proposes removing PGP signatures from CPython artifacts and solely relying on Sigstore. But just what is Sigstore? This post explains how CPython gets signed and why Sigstore is a good choice.
SETH LARSON
Currently, if you want to play around with Wagtail, most people try the Bakery Demo test site, but it is not meant to be a starter site. They’ve created a new starter template that provides you with a high-performance, production-grade Wagtail site. This introduces you to it.
JAKE HOWARD • Shared by Meagen Voss
Python’s Global Interpreter Lock or GIL, in simple words, is a mutex (or a lock) that allows only one thread to hold the control of the Python interpreter at any one time. In this video course you’ll learn how the GIL affects the performance of your Python programs.
REAL PYTHON course
“With Temporal, we…regularly reduced lines of code from 300 to 30.” -DigitalOcean. Ever wish you could eliminate recovery logic, callbacks, and timers? Temporal’s open source programming model allows you to stop plumbing and start focusing on what matters: building awesome features. Check it out now →
TEMPORAL TECHNOLOGIES sponsor
At work, Adriaan deals with code that interfaces with Unix SysV’s shared memory components. For convenience he wanted to get at this from Python, and “because work”, from Python 3.7. This post talks about how he solved the problem.
ADRIAAN DE GROOT
Bite Code summarizes some of the lesser covered changes to Python in the 3.13 release, including how some of the REPL improvements made it into pdb, improvements to shutil, and small additions to the asyncio library.
BITE CODE!
This tutorial explores how the htmx library can bring dynamic functionality, like lazy loading, search-as-you-type, and infinite scroll to your Django project with almost no JavaScript necessary.
PYCHARM CHANNEL video
This post shows the results of a performance comparison between Python 3.12 and 3.13 on two different processors. TL;DR: Python 3.13 is faster, but there are a couple of hairy edge cases.
WŁODZIMIERZ LEWONIEWSKI
This post examines the devaluation of software engineer titles and its impact on the integrity of the tech industry.
TREVOR LASN
This is a listing of the recorded talks from PyData Amsterdam.
YOUTUBE video
GITHUB.COM/NIKDEDOV • Shared by Nikolai
Scrapling: Lightning-Fast, Adaptive Web Scraping for PythonGITHUB.COM/D4VINCI • Shared by Karim Shoair
otterwiki: A Minimalistic Wiki Powered by Python msgspec: Fast Serialization and Validation Library beartype: Bare Metal Type Checker Events Weekly Real Python Office Hours Q&A (Virtual) October 30, 2024
REALPYTHON.COM
October 31 to November 3, 2024
PYCON.FR
October 31 to November 3, 2024
PYCON.ORG
October 31, 2024
MEETUP.COM
November 2, 2024
MEETUP.COM
November 4, 2024
J.MP
Happy Pythoning!
This was PyCoder’s Weekly Issue #653.
View in Browser »
[ Subscribe to 🐍 PyCoder’s Weekly 💌 – Get the best Python news, articles, and tutorials delivered to your inbox once a week >> Click here to learn more ]
PyCharm: Data Exploration With pandas
Maybe you’ve heard complicated-sounding phrases such as ‘“Students t-test”, “regression models”, “support vector machines”, and so on. You might think there’s so much you need to learn before you can explore and understand your data, but I am going to show you two tools to help you go faster. These are summary statistics and graphs.
Summary statistics and graphs/plots are used by new and experienced data scientists alike, making them the perfect building blocks for exploring data.
We will be working with this dataset available from Kaggle if you’d like to follow along. I chose this dataset because it has several interesting properties, such as multiple continuous and categorical variables, missing data, and a variety of distributions and skews. I’ll explain each variable I work with and why I chose each one to show you the tools you can apply to your chosen data set.
In our previous blog posts, we looked at where to get data from and bring that data into PyCharm. You can look at steps 1 and 2 from our blog post entitled 7 ways to use Jupyter notebooks in PyCharm to create a new Jupyter notebook and import your data as a CSV file if you need a reminder. You can use the dataset I linked above or pick your own for this walkthrough.
We’re going to be using the pandas library in this blog post, so to ensure we’re all on the same page, your code should look something like the following block in a Jupyter notebook – you’ll need to change the spreadsheet name and location to yours, though. Make sure you’ve imported matplotlib, too, as we will be using that library to explore our data.
import pandas as pd import matplotlib as plt df = pd.read_csv('../data/AmesHousing.csv') dfWhen you run that cell, PyCharm will show you your DataFrame, and we can get started.
Try PyCharm Professional for free
Summary statisticsWhen we looked at where to get data from, we discussed continuous and categorical variables. We can use Jupyter notebooks inside PyCharm to generate different summary statistics for these, and, as you might have already guessed, the summary statistics differ depending on whether the variables are continuous or categorical.
Continuous variables summary statisticsFirst, let’s see how we can view our summary statistics. Click on the small bar graph icon on the right-hand side of your DataFrame and select Compact:
Let me give you a little tip here if you’re unsure which variables are continuous and which are categorical, PyCharm shows different summary statistics for each one. The ones with the mini graphs (blue in this screenshot) are continuous, and those without are categorical.
This data set has several continuous variables, such as Order, PID, MS SubClass, and more, but we will focus on Lot Frontage first. That is the amount of space at the front of the property.
The summary statistics already give us some clues:
There’s a lot of data here, so let’s break it down and explore it to understand it better. Immediately, we can see that we have missing data for this variable; that’s something we want to note, as it might mean we have some issues with the dataset, although we won’t go into that in this blog post!
First, you can see the little histogram in blue in my screenshot, which tells us that we have a positive skew in our data because the data tails off to the right. We can further confirm this with the data because the mean is slightly larger than the median. That’s not entirely surprising, given we’d expect the majority of lot frontages to be of a similar size, but perhaps there are a small number of luxury properties with much bigger lot frontages that are skewing our data. Given this skew, we would be well advised not to use the standard deviation as a measure of dispersion because that is calculated by using all data points, so it’s affected by outliers, which we know we have on one side of our distribution.
Next, we can calculate our interquartile range as the difference between our 25th percentile of 58.0 and our 75th percentile of 80.0, giving us an interquartile range of 22.0. Alongside the interquartile range, it’s helpful to consider the median, the middle value in our data, and unlike the mean, it is not based on every data point. The median is more appropriate for Lot Frontage than the mean because it’s not affected by the outliers we know we have.
Since we’re talking about the median and interquartile range, it is worth saying that box plots are a great way to represent these values visually. We can ask JetBrains AI Assistant to create one for us with a prompt such as this:
Create code using matplotlib for a box plot for ‘Lot Frontage’. Assume we have all necessary imports and the data exists.
Here’s the code that was generated:
plt.figure(figsize=(10, 6)) plt.boxplot(df['Lot Frontage'].dropna(), vert=False) plt.title('Box Plot of Lot Frontage') plt.xlabel('Lot Frontage') plt.show()When I click Accept and run, we get our box plot:
The median is the line inside the box, which, as you can see, is slightly to the left, confirming the presence of the positive or right-hand skew. The box plot also makes it very easy to see a noticeable number of outliers to the right of the box, known as “the tail”. That’s the small number of likely luxury properties that we suspect we have.
It’s important to note that coupling the mean and standard deviation or the median and IQR gives you two pieces of information for that data: a central tendency and the variance. For determining the central tendency, the mean is more prone to being affected by outliers, so it is best when there is no skew in your data, whereas the median is more robust in that regard. Likewise, for the variation, the standard deviation can be affected by outliers in your data. In contrast, the interquartile range will always tell you the distribution of the middle 50% of your data. Your goals determine which measurements you want to use.
Categorical variables summary statisticsWhen it comes to categorical variables in your data, you can use the summary statistics in PyCharm to find patterns. At this point, we need to be clear that we’re talking about descriptive rather than inferential statistics. That means we can see patterns, but we don’t know if they are significant.
Some examples of categorical data in this data set include MS Zoning, Lot Shape, and House Style. You can gain lots of insights just by looking through your data set. For example, looking at the categorical variable Neighborhood, the majority are stated as Other in the summary statistics with 75.8%. This tells you that there might well be a lot of categories in Neighborhood, which is something to bear in mind when we move on to graphs.
As another example, the categorical variable House Style states that about 50% of the houses are one-story, while 30% are two-story, leaving 20% that fall into some other category that you might want to explore in more detail. You can ask JetBrains AI for help here with a prompt like:
Write pandas code that tells me all the categories for ‘House Style’ in my DataFrame ‘df’, which already exists. Assume we have all the necessary imports and that the data exists.
Here’s the resulting code:
unique_house_styles = df['House Style'].unique() print("Unique categories for 'House Style':") print(unique_house_styles)When we run that we can see that the remaining 20% is split between various codes that we might want to research more to understand what they mean:
Unique categories for ‘House Style’:
['1Story' '2Story' '1.5Fin' 'SFoyer' 'SLvl' '2.5Unf' '1.5Unf' '2.5Fin']
Have a look through the data set at your categorical variables and see what insights you can gain!
Before we move on to graphs, I want to touch on one more piece of functionality inside PyCharm that you can use to access your summary statistics called Explain DataFrame. You can access it by clicking on the purple AI icon on the top-right of the DataFrame and then choosing AI Actions | Explain DataFrame.
JetBrains AI lists out your summary statistics but may also add some code snippets that are helpful for you to get your data journey started, such as how to drop missing values, filter rows based on a condition, select specific columns, as well as group and aggregate data.
GraphsGraphs or plots are a way of quickly getting patterns to pop out at you that might not be obvious when you’re looking at the numbers in the summary statistics. We’re going to look at some of the plots you can get PyCharm to generate to help you explore your data.
First, let’s revisit our continuous variable, Lot Frontage. We already learned that we have a positive or right-hand skew from the mini histogram in the summary statistics, but we want to know more!
In your DataFrame in PyCharm, click the Chart View icon on the left-hand side:
Now click the cog on the right-hand side of the chart that says Show series settings and select the Histogram plot icon on the far right-hand side. Click x to clear the values in the X axis and Y axis and then select Lot Frontage with group and sort for the X axis and Lot Frontage with count for the Y axis:
PyCharm generates the same histogram as you see in the summary settings, but we didn’t have to write a single line of code. We can also explore the histogram and mouse over data points to learn more.
Let’s take it to the next level while we’re here. Perhaps we want to see if the condition of the property, as captured by the Overall Cond variable, predicts the sale price.
Change your X axis SalePrice group and sort and your Y axis to SalePrice count and then add the group Overall Cond:
Looking at this chart, we can hypothesize that the overall condition of the property is indeed a predictor of the sale price, as the distribution and skew are remarkably similar. One small note is that grouping histograms like this works best when you have a smaller number of categories. If you change Groups to Neighborhood, which we know has many more categories, it becomes much harder to view!
Moving on, let’s stick with PyCharm’s plotting capabilities and explore bar graphs. These are a companion to frequency charts such as histograms, but can also be used for categorical data. Perhaps you are interested in Neighbourhood (a categorical variable) in relation to SalesPrice.
Click the Bar [chart] icon on the left-hand side of your series setting, then select Neighbourhood as Categories and SalesPrice with the median as the Values:
This helps us understand the neighborhoods with the most expensive and cheapest housing. I chose the median for the SalesPrice as it’s less susceptible to outliers in the data. For example, I can see that housing in Mitchel is likely to be substantially cheaper than in NoRidge.
Line plots are another useful plot for your toolkit. You can use these to demonstrate trends between continuous variables over a period of time. For example, select the Line [graph] icon and then choose Year Built as the X axis and SalePrice with the mean as the Y axis:
This suggests a small positive correlation between the year the house was built and the price of the house, especially after 1950. If you’re feeling adventurous, remove the mean from SalePrice and see how your graph changes when it has to plot every single price!
The last plot I’d like to draw your attention to is scatter plots. These are a great way to see a relationship between two continuous variables and any correlation between them. A correlation shows the strength of a relationship between two variables. To dig deeper, check out this beginner-friendly overview from Real Python.
For example, if we set our X axis to SalePrice and our Y axis to Gr LivArea, we can see that there is a positive correlation between the two variables, and we can also easily spot some outliers in our data, including a couple of houses with a lower sale price but a huge living area!
SummaryHere’s a reminder of what we’ve covered today. You can access your summary statistics in PyCharm either through Explain DataFrame with JetBrains AI or by clicking on the small graph icon on the right-hand side of a DataFrame called Column statistics and then selecting Compact. You can also use Detailed to get even more information than we’ve covered in this blog post.
You can get PyCharm to create graphs to explore your data and create hypotheses for further investigation. Some more commonly used ones are histograms, bar charts, line graphs, and scatter plots.
Finally, you can use JetBrains AI Assistant to generate code with natural language prompts in the AI tool window. This is a quick way to learn more about your data and start thinking about the insights on offer.
Download PyCharm Professional to try it out for yourself! Get an extended trial today and experience the difference PyCharm Professional can make in your data science endeavors. Use the promotion code “PyCharmNotebooks” at checkout to activate your free 60-day subscription to PyCharm Professional. The free subscription is available for individual users only.
Try PyCharm Professional for free
Using both summary statistics and graphs in PyCharm, we can learn a lot about our data, giving us a solid foundation for our next step – cleaning our data, which we will talk about in the next blog post in this series.
Real Python: Python's Magic Methods in Classes
As a Python developer who wants to harness the power of object-oriented programming, you’ll love to learn how to customize your classes using special methods, also known as magic methods or dunder methods. A special method is a method whose name starts and ends with a double underscore. These methods have special meanings in Python.
Python automatically calls magic methods as a response to certain operations, such as instantiation, sequence indexing, attribute managing, and much more. Magic methods support core object-oriented features in Python, so learning about them is fundamental for you as a Python programmer.
In this video course, you’ll:
- Learn what Python’s special or magic methods are
- Understand the magic behind magic methods in Python
- Customize different behaviors of your custom classes with special methods
[ Improve Your Python With 🐍 Python Tricks 💌 – Get a short & sweet Python Trick delivered to your inbox every couple of days. >> Click here to learn more and see examples ]
Real Python: Quiz: Using .__repr__() vs .__str__() in Python
In this quiz, you’ll test your understanding of Python’s .__repr__() and .__str__() special methods. These methods allow you to control how a program displays an object, making your classes more readable and easier to debug and maintain.
[ Improve Your Python With 🐍 Python Tricks 💌 – Get a short & sweet Python Trick delivered to your inbox every couple of days. >> Click here to learn more and see examples ]
Julien Tayon: Is chatgpt good at generating code for tuning a guitar ?
Science he was a patented CS engineer he wanted to prove me that my new guitar tuner was useless since AI could come with a better less convoluted exact example in less lines of code than mine (mine is adapted from a blog on audio processing and fast fourier transform because it was commented and was refreshing me the basics of signal processing).
And I asked him, have you ever heard of the Nyquist frequency ? or the tradeoff an oscilloscope have to do between time locality and accuracy ?
Of course he didn't. And was proud that a wannabee coder would be proven useless thanks to the dumbest AI.
So I actually made this guitar tuner because this time I wanted to have an exact figure around the Hertz.
The problem stated by FFT/Nyquist formula is that if I want an exact number around 1Hz (1 period per second) I should sample at least half a period (hence .5 second), and should not expect a good resolution.
The quoted chatgpt code takes 1024 samples out of 44100/sec, giving it a nice reactivity of 1/44th of a second with an accuracy of 44100/1024/2 => 21Hz.
I know chatgpt does not tune a guitar, but shouldn't the chatgpt user bragging about the superiority of pro as him remember that when we tune we may tune not only at A = 440Hz but maybe A = 432Hz or other ?
A note is defined as a racine 12th of 2 compared to an arbitrary reference (remember an octave is doubling => 12 half tones = 2) ; what makes a temperate scale is not the reference but the relationship between notes and this enable bands of instrument to tune themselves according to the most unreliable but also nice instrument which is the human voice.
Giving the user 3 decimal after the comma is called being precise : it makes you look like a genius in the eye of the crowd. Giving the user 0 decimal but accurate frequency is what makes you look dumb in the eyes of the computer science engineer, but it way more useful in real life.
Here I took the liberty with pysine to generate A on 6 octaves (ref A=440) and use the recommanded chatgpt buffer size acknowledged by a pro CS engineer for tuning your guitar and my default choices. for i in 55.0 110.0 220.0 440.0 880.0 1760.0 ; do python -m pysine $i 3; done Here is the result with a chunk size of 1024 : And here is the result with a chunk size corresponding to half a second of sampling :
I may not be a computer engineer, I am dumb, but checking with easy to use tools that your final result is in sync with your goal is for me more important than diplomas and professional formations.
The code is yet another basic animation in matplotlib with a nice arrow pointing the frequency best fitting item. It is not the best algorithm, but it does the job.
Showing the harmonics as well as the tonal has another benefit it answers the questions : why would I tune my string on the note of the upper string ?
Like tuning E on A ?
Well because -at least for my half broken guitar- it ensures to me that I will tune on the tonal note.
Here is a sample of tuning E on the empty string : And this is how tuning the E string on the A note looks like : And don't pay attention to the 56Hz residual noise triggered by my fans/appliance turning and making a constant noise :D Here is the code import pyaudio import matplotlib.pyplot as plt import matplotlib.animation as animation import numpy as np import time from sys import argv A = 440.0 try: A=float(argv[1]) except IndexError: pass form_1 = pyaudio.paInt16 # 16-bit resolution chans = 1 # 1 channel samp_rate = 44100 # 44.1kHz sampling rate chunk = 44100//2# .5 seconds of sampling for 1Hz accuracy audio = pyaudio.PyAudio() # create pyaudio instantiation # create pyaudio stream stream = audio.open( format = form_1,rate = samp_rate,channels = chans, input = True , frames_per_buffer=chunk ) fig = plt.figure(figsize=(13,8)) ax = fig.add_subplot(111) plt.grid(True) def compute_freq(ref, half_tones): return [ 1.0*ref*(2**((half_tones+12*i )/12)) for i in range(-4,4) ] print(compute_freq(A,0)) note_2_freq = dict( E = compute_freq(A,-5), A = compute_freq(A, 0), D = compute_freq(A, 5), G = compute_freq(A,-2), B = compute_freq(A, 2), ) resolution = samp_rate/(2*chunk) def closest_to(freq): res = dict() for note, freqs in note_2_freq.items(): res[note]=max(freqs) for f in freqs: res[note]= min(res[note], abs(freq -f)) note,diff_freq = sorted(res.items(), key = lambda item : item[1])[0] for f in note_2_freq[note]: if abs(freq-f) == diff_freq: return "%s %s %2.1f %d" % ( note, abs(freq - f ) < resolution and "=" or ( freq > f and "+" or "-"), abs(freq-f), freq ) def init_func(): plt.rcParams['font.size']=18 plt.xlabel('Frequency [Hz]') plt.ylabel('Amplitude [Arbitry Unit]') plt.grid(True) ax.set_xscale('log') ax.set_yscale('log') ax.set_xticks( note_2_freq["E"] + note_2_freq["A"]+ note_2_freq["D"]+ note_2_freq["G"]+ note_2_freq["B"] , labels = ( [ "E" ] * len(note_2_freq["E"]) + [ "A" ] * len(note_2_freq["A"]) + [ "D" ] * len(note_2_freq["D"]) + [ "G" ] * len(note_2_freq["G"]) + [ "B" ] * len(note_2_freq["B"]) ) ) ax.set_xlim(40, 4000) return ax def data_gen(): stream.start_stream() data = np.frombuffer(stream.read(chunk),dtype=np.int16) stream.stop_stream() yield data i=0 def animate(data): global i i+=1 ax.cla() init_func() # compute FFT parameters f_vec = samp_rate*np.arange(chunk/2)/chunk # frequency vector based on window # size and sample rate mic_low_freq = 50 # low frequency response of the mic low_freq_loc = np.argmin(np.abs(f_vec-mic_low_freq)) fft_data = (np.abs(np.fft.fft(data))[0:int(np.floor(chunk/2))])/chunk fft_data[1:] = 2*fft_data[1:] plt.plot(f_vec,fft_data) max_loc = np.argmax(fft_data[low_freq_loc:])+low_freq_loc # max frequency resolution plt.annotate(r'$\Delta f_{max}$: %2.1f Hz, A = %2.1f Hz' % ( resolution, A), xy=(0.7,0.92), xycoords='figure fraction' ) ax.set_ylim([0,2*np.max(fft_data)]) # annotate peak frequency annot = ax.annotate( 'Freq: %s'%(closest_to(f_vec[max_loc])), xy=(f_vec[max_loc], fft_data[max_loc]),\ xycoords='data', xytext=(0,30), textcoords='offset points', arrowprops=dict(arrowstyle="->"), ha='center',va='bottom') #fig.savefig('full_figure-%04d.png' % i) return ax, ani = animation.FuncAnimation( fig, animate, data_gen, init_func, interval=.15, cache_frame_data=False, repeat=True, blit=False ) plt.show()
Talk Python to Me: #483: Reflex Framework: Frontend, Backend, Pure Python
Django Weblog: 2025 DSF Board Candidates
Thank you to the 21 individuals who have chosen to stand for election. This page contains their candidate statements submitted as part of the 2025 DSF Board Nominations.
Our deepest gratitude goes to our departing board members, Çağıl Uluşahin Sonmez, Chaim Kirby, Katie McLaughlin; for your contributions and commitment to the Django community ❤️
Those eligible to vote in this election will receive information on how to vote shortly. Please check for an email with the subject line “2025 DSF Board Voting”. Voting will be open until 23:59 on November 15, 2024 Anywhere on Earth.
Any questions? Reach out via email to foundation@djangoproject.com.
All candidate statements ¶To make it simpler to review all statements, here they are as a list of links. Voters: please take a moment to read all statements before voting! It will take some effort to rank all candidates on the ballot. We believe in you.
- Abigail Gbadago — Accra, Ghana
- Alex Gómez — Barcelona, Spain
- Amir Tarighat — New York
- Ariane Djeupang Jocelyne — Yaounde, Cameroon
- Bhuvnesh Sharma — India
- Chris Achinga — Mombasa, kenya
- Cory Zue — Cape Town, South Africa
- David Vaz — Porto, Portugal
- Gabriel Arias Romero — Mexico
- Jeff Triplett — Lawrence, KS USA
- Julius Nana Acheampong Boakye — Accra Ghana
- Keanya Phelps — Chicago IL US
- Kevin Renskers — The Netherlands
- Kátia Yoshime Nakamura — Berlin, Germany
- Lilian — United States
- Marcelo Elizeche Landó — Paraguay
- Paolo Melchiorre — Italy
- Patryk Bratkowski — Patryk Bratkowski
- Priya Pahwa — India, Asia
- Tom Carrick — Amsterdam, Netherlands
- Vitaly Semotiuck — Rzeszow, Poland
Hi,
I am Abigail(Afi), a DSF member who has contributed to the Django Ecosystem for about four years. I have held the following positions in the community:
- Leadership council member for Black Python Devs (current)
- Open Source Program Manager for Black Python Devs - I am managing 39 of our community members make their first steps in open source (current)
- Programs Team member for DjangoCon US 2024
- Contributed in organizing Django Girls Zanzibar (2023) ahead of the first DjangoCon Africa, co-organiser of Django Girls in Kwahu-Ghana (2019), and coach at Django Girls Ho-Ghana; 2018, 2024 and Zanzibar (2023)
- DjangoCon US Speaker 2023, you can watch my talk here: Strategies for Handling Conflicts and Rollbacks with Django
I have extensive experiences with the community, which have contributed to my growth, and I believe serving on the board is a good way to give back. As such, I am positive that I would bring a refreshing perspective to the board and be a good match for community integration with Django.
As a board member, I plan to increase interactions between the DSF and its user base by providing an official mailing list highlighting non-technical and technical updates that will keep Django users up-to-date with current developments and build a relationship with our user base. Through this, I aim to gather djangonauts from everywhere to support creating the next leaders of the Django community.
In addition, I would like to use my experience in fostering Strategic Partnerships and Fundraising in the nonprofit space to help the DSF Fundraising WG find more sponsors for the DSF. While working with a community, I fostered vital partnerships with about 10 organisations, which contributed to reaching our Fundraising and Partnerships goal despite most organisations slashing nonprofit donations.
As such, I believe those skills, coupled with my community experience, will contribute to the growth of the Django Community, especially when we attract sponsors and increase their efforts and visibility on our social media.
Alex Gómez Barcelona, Spain ¶View personal statementI began developing with Django at version 1.11 and have been an avid user since. I am a member of Djangonaut Space and was previously a Djangonaut in the program. I’m also an active member of Python Spain and Python Barcelona and have coached at multiple DjangoGirls workshops.
I believe the next few years will be crucial for Django's future. It’s important for us to remain relevant and ensure that Django continues to be a choice for new projects, not just for maintaining existing ones.
The DSF needs an executive director, we’ve reached the limit of what a volunteer board can do or be asked to do. This is my first and main priority for 2025 and I believe without such a change we will struggle to meaningfully advance.
An obstacle to enacting an executive director is the need to expand the foundation's funding and pool of sponsors, and I propose that one of our most effective ways to achieve this is by expanding our communications. Too little of the Django user base is reached by the DSF and other non-official Django communications, leaving a wide userbase who may be very willing to support the project but do not know they can.
In support of these goals, I will also make the website a priority. We’re years into attempting to revamp it, the last successful attempt being a decade ago. The website working group is not yet finalized, an executive director will help us push this forward.
The DSF needs fresh perspectives, and with your support I believe I will bring positive changes to the Django community.
Amir Tarighat New York ¶View personal statementHi DSF board members! My name is Amir Tarighat and I’m a software engineer and long time user of Django. I think since version ~1.8. I live in NYC.
I’m 3x VC backed founder and an active investor, currently I am the CEO of Agency which is a Y Combinator backed company.
I’m an expert in cybersecurity and compliance, and have served on several boards including one non-profit and an elected neighborhood council position.
I would love to serve the Django community and help grow its use by helping with fundraising, community events and sponsorships, and with anything security or compliance related. I’d also love to help with anything startup related.
Ariane Djeupang Jocelyne Yaounde, Cameroon ¶View personal statementI am Ariane Djeupang, a junior project manager, Community builder and freelance Machine Learning Engineer from Cameroon.
As a young Black African woman in STEM from the francophone region of Africa and an active DSF member, I’ve dedicated my career to fostering inclusivity and representation in the tech community and I am confident that I bring a unique perspective to the table. My extensive experience organizing major events like:
- DjangoCon US 2024,
- DjangoCon Africa 2023, and
- PyCon Africa 2020 (as a volunteer) | 2024 (as an IOC member ) has equipped me with the skills and insights needed to drive inclusivity and community engagement.
My journey has been fueled by a passion for diversity and representation. I have seen firsthand the incredible impact that inclusive environments can have on underrepresented communities, especially in Africa, and I am dedicated to amplifying these voices within the Django ecosystem. As a mentor in the both the Python and the Django Community, as well as a mentor and community manager at BEL'S AI Initiative in Cameroon, I have empowered many young technologists, fostering a supportive and inclusive community.
I aim to bridge the gap between the DSF Board and our vibrant African community, ensuring that our unique perspectives and needs are heard and addressed. I am committed to being the voice of Africa within the board and representing the board within my community. By voting for me, you are supporting a vision of inclusivity, innovation, and growth for the Django community.
To achieve this, I plan to:
- Launch official DSF multilingual mentoring programs, targeted at underrepresented groups from Africa, with plans to expand globally.
- Introduce the Django Diversity Incubator, offering resources, workshops, scholarships, and global hackathons to underrepresented groups around the world.
- Create a Django Open Source Fellows interns role, to welcome new people into code and non-code contributions.
Thank you for your consideration.
Bhuvnesh Sharma India ¶View personal statementHi everyone! I'm excited to throw my hat in the ring for the DSF Board of Directors.
To me, there appears to be a critical component that could benefit from increased attention: social media and marketing. And I believe It's time we start giving Django the social media attention it deserves.
Let's be real: If we master this social media game, Django's reach will explode, and the entire ecosystem will thrive.
The more we boost Django’s presence online, the more up-and-coming developers will flock to it. And with that surge in usage comes the rise of Django-focused communities—stronger, more engaged, and constantly growing.
Now, here’s where it gets exciting: more visibility leads to a snowball effect.
- Visibility drives growth: More eyes on Django → more users → more contributors
- Quality fuels adoption: More contributors → better Django → increased commercial usage
- Success attracts support: Increased usage → more sponsors → resources for further expansion
Then guess what? We loop back to the start: Django gets bigger, stronger, and better.
Here are few-of-many pointers that I am aiming to start with during my tenure as a board member:
- Boost Django's presence in Asia through targeted outreach and events.
- Launch Django Ambassadors program to recognize influential community members.
- Facilitate non-coding contributions to Django (design, content, event organizing).
- Create a volunteer layer between the DSF and interested individuals who are eager to contribute to specific working groups (WGs).
- Produce engaging social media content similar to Feature Fridays.
I am highly motivated to lead Django’s social media and marketing as a Board member. I have more high-level plans and ideas in mind, and I’m focused on finding the right time and people for their execution. Additionally, I would represent the Asia region and bring valuable diversity in the DSF board. You can read more about my plans in the blog here: Making Django Unstoppable: My Plan to Boost Visibility and Drive Growth
Now talking about myself, I am a django core contributor and have been involved with DSF for around past 1.5 years as a DSF member. I also did Google Summer of Code with Django in 2023 and mentored in Google Summer of Code 2024 with Django. Apart from code contributions I have contributed to Django in various others ways:
- I am Co-Chair at the social media WG at DSF. (all the Feature Fridays posts are created by me :) )
- I was a navigator at Djangonaut Space’s first session.
- I recently started a community called Django India with an aim to popularize Django in India.
Excited for what lies ahead!
Chris Achinga Mombasa, kenya ¶View personal statementMy journey as a software developer has been profoundly shaped by the power of community. From the outset, participating in developer meetups and events, particularly DjangoCon Africa, has not only strengthened my technical skills but also reshaped my understanding of growth—both personal and professional.
Driven by a desire to make a meaningful difference, I am pursuing a position on the Django Software Foundation Board. I bring a commitment to promoting diversity, inclusivity, and accessibility within the Django ecosystem. As a vocal advocate for African and minority communities, I believe my presence on the Board would add a valuable perspective to the DSF’s mission, ensuring that emerging developers from underrepresented backgrounds find opportunities, resources, and community support in Django.
My experience with the Swahilipot Hub Foundation, a Kenyan NGO supporting youth along the coast, has equipped me with essential skills in community engagement and in applying technology for social good. Through this role, I have developed Django-based solutions that empower community self-management—an experience that has reinforced my belief in Django’s potential to uplift communities around the globe. On the DSF Board, I aim to serve not only as a representative for these communities but also as a mentor and technical guide.
Cory Zue Cape Town, South Africa ¶View personal statementI’m running for the board because I love Django, I’ve built my career on it, I want to see it succeed for another 20 years, and I think I can help.
My background is as a Django user and educator. I’ve built several successful products on Django, spoken at multiple DjangoCons and PyCons and have published many popular articles and videos about using Django. I currently run a Django boilerplate product that helps people build apps and start businesses on top of Django. I’m also a member of the DSF and the social media working group.
My platform is relatively simple. I don’t want Django to get left behind. I’ve seen old frameworks like Rails and Laravel continually reinvent themselves, bringing new cohorts of web developers into the fold, while Django has largely stayed the same.
Part of the issue is Django’s reluctance to adopt modern technologies— with better front end being at the top of my list. But I don’t have unrealistic aspirations of adding HTMX, Tailwind, or React to Django, so much as starting the conversation about how the Django ecosystem can have a better story for people who want to use those things.
The other part—and the part I hope to help with more—is cultural. Specifically, getting Django to do a better job at selling itself. This means working harder to pitch and position Django as a great, modern framework for building apps. As well as creating more opportunities and incentives for funding Django.
If elected, I’ll try to be a voice on the board that pushes Django forwards, while understanding that I will often get pushed back. Let’s keep Django great for another 20 years!
David Vaz Porto, Portugal ¶View personal statementI am a software developer with over 20 years of experience and have been passionate about Django since 2007, starting with version 0.96. Over the years, I have not only built my career around Django and Python, but I have also actively contributed to expanding the Django community. My journey has led me to found a consultancy firm focused on these technologies, and I’ve dedicated my efforts to bringing new developers into the community and fostering its growth.
In 2019, during DjangoCon Europe in Copenhagen, I strongly desired to take my community involvement to the next level. I proposed to organize DjangoCon Europe 2020 in Portugal. Though the pandemic reshaped those plans, I co-organized the first virtual-only DjangoCon Europe in 2020, another virtual edition in 2021, and the first hybrid event in 2022. Our 2022 edition set a new record, with over 500 in-person attendees and 200+ online participants. The experience has been gratifying, and I continue to be actively involved in the community by co-organizing DjangoCon Europe 2024 in Vigo, Spain, and preparing for DjangoCon Europe 2025 in Dublin, Ireland.
In addition to my work with Django, I am deeply committed to the growth of the Python community in Portugal. In 2022, I co-founded PyCon Portugal, intending to host the conference in a different city each year to maximize its reach and impact. The first edition in Porto succeeded, followed by Coimbra in 2023, which attracted participants from over 25 countries. By the time of this election, PyCon Portugal 2024 in Braga will have concluded, furthering our goal of uniting and strengthening the Portuguese Python community.
I am enthusiastic, committed, and pragmatic. In every initiative I’ve taken, I strive to make a positive and meaningful impact, influencing and empowering those around me. My experience organizing large-scale events, building communities, and fostering collaboration can be valuable to the Django Software Foundation.
I look forward to contributing my skills and dedication to help guide the DSF’s efforts in the years ahead.
Gabriel Arias Romero Mexico ¶View personal statementsolo soy un fan y me encanta el framework
Jeff Triplett Lawrence, KS USA ¶View personal statementI'm running for the Django Software Foundation board of directors to help serve the community and reshape the board and foundation.
The key to making the DSF more sustainable is the stability that hiring an Executive Director brings. From day-to-day communications to supporting the Django Fellows to improving our ability to fundraise, everything revolves around having someone whose job is to run and support the foundation. I believe an ED will help Django get a seat to more conversations involving open source and web standards that we get passed over today.
I bring over two decades of non-profit experience, including co-founding DEFNA (the other Django non-profit) and serving on the Python Software Foundation, including leadership roles (Treasurer and Vice Chair). I have also helped organize DjangoCon US for over a decade, and we have seen many community members and leaders grow through that community-building experience. I'm an advisor for Black Python Devs and have been a mentor through the Djangonaut Space project.
I want to revise and revisit our sponsorship plans and fundraising goals. They have not changed much over the years despite companies' needs changing significantly. We did this with the PSF, and it increased the number of developers in resident roles (the PSF's version of Fellows) we could fund. It's time for the DSF to revise our plans.
I want to revise our approach to DjangoCons and other "why aren't they called DjangoCon" community events. Why aren't more of these promoted or listed through the Django website?
I firmly believe in the Campsite Rule: "Always leave the campground cleaner than you found it." I feel good about the mark I have left on the Django and Python communities over this past decade, and I am happy to serve the Django community in a more significant role if given the opportunity.
Julius Nana Acheampong Boakye Accra Ghana ¶View personal statementI'm excited to nominate myself for the Django Software Foundation's Board of Directors. With 4 years of experience in the tech industry, I've seen the impact Django can have on a project's success. I've contributed to the community through speaking at conferences, organizers global DjangoCon conference , teaching Django on campuses and am committed to using my skills to help the board make informed decisions.
My goals are to increase diversity and inclusion within the community and improve the overall health and stability of the Django project. If elected, I promise to be an active and engaged member, always putting the needs of the community first.
Thank you for considering my nomination. I'm excited to serve the Django community and contribute to its continued success.
Keanya Phelps Chicago IL US ¶View personal statementI am excited to submit my candidacy for the Django Software Foundation (DSF) board. Having transitioned into software development after a career change, I feel like I bring a unique perspective to the challenges and opportunities within the Django ecosystem. I am deeply passionate about diversity, inclusion, and mentorship,
My journey into tech by way of Django, has been shaped by collaboration, continuous learning, and the support of mentors, which is why I am eager to give back to the Django community. I am particularly enthusiastic about contributing to initiatives that promote diverse voices and create inclusive environments where everyone feels empowered too contribute and to leave things better than how they found them.
In addition to my commitment to diversity, I am driven by a love of running projects, research, and collaboration.
As a member of the DSF board, I would bring fresh ideas, a collaborative spirit, and a dedication to making Django an even more inclusive, forward-thinking community.
Kevin Renskers The Netherlands ¶View personal statementI’ve been using Django since 2009, and apart from blogging about Django for 15 years, I’ve always been mostly on the sidelines. It’s about time to get more involved with the community, share my experience and expertise, offer my time. I’m mainly interested in the enforcement of the Django trademark and code of conduct, ensuring a healthy community.
Kátia Yoshime Nakamura Berlin, Germany ¶View personal statementI am a Software Engineer with over 10 years of experience, working with Django both personally and professionally since 2015. My journey with Django started in 2015 when I attended my first Django Girls event in Brazil. Since then, I’ve built my career around Django, contributing to the community while actively attending, participating in and helping organize Python and Django conferences/events.
In 2018 and 2019, I helped organize PyCon Balkan in Belgrade (Serbia). Since 2016, I've coached and organized Django Girls workshops around the world, including in Rio de Janeiro (Brazil), Budapest (Hungary), Brno (Czechia), Belgrade (Serbia), Porto (Portugal), and Vigo (Spain).
Over the past few years, I've been deeply involved in DjangoCon events, particularly in Europe, where I’ve volunteered and organized Django Girls workshops.
Since 2020, I’ve had the privilege of serving as a board member of the Django Software Foundation (DSF). The pandemic brought us significant challenges, but we've built a resilient team, eager to push Django forward with fresh perspectives and new solutions. I’ve also been involved in the early efforts to shape a long-term plan for future conferences across Europe, focusing on engaging more organizers and selecting host teams earlier - up to two years in advance - for better flexibility and planning. However, there's still more we aim to achieve.
I’d love to keep supporting our Django community as a board member, promoting more diversity and inclusiveness while encouraging collaboration and exciting initiatives.
Lilian United States ¶View personal statementI’m Lilian 👋, a DSF Member, Django ORM contributor, and Djangonaut Space Coordinator.
Lots of talent is locked up in the industry simply due to gatekeeping. Let’s improve processes and tap into this pool of talent, so we can move Django forward in the right direction.
The DSF should do more to facilitate the connection between newcomers and maintainers. Let’s create a space where we provide the support system they need to collaborate productively, for technical teams and working groups alike.
We also need to facilitate bolder decision making. For the framework: sponsored features and fundamentals like async support, JIT, type annotations. For the Foundation: more transparency, an Executive Director, a newsletter.
How can we achieve this?- Coordination with the Steering Council for tech decisions, via a Board Liaison role.
- Gather feedback from program organizers to determine gaps that need support.
- Facilitate collaboration among newcomers and maintainers.
- Better marketing: such as promoting community initiatives.
- Documented playbooks! To scale the Working Groups concept.
Frustrated by the status quo in the industry, and yet inspired by changes happening to Django, I’m motivated to help more people get involved with Django as code contributors and leaders.
Marcelo Elizeche Landó Paraguay ¶View personal statementWhy I’m RunningBefore assisting to DjangoCon US, I saw Django as just part of the larger Python community. But seeing how this community goes above and beyond to support both longtime members and newcomers changed that for me. When others suggested I run for the board, it felt like a way I could give back and share what makes Django special on a global scale.
A Bit About MeI co-founded and organized the Python Paraguay community, starting with our first PyDay in 2015, which was a huge success and sparked a lasting momentum. Since then, I’ve organized meetups, events, workshops, and grown our community to almost two thousand members—the most active tech group in Paraguay! I also used Django for projects that make a difference: AyudaPy.org, a mutual aid platform during COVID-19 (which I presented at DjangoCon US 2022), and Lista Hũ, a tool to protect against scammers, both of which highlight Django’s potential for social good.
Ideas for Django- Learning Curve: Improving the Django tutorial and expanding learning resources can make Django more accessible and less intimidating for newcomers. Creating more comprehensive, step-by-step guides will empower new developers and ease their journey into Django.
- Supporting Global Accessibility: Expanding Django’s reach by focusing on language accessibility and gathering regional feedback is key. Adding questions to the Django Developers Survey on preferred languages and translation quality could help the community prioritize localization efforts, ensuring developers worldwide feel supported in their native languages.
I believe this community is on the right path, and it would be an honor to contribute as a board member
Paolo Melchiorre Italy ¶View personal statementThe Django community is the best one I could be a part of, and since I started using Django, I have seen wonderful initiatives born and thrive within it (e.g., Django Girls+, Djangonaut Space, Django Fellow). We should bring this momentum to other areas as well: fundraising, the website, development sprints, content translations, self-promotion (e.g., release videos), multimedia content (e.g., videos, books, podcasts, photos, …), feedback from Django users, Django's environmental impact.
I think that the Django Software Foundation has the potential to facilitate and promote these initiatives. It also has the authority to relate to other Open Source communities, to seek synergies, and with big corporations, to grow from an economic point of view, being able to pay more people (e.g., Django Fellows, Directors, UI/UX experts, …)
I believe I can give a boost to these initiatives, with my experience in the Django community, and with an original point of view in the Board, as a member of the Italian Python community, and founder of a local community.
Patryk Bratkowski Patryk Bratkowski ¶View personal statementHello, Djangonauts!
If you are one of the regulars on the official Django Discord server, my passion and dedication to both the Django community and framework should be no secret. As a helper, I have helped countless other developers use Django successfully. As a moderator, I do my best to ensure that we have a community that we can all be proud to consider our own, regardless of our background. An environment that is inclusive, diverse, and welcoming. To me, it feels like home, and I hope you all feel the same way.
For those I haven't yet had the pleasure to meet on Discord or elsewhere, I hope we do soon.
About me:
- I have been building on the web since the Geocities days, and have over 17 years of professional experience, meaning I know how to get things done.
- I have experience building and managing communities, including forums and subreddits, meaning I can readily help with the technical and human aspects.
- I am proactive, and lucky enough to have a lot of flexibility in how I spend my time, meaning I can help turn decisions into action.
- I am open-minded, and eager to learn, meaning I am looking forward to working for the community, with the board, rather than wanting to impose my own ideas.
- I am a polyglot speaking more than four languages fluently, meaning I feel connections to others, regardless of geographical borders.
If elected, my goals will be:
- Collaborating with the other board members. Django's popularity and stability is a testament to the fantastic work current and past board members and developers have done, and while I may have my own ideas, I would first want to know more about any backlog, plans, or other issues that need to be resolved rather than bring about drastic changes.
- Efficiently implementing board decisions. While plans may sometimes forcibly change, they at least need someone to take charge of them. I am happy to lend my technical expertise when required, and deal with other roadblocks.
- Community representation. As a fairly visible member of the Django community, I am looking forward to ensuring the community feels represented and heard, and seeing what more we can do to help the community grow.
- Increase representation of non-English speakers. While English is the de facto business language, there are other large markets that would benefit from better support.
As Django nears twenty years of existence, becoming a board member certainly gives us some big shoes to fill, but between my passion, this amazing community's support, and the time I can dedicate to the position, I am confident that I can help the community continue to thrive, make a tangible difference, and better serve the community we all know and love.
Best regards, and best of luck to all the other applicants,
Pat
Priya Pahwa India, Asia ¶View personal statementBalancing code, community, and collaboration, I am actively holding the following position of responsibilities:
- Co-Chair of the Fundraising Working Group at the Django Software Foundation
- Session Organizer of Djangonaut Space
- Software Development Engineer (Django backend and Infra) at a wealth tech startup.
- 2023 SWE intern (Django techstack) under the GitHub Octernships program.
Having had the experience of building inclusive student tech communities and organizing numerous meetups and global hackathons as a GitHub Campus Expert, I can bring fresh perspectives to the DSF Board and bridge the currently huge gap between the student community and the potential Django leadership positions. As a DSF Board of Directors, I will push for initiatives to:
- Build a Django Evangelist Program or a Django Developer Advocacy Working Group
- Introduce a dedicated Django track at student hackathons to increase the framework’s visibility amongst budding developers.
- Establish a robust DEIB (Diversity, Equity, Inclusion, and Belonging) framework in both theory and practice for DSF
- Include subtle subconscious yet impactful details, such as designing the assets of custom merchandise—like stickers—that represent diverse races and backgrounds to ensure everyone feels valued.
- Continue driving fundraising efforts to engage potential corporate sponsors with a structured funding roadmap and prospectus that aligns with our community needs.
- Develop a one-stop-solution DSF community handbook - an easily accessible guide for newcomers
I’m dedicated to bringing the voice of the Asian Indian community to the DSF Board. The lack of DjangoCons and a strong local Django network in this region limits talented individuals from essential growth opportunities. I aim to foster a sense of belonging at the table, expand rewards in exchange for volunteering, and ensure the Django community thrives everywhere, especially in underserved areas with psychological safety and welcoming ways for one and all.
Tom Carrick Amsterdam, Netherlands ¶View personal statementHello! For those that don't know me, I've also been actively contributing features for most of the last decade. I help run the Discord, the accessibility team, and I'm on the fundraising working group. If that sounds like a lot of time commitment already, you're right. If you vote for me I might have to become dormant in some other roles.
But I don't really want to talk about my perspective as a contributor, I want to talk about my experience as a user. I've been using Django since around 2008. We have great batteries for 2008. For 2024? I am not so sure. I feel like we are missing things like:
- Built in 2FA with WebAuthn / passkeys.
- Better serialization to make APIs without needing a second framework.
- A better frontend story, whether that's tutorials on integrating frameworks or how to use simpler solutions like HTMX, template components (or all of the above).
- A more modern, accessible admin interface with better UX.
- Simpler project setup for small projects, including deployment and static files (integrating white noise?).
- (type hints maybe?)
- I could increase the size of this Wishlist by several factors and still not be done.
The reason I believe we're missing these things is simple (and possibly wrong). Django is getting bigger, more mature, and prioritises stability. These are all great things, but they do slow down development when almost all new features are contributed by people volunteering their time.
To fix this, Django needs money, which is why I joined the fundraising group, and then there is the question of spending that money. And for the me the priorities are clear:
- Spend money to make more money.
- Hire more fellows and widen their remit to contributing new features.
And that's my "manifesto", if you like.
Vitaly Semotiuck Rzeszow, Poland ¶View personal statementhttps://www.linkedin.com/in/vitaly-sem/
Your move nowThat’s it, you’ve read it all 🌈! Be sure to vote if you’re eligible, by using the link shared over email. To support the future of Django, donate to the Django Software Foundation on our website or via GitHub Sponsors.
Paolo Melchiorre: 2025 Django Software Foundation board nomination
My self-nomination statement for the 2025 Django Software Foundation (DSF) board of directors elections
Trey Hunner: Adding keyboard shortcuts to the Python REPL
I talked about the new Python 3.13 REPL a few months ago and after 3.13 was released. I think it’s awesome.
I’d like to share a secret feature within the Python 3.13 REPL which I’ve been finding useful recently: adding custom keyboard shortcuts.
This feature involves a PYTHONSTARTUP file, use of an unsupported Python module, and dynamically evaluating code.
In short, we may be getting ourselves into trouble. But the result is very neat!
Thanks to Łukasz Llanga for inspiring this post via his excellent EuroPython keynote talk.
The goal: keyboard shortcuts in the REPLFirst, I’d like to explain the end result.
Let’s say I’m in the Python REPL on my machine and I’ve typed numbers =:
1 >>> numbers =I can now hit Ctrl-N to enter a list of numbers I often use while teaching (Lucas numbers):
1 numbers = [2, 1, 3, 4, 7, 11, 18, 29]That saved me some typing!
Getting a prototype workingFirst, let’s try out an example command.
Copy-paste this into your Python 3.13 REPL:
1 2 3 4 5 6 7 8 9 10 11 from _pyrepl.simple_interact import _get_reader from _pyrepl.commands import Command class Lucas(Command): def do(self): self.reader.insert("[2, 1, 3, 4, 7, 11, 18, 29]") reader = _get_reader() reader.commands["lucas"] = Lucas reader.bind(r"\C-n", "lucas")Now hit Ctrl-N.
If all worked as planned, you should see that list of numbers entered into the REPL.
Cool! Now let’s generalize this trick and make Python run our code whenever it starts.
But first… a disclaimer.
Here be dragons 🐉Notice that _ prefix in the _pyrepl module that we’re importing from? That means this module is officially unsupported.
The _pyrepl module is an implementation detail and its implementation may change at any time in future Python versions.
In other words: _pyrepl is designed to be used by Python’s standard library modules and not anyone else. That means that we should assume this code will break in a future Python version.
Will that stop us from playing with this module for the fun of it?
It won’t.
Creating a PYTHONSTARTUP fileSo we’ve made one custom key combination for ourselves. How can we setup this command automatically whenever the Python REPL starts?
We need a PYTHONSTARTUP file.
When Python launches, if it sees a PYTHONSTARTUP environment variable it will treat that environment variable as a Python file to run on startup.
I’ve made a /home/trey/.python_startup.py file and I’ve set this environment variable in my shell’s configuration file (~/.zshrc):
1 export PYTHONSTARTUP=$HOME/.python_startup.pyTo start, we could put our single custom command in this file:
1 2 3 4 5 6 7 8 9 10 11 12 13 try: from _pyrepl.simple_interact import _get_reader from _pyrepl.commands import Command except ImportError: pass # Not in the new pyrepl OR _pyrepl implementation changed else: class Lucas(Command): def do(self): self.reader.insert("[2, 1, 3, 4, 7, 11, 18, 29]") reader = _get_reader() reader.commands["lucas"] = Lucas reader.bind(r"\C-n", "lucas")Note that I’ve stuck our code in a try-except block. Our code only runs if those _pyrepl imports succeed.
Note that this might still raise an exception when Python starts if the reader object’s command attribute or bind method change in a way that breaks our code.
Personally, I’d like to see those breaking changes occur print out a traceback the next time I upgrade Python. So I’m going to leave those last few lines without their own catch-all exception handler.
Generalizing the codeHere’s a PYTHONSTARTUP file with a more generalized solution:
1 2 3 4 5 6 7 8 9 10 11 12 13 14 15 16 17 18 19 20 21 22 23 24 25 try: from _pyrepl.simple_interact import _get_reader from _pyrepl.commands import Command except ImportError: pass else: # Hack the new Python 3.13 REPL! cmds = { r"\C-n": "[2, 1, 3, 4, 7, 11, 18, 29]", r"\C-f": '["apples", "oranges", "bananas", "strawberries", "pears"]', } from textwrap import dedent reader = _get_reader() for n, (key, text) in enumerate(cmds.items(), start=1): name = f"CustomCommand{n}" exec(dedent(f""" class _cmds: class {name}(Command): def do(self): self.reader.insert({text!r}) reader.commands[{name!r}] = {name} reader.bind({key!r}, {name!r}) """)) # Clean up all the new variables del _get_reader, Command, dedent, reader, cmds, text, key, name, _cmds, nThis version uses a dictionary to map keyboard shortcuts to the text they should insert.
Note that we’re repeatedly building up a string of Command subclasses for each shortcut, using exec to execute the code for that custom Command subclass, and then binding the keyboard shortcut to that new command class.
At the end we then delete all the variables we’ve made so our REPL will start the clean global environment we normally expect it to have:
1 2 3 4 Python 3.13.0 (main, Oct 8 2024, 10:37:56) [GCC 11.4.0] on linux Type "help", "copyright", "credits" or "license" for more information. >>> dir() ['__annotations__', '__builtins__', '__cached__', '__doc__', '__file__', '__loader__', '__name__', '__package__', '__spec__']Is this messy?
Yes.
Is that a needless use of a dictionary that could have been a list of 2-item tuples instead?
Yes.
Does this work?
Yes.
Doing more interesting and risky stuffNote that there are many keyboard shortcuts that may cause weird behaviors if you bind them.
For example, if you bind Ctrl-i, your binding may trigger every time you try to indent. And if you try to bind Ctrl-m, your binding may be ignored because this is equivalent to hitting the Enter key.
So be sure to test your REPL carefully after each new binding you try to invent.
If you want to do something more interesting, you could poke around in the _pyrepl package to see what existing code you can use/abuse.
For example, here’s a very hacky way of making a binding to Ctrl-x followed by Ctrl-r to make this import subprocess, type in a subprocess.run line, and move your cursor between the empty string within the run call:
1 2 3 4 5 6 7 8 9 10 11 12 class _cmds: class Run(Command): def do(self): from _pyrepl.commands import backward_kill_word, left backward_kill_word(self.reader, self.event_name, self.event).do() self.reader.insert("import subprocess\n") code = 'subprocess.run("", shell=True)' self.reader.insert(code) for _ in range(len(code) - code.index('""') - 1): left(self.reader, self.event_name, self.event).do() reader.commands["subprocess_run"] = _cmds.Run reader.bind(r"\C-x\C-r", "subprocess_run") What keyboard shortcuts are available?As you play with customizing keyboard shortcuts, you’ll likely notice that many key combinations result in strange and undesirable behavior when overridden.
For example, overriding Ctrl-J will also override the Enter key… at least it does in my terminal.
I’ll list the key combinations that seem unproblematic on my setup with Gnome Terminal in Ubuntu Linux.
Here are Control key shortcuts that seem to be complete unused in the Python REPL:
- Ctrl-N
- Ctrl-O
- Ctrl-P
- Ctrl-Q
- Ctrl-S
- Ctrl-V
Note that overriding Ctrl-H is often an alternative to the backspace key
Here are Alt/Meta key shortcuts that appear unused on my machine:
- Alt-A
- Alt-E
- Alt-G
- Alt-H
- Alt-I
- Alt-J
- Alt-K
- Alt-M
- Alt-N
- Alt-O
- Alt-P
- Alt-Q
- Alt-S
- Alt-V
- Alt-W
- Alt-X
- Alt-Z
You can add an Alt shortcut by using \M (for “meta”). So r"\M-a" would capture Alt-A just as r"\C-a" would capture Ctrl-A.
Here are keyboard shortcuts that can be customized but you might want to consider whether the current default behavior is worth losing:
- Alt-B: backward word (same as Ctrl-Left)
- Alt-C: capitalize word (does nothing on my machine…)
- Alt-D: kill word (delete to end of word)
- Alt-F: forward word (same as Ctrl-Right)
- Alt-L: downcase word (does nothing on my machine…)
- Alt-U: upcase word (does nothing on my machine…)
- Alt-Y: yank pop
- Ctrl-A: beginning of line (like the Home key)
- Ctrl-B: left (like the Left key)
- Ctrl-E: end of line (like the End key)
- Ctrl-F: right (like the Right key)
- Ctrl-G: cancel
- Ctrl-H: backspace (same as the Backspace key)
- Ctrl-K: kill line (delete to end of line)
- Ctrl-T: transpose characters
- Ctrl-U: line discard (delete to beginning of line)
- Ctrl-W: word discard (delete to beginning of word)
- Ctrl-Y: yank
- Alt-R: restore history (within history mode)
Find something fun while playing with the _pyrepl package’s inner-workings?
I’d love to hear about it! Comment below to share what you found.
Pages
Recent Publications
- Managing Hidden Dependencies in OO Software: a Study Based on Open Source Projects
- Open Source Communities as Liminal Ecosystems
- Investigating developers' email discussions during decision-making in Python language evolution
- Developers, Quality Control and Download Volume in Open Source Software (OSS) Projects
FLOSS Project Planets
FLOSS Research
- Improving Open Source security with the new GitHub Secure Open Source Fund
- Celebrating 5 years at the Open Source Initiative: a journey of growth, challenges, and community engagement
- Highlights from the Digital Public Goods Alliance Annual Members Meeting 2024
- Give Your Input on the State of Open Source Survey
- Open Data and Open Source AI: Charting a course to get more of both