
Feeds
Drupal Association blog: DrupalCon Barcelona 2024 brings the open source Drupal community together
DrupalCon, the main event about the digital experience platform Drupal, was held this year in Barcelona, Spain, from 24-27 September. DrupalCon unites thousands of people from around the globe who use, develop, design, and support the Drupal platform. Over 1,300 digital experts and Drupal professionals gathered to exchange ideas, work on the Drupal project, and propel Drupal innovation.
On 24 September, Founder and Project Lead Dries Buytaert gave an inspiring keynote about developing an exciting new product - Drupal CMS. Dries shared a progress update on the timeline of Drupal CMS, showing a demo of the current state, the event-building and SEO capabilities, and the acceleration of site building through AI tools. This will allow Drupal experts and potential end users to drastically change how they build websites, using prompts to create in minutes what used to take days.
A three-day program of over 100 sessionsDrupalCon Barcelona hosted over 100 workshops, presentations, and several exciting keynotes in a packed three-day program. After the Opening Ceremony, the Women in Drupal Awards were held, recognizing the incredible impact Drupal has on Diversity, Equity, and Inclusion. Winners Pamela Barone, All Petrovska, and Esmeralda Tijhoff took home the awards, acknowledging their accomplishments in the Drupal community.
For almost ten years, the results of the Drupal Business Survey have been presented at DrupalCon. The Drupal Business Survey, organized by the Drupal Business Network, has been collecting data from Drupal service providers and agencies from all over the world. On 26 September, insights from the 2024 survey were shared in an informative session. While the digital industry is not unaware of worldly events that impact economy and sales, many agencies are excited about Drupal CMS. Over 70 digital agencies working with Drupal came to gather to review and work on their strategy for 2025 and beyond.
In the Expo Hall, DrupalCon Barcelona attendees learned more about the Ripple Makers membership and Drupal Certified Partners at the Drupal Association booth. Ripple Makers is the revamped Drupal Association Membership, supporting driving innovation and adoption of Drupal as a high-impact digital public good. The Drupal Certified Partner program recognizes and awards agencies that demonstrate significant innovation, philanthropic leadership, and contribution to the Drupal project. To learn more about the Drupal Certified Partner program, visit the Certified Partner Program page on Drupal.org.
Driving Drupal innovation through collaborationThe Drupal Association Board got together the weekend prior to DrupalCon for their bi-annual in-person board meeting. Topics of discussion included Drupal CMS, its roadmap, and the overall strategy and ambitions for Drupal. They held their public board meeting on Wednesday at DrupalCon to announce the newest Board Members: Alejandro Moreno, Sachiko Muto, and Stella Power. During the public meeting, CEO Tim Doyle also announced the launch of a new program, Adopt-a-Document.
On the last day of the conference, Drupal experts stayed for Contribution Day, where they worked on Drupal’s next exciting innovations. Drupal’s community has over 100,000 passionately committed users driving innovation of one of the world’s largest open source projects. Many social events occur in the evenings at DrupalCon, including Drupal’s pub quiz called Trivia Night on Thursday.
At the closing ceremony, the city for DrupalCon Europe 2025 was announced: Vienna.
About the Drupal AssociationThe Drupal Association is a nonprofit organization focused on accelerating Drupal, fostering the growth of the Drupal community, and supporting the project’s vision to create a safe, secure, and open web for everyone. The Drupal Association also administers Drupal.org on behalf of the Drupal community. You can also support the continued success of the Drupal project by getting involved. Learn more.
Python GUIs: Introduction to the QGraphics framework — Creating vector interfaces using the QGraphics View framework
The Qt Graphics View Framework allows you to develop fast and efficient 2D vector graphic scenes. Scenes can contain millions of items, each with their own features and behaviors. By using the Graphics View via PySide6 you get access to this highly performant graphics layer in Python. Whether you're integrating vector graphics views into an existing PySide6 application, or simply want a powerful vector graphics interface for Python, Qt's Graphics View is what you're looking for.
Some common uses of the Graphics View include data visualization, mapping applications, 2D design tools, modern data dashboards and even 2D games.
In this tutorial we'll take our first steps looking at the Qt Graphics View framework, building a scene with some simple vector items. This will allow us to familiarize ourselves with the API and coordinate system, which we'll use later to build more complex examples.
Table of Contents- The Graphics View Framework
- A simple scene
- Another way to create objects.
- Building a more complex scene
- Adding graphics views to Qt layouts
The Graphics View framework consists of 3 main parts QGraphicsView, QGraphicsScene, and QGraphicsItem, each with different responsibilities.
The framework can be interpreted using the Model-View paradigm, with the QGraphicsScene as the Model and the QGraphicsView as the View. Each scene can have multiple views. The QGraphicsItems within the scene can be considered as items within the model, holding the visual data that the scene combines to define the complete image.
QGraphicsScene is the central component that glues everything together. It acts as a whiteboard on which all items are drawn (circles, rectangles, lines, pixmaps, etc). The QGraphicsView has the responsibility of rendering a given scene -- or part of it, with some transformation (scaling, rotating, shearing) -- to display it to the user. The view is a standard Qt widget and can be placed inside any Qt layout.
QGraphicsScene provides some important functionalities out of the box, so we can use them to develop advanced applications without struggling with low-level details. For example --
- Collision Detection, detect a graphics item is collided with another item.
- Item Selection, gives us the ability to deal with multiple items at the same time, for example, the user can select multiple items, and when pressing delete, a function asks the scene to give the list for all selected items, and then delete them.
- Items discovery, the scene can tell us what items are present (or part of them) at a specific point or inside some defined region, for example, if the user adds an item that intersects with a forbidden area, the program will detect them and give them another (mostly red) color.
- Events Propagation, the scene receives the events and then propagates them to items.
To define a QGraphicsScene you define it's boundaries or sceneRect which defines the x & y origins and dimensions of the scene. If you don't provide a sceneRect it will default to the minimum bounding rectangle for all child items -- updating as items are added, moved or removed. This is flexible but less efficient.
Items in the scene are represented by QGraphicsItem objects. These are the basic building block of any 2D scene, representing a shape, pixmap or SVG image to be displayed in the scene. Each item has a relative position inside the sceneRect and can have different transformation effects (scale, translate, rotate, shear).
Finally, the QGraphicsView is the renderer of the scene, taking the scene and displaying it -- either wholly or in part -- to the user. The view itself can have transformations (scale, translate, rotate and shear) applied to modify the display without affecting the underlying scene. By default the view will forward mouse and keyboard events to the scene allowing for user interaction. This can be disabled by calling view.setInteractive(False).
A simple sceneLet's start by creating a simple scene. The following code creates QGraphicsScene, defining a 400 x 200 scene, and then displays it in a QGraphicsView.
python import sys from PySide6.QtWidgets import QGraphicsScene, QGraphicsView, QApplication app = QApplication(sys.argv) # Defining a scene rect of 400x200, with it's origin at 0,0. # If we don't set this on creation, we can set it later with .setSceneRect scene = QGraphicsScene(0, 0, 400, 200) view = QGraphicsView(scene) view.show() app.exec()If you run this example you'll see an empty window.
The empty graphics scene, shown in a QGraphicsView window.
Not very exciting yet -- but this is our QGraphicsView displaying our empty scene.
As mentioned earlier, QGraphicsView is a widget. In Qt any widgets without a parent display as windows. This is why our QGraphicsView appears as a window on the desktop.
Adding itemsLet's start adding some items to the scene. There are a number of built-in graphics items which you can customize and add to your scene. In the example below we use QGraphicsRectItem which draws a rectangle. We create the item passing in it's dimensions, and then set it's position pen and brush before adding it to the scene.
python import sys from PySide6.QtWidgets import QGraphicsScene, QGraphicsView, QGraphicsRectItem, QApplication from PySide6.QtGui import QBrush, QPen from PySide6.QtCore import Qt app = QApplication(sys.argv) # Defining a scene rect of 400x200, with it's origin at 0,0. # If we don't set this on creation, we can set it later with .setSceneRect scene = QGraphicsScene(0, 0, 400, 200) # Draw a rectangle item, setting the dimensions. rect = QGraphicsRectItem(0, 0, 200, 50) # Set the origin (position) of the rectangle in the scene. rect.setPos(50, 20) # Define the brush (fill). brush = QBrush(Qt.red) rect.setBrush(brush) # Define the pen (line) pen = QPen(Qt.cyan) pen.setWidth(10) rect.setPen(pen) scene.addItem(rect) view = QGraphicsView(scene) view.show() app.exec()Running the above you'll see a single, rather ugly colored, rectangle in the scene.
A single rectangle in the scene
Adding more items is simply a case of creating the objects, customizing them and then adding them to the scene. In the example below we add an circle, using QGraphicsEllipseItem -- a circle is just an ellipse with equal height and width.
python import sys from PySide6.QtWidgets import QGraphicsScene, QGraphicsView, QGraphicsRectItem, QGraphicsEllipseItem, QApplication from PySide6.QtGui import QBrush, QPen from PySide6.QtCore import Qt app = QApplication(sys.argv) # Defining a scene rect of 400x200, with it's origin at 0,0. # If we don't set this on creation, we can set it later with .setSceneRect scene = QGraphicsScene(0, 0, 400, 200) # Draw a rectangle item, setting the dimensions. rect = QGraphicsRectItem(0, 0, 200, 50) # Set the origin (position) of the rectangle in the scene. rect.setPos(50, 20) # Define the brush (fill). brush = QBrush(Qt.red) rect.setBrush(brush) # Define the pen (line) pen = QPen(Qt.cyan) pen.setWidth(10) rect.setPen(pen) ellipse = QGraphicsEllipseItem(0, 0, 100, 100) ellipse.setPos(75, 30) brush = QBrush(Qt.blue) ellipse.setBrush(brush) pen = QPen(Qt.green) pen.setWidth(5) ellipse.setPen(pen) # Add the items to the scene. Items are stacked in the order they are added. scene.addItem(ellipse) scene.addItem(rect) view = QGraphicsView(scene) view.show() app.exec()The above code will give the following result.
A scene with two items
The order you add items affects the stacking order in the scene -- items added later will always appear on top of items added first. However, if you need more control you can set the stacking order using .setZValue.
python ellipse.setZValue(500) rect.setZValue(200)Now the circle (ellipse) appears above the rectangle.
Using Zvalue to order items in the scene
Try experimenting with setting the Z value of the two items -- you can set it before or after the items are in the scene, and can change it at any time.
Z in this context refers to the Z coordinate. The X & Y coordinates are the horizontal and vertical position in the scene respectively. The Z coordinate determines the relative position of items toward the front and back of the scene -- coming "out" of the screen towards the viewer.
There are also the convenience methods .stackBefore() and .stackAfter() which allow you to stack your QGraphicsItem behind, or in front of another item in the scene.
python ellipse.stackAfter(rect) Making items moveableOur two QGraphicsItem objects are currently fixed in position where we place them, but they don't have to be! As already mentioned Qt's Graphics View framework allows items to respond to user input, for example allowing them to be dragged and dropped around the scene at will. Simple functionality like is actually already built in, you just need to enable it on each QGraphicsItem. To do that we need to set the flag QGraphicsItem.GraphicsItemFlags.ItemIsMoveable on the item.
The full list of graphics item flags is available here.
python import sys from PySide6.QtWidgets import QGraphicsScene, QGraphicsView, QGraphicsItem, QGraphicsRectItem, QGraphicsEllipseItem, QApplication from PySide6.QtGui import QBrush, QPen from PySide6.QtCore import Qt app = QApplication(sys.argv) # Defining a scene rect of 400x200, with it's origin at 0,0. # If we don't set this on creation, we can set it later with .setSceneRect scene = QGraphicsScene(0, 0, 400, 200) # Draw a rectangle item, setting the dimensions. rect = QGraphicsRectItem(0, 0, 200, 50) # Set the origin (position) of the rectangle in the scene. rect.setPos(50, 20) # Define the brush (fill). brush = QBrush(Qt.red) rect.setBrush(brush) # Define the pen (line) pen = QPen(Qt.cyan) pen.setWidth(10) rect.setPen(pen) ellipse = QGraphicsEllipseItem(0, 0, 100, 100) ellipse.setPos(75, 30) brush = QBrush(Qt.blue) ellipse.setBrush(brush) pen = QPen(Qt.green) pen.setWidth(5) ellipse.setPen(pen) # Add the items to the scene. Items are stacked in the order they are added. scene.addItem(ellipse) scene.addItem(rect) ellipse.setFlag(QGraphicsItem.ItemIsMovable) view = QGraphicsView(scene) view.show() app.exec()In the above example we've set ItemIsMovable on the ellipse only. You can drag the ellipse around the scene -- including behind the rectangle -- but the rectangle itself will remain locked in place. Experiment with adding more items and configuring the moveable status.
If you want an item to be selectable you can enable this by setting the ItemIsSelectable flag, for example here using .setFlags() to set multiple flags at the same time.
python ellipse.setFlags(QGraphicsItem.ItemIsMovable | QGraphicsItem.ItemIsSelectable)If you click on the ellipse you'll now see it surrounded by a dashed line to indicate that it is selected. We'll look at how to use item selection in more detail in a later tutorial.
A selected item in the scene, highlighted with dashed lines
Another way to create objects.So far we've been creating items by creating the objects and then adding them to the scene. But you can also create an object in the scene directly by calling one of the helper methods on the scene itself, e.g. scene.addEllipse(). This creates the object and returns it so you can modify it as before.
python import sys from PySide6.QtWidgets import QGraphicsScene, QGraphicsView, QGraphicsRectItem, QApplication from PySide6.QtGui import QBrush, QPen from PySide6.QtCore import Qt app = QApplication(sys.argv) scene = QGraphicsScene(0, 0, 400, 200) rect = scene.addRect(0, 0, 200, 50) rect.setPos(50, 20) # Define the brush (fill). brush = QBrush(Qt.red) rect.setBrush(brush) # Define the pen (line) pen = QPen(Qt.cyan) pen.setWidth(10) rect.setPen(pen) view = QGraphicsView(scene) view.show() app.exec()Feel free to use whichever form you find most comfortable in your code.
You can only use this approach for the built-in QGraphicsItem object types.
Building a more complex sceneSo far we've built a simple scene using the basic QGraphicsRectItem and QGraphicsEllipseItem shapes. Now let's use some other QGraphicsItem objects to build a more complex scene, including lines, text and QPixmap (images).
python from PySide6.QtCore import QPointF, Qt from PySide6.QtWidgets import QGraphicsRectItem, QGraphicsScene, QGraphicsView, QApplication from PySide6.QtGui import QBrush, QPainter, QPen, QPixmap, QPolygonF import sys app = QApplication(sys.argv) scene = QGraphicsScene(0, 0, 400, 200) rectitem = QGraphicsRectItem(0, 0, 360, 20) rectitem.setPos(20, 20) rectitem.setBrush(QBrush(Qt.red)) rectitem.setPen(QPen(Qt.cyan)) scene.addItem(rectitem) textitem = scene.addText("QGraphics is fun!") textitem.setPos(100, 100) scene.addPolygon( QPolygonF( [ QPointF(30, 60), QPointF(270, 40), QPointF(400, 200), QPointF(20, 150), ]), QPen(Qt.darkGreen), ) pixmap = QPixmap("cat.jpg") pixmapitem = scene.addPixmap(pixmap) pixmapitem.setPos(250, 70) view = QGraphicsView(scene) view.setRenderHint(QPainter.Antialiasing) view.show() app.exec()If you run the example above you'll see the following scene.
Scene with multiple items including a rectangle, polygon, text and a pixmap.
Let's step through the code looking at the interesting bits.
Polygons are defined using a series of QPointF objects which give the coordinates relative to the items position. So, for example if you create a polygon object with a point at 30, 20 and then move this polygon object X & Y coordinates 50, 40 then the point will be displayed at 80, 60 in the scene.
Points inside an item are always relative to the item itself, and item coordinates are always relative to the scene -- or the item's parent, if it has one. We'll take a closer look at the Graphics View coordinate system in the next tutorial.
To add an image to the scene we can open it from a file using QPixmap(). This creates a QPixmap object, which can then in turn add to the scene using scene.addPixmap(pixmap). This returns a QGraphicsPixmapItem which is the QGraphicsItem type for the pixmap -- a wrapper than handles displaying the pixmap in the scene. You can use this object to perform any changes to item in the scene.
The multiple layers of objects can get confusing, so it's important to choose sensible variable names which make clear the distinction between, e.g. the pixmap itself and the pixmap item that contains it.
Finally, we set the flag RenderHint,Antialiasing on the view to smooth the edges of diagonal lines. You almost always want to enable this on your views as otherwise any rotated objects will look very ugly indeed. Below is our scene without antialiasing enabled, you can see the jagged lines on the polygon.
Scene with antialiasing disabled.
Antialiasing has a (small) performance impact however, so if you are building scenes with millions of rotated items it may in some cases make sense to turn it off.
Adding graphics views to Qt layoutsThe QGraphicsView is subclassed from QWidget, meaning it can be placed in layouts just like any other widget. In the following example we add the view to a simple interface, with buttons which perform a basic effect on the view -- raising and lowering selected item's ZValue. This has the effect of allowing us to move items in front and behind other objects.
The full code is given below.
python import sys from PySide6.QtCore import Qt from PySide6.QtGui import QBrush, QPainter, QPen from PySide6.QtWidgets import ( QApplication, QGraphicsEllipseItem, QGraphicsItem, QGraphicsRectItem, QGraphicsScene, QGraphicsView, QHBoxLayout, QPushButton, QSlider, QVBoxLayout, QWidget, ) class Window(QWidget): def __init__(self): super().__init__() # Defining a scene rect of 400x200, with it's origin at 0,0. # If we don't set this on creation, we can set it later with .setSceneRect self.scene = QGraphicsScene(0, 0, 400, 200) # Draw a rectangle item, setting the dimensions. rect = QGraphicsRectItem(0, 0, 200, 50) rect.setPos(50, 20) brush = QBrush(Qt.red) rect.setBrush(brush) # Define the pen (line) pen = QPen(Qt.cyan) pen.setWidth(10) rect.setPen(pen) ellipse = QGraphicsEllipseItem(0, 0, 100, 100) ellipse.setPos(75, 30) brush = QBrush(Qt.blue) ellipse.setBrush(brush) pen = QPen(Qt.green) pen.setWidth(5) ellipse.setPen(pen) # Add the items to the scene. Items are stacked in the order they are added. self.scene.addItem(ellipse) self.scene.addItem(rect) # Set all items as moveable and selectable. for item in self.scene.items(): item.setFlag(QGraphicsItem.ItemIsMovable) item.setFlag(QGraphicsItem.ItemIsSelectable) # Define our layout. vbox = QVBoxLayout() up = QPushButton("Up") up.clicked.connect(self.up) vbox.addWidget(up) down = QPushButton("Down") down.clicked.connect(self.down) vbox.addWidget(down) rotate = QSlider() rotate.setRange(0, 360) rotate.valueChanged.connect(self.rotate) vbox.addWidget(rotate) view = QGraphicsView(self.scene) view.setRenderHint(QPainter.Antialiasing) hbox = QHBoxLayout(self) hbox.addLayout(vbox) hbox.addWidget(view) self.setLayout(hbox) def up(self): """ Iterate all selected items in the view, moving them forward. """ items = self.scene.selectedItems() for item in items: z = item.zValue() item.setZValue(z + 1) def down(self): """ Iterate all selected items in the view, moving them backward. """ items = self.scene.selectedItems() for item in items: z = item.zValue() item.setZValue(z - 1) def rotate(self, value): """ Rotate the object by the received number of degrees """ items = self.scene.selectedItems() for item in items: item.setRotation(value) app = QApplication(sys.argv) w = Window() w.show() app.exec()If you run this, you will get a window like that shown below. By selecting an item in the graphics view and then clicking either the "Up" or "Down" button you can move items up and down within the scene -- behind and in front of one another. The items are all moveable, so you can drag them around too. Clicking on the slider will rotate the currently selected items by the set number of degrees.
A graphics scene with some custom controls
The raising and lowering is handled by our custom methods up and down, which work by iterating over the currently selected items in the scene -- retrieved using scene.selectedItems() and then getting the items z value and increasing or decreasing it respectively.
python def up(self): """ Iterate all selected items in the view, moving them forward. """ items = self.scene.selectedItems() for item in items: z = item.zValue() item.setZValue(z + 1)While rotation is handled using the item.setRotation method. This receives the current angle from the QSlider and again, applies it to any currently selected items in the scene.
python def rotate(self, value): """ Rotate the object by the received number of degrees. """ items = self.scene.selectedItems() for item in items: item.setRotation(value)Take a look at the QGraphicsItem documentation for some other properties you can control with widgets and try extending the interface to allow you to change them dynamically.
Hopefully this quick introduction to the Qt Graphics View framework has given you some ideas of what you can do with it. In the next tutorials we'll look at how events and user interaction can be handled on items and how to create custom & compound items for your own scenes.
Matt Layman: Postgres to SQLite - Building SaaS #204
Reproducible Builds (diffoscope): diffoscope 278 released
The diffoscope maintainers are pleased to announce the release of diffoscope version 278. This version includes the following changes:
[ Chris Lamb ] * Temporarily remove procyon-decompiler from Build-Depends as it was removed from testing (#1057532). (Closes: #1082636) * Add a helpful contextual message to the output if comparing Debian .orig tarballs within .dsc files without the ability to "fuzzy-match" away the leading directory. (Closes: reproducible-builds/diffoscope#386) * Correctly invert "X% similar" value and do not emit "100% similar". (Closes: reproducible-builds/diffoscope#391) * Update copyright years.You find out more by visiting the project homepage.
PreviousNext: Next level theming with Pinto
Discover how to take your Drupal theming to the next level with the brand-new Pinto module.
by adam.bramley / 27 September 2024Pinto is a new module written by Daniel Phin (dpi). At PreviousNext, all new projects use it to dramatically improve the developer experience and velocity for theming Drupal sites.
Pinto allows all theming logic to be encapsulated in reusable Theme Objects, removing the need for many traditional Drupal theming architectures such as theme hooks, preprocessing, field formatters, and even Display settings. It can easily integrate with tools such as Storybook to reuse templates—eliminating duplicated markup and making your frontenders happy!
This blog post assumes the use of a design system tool such as Storybook, which will help us paint a picture of how Pinto can level up your Drupal theming.
Issues with traditional Drupal themingTraditional Drupal theming might look something like this:
- A Frontender builds components in Storybook, containing CSS, JS, and twig templates
- A Backender implements one or more of the following:
- Theme hooks in a module, profile, or theme
- Templates are copied from Storybook and massaged into Drupal’s theme system
- A field formatter injects field data into the theme function
- Preprocess hooks massage or stitch together other data
- Twig templates contain logic to further massage variables for output in twig
- Entity view displays wire up the formatter
This approach can lead to several maintenance issues in the long term.
Have you ever looked at a page and wondered how something got there? Twig debugging can help track down specific templates, but it can be difficult to pinpoint exactly how a particular piece of data made its way onto the page.
Pinto eliminates all of this guesswork by allowing you to break components down into theme objects (i.e. PHP classes) and encapsulate all logic in a single place to be reused anywhere that component is needed.
Pinto basicsIn this section, we’ll discuss how to set Pinto up and explain some of the architecture of how the module works.
First off, we need to install Pinto:
composer require drupal/pintoPinto automatically discovers new theme objects inside designated namespaces. You can define any number of these, but we’ll use a single namespace called "MyProjectDs" (Ds stands for Design system) for our purposes. For Pinto to discover the objects in this namespace, you need to define the pinto.namespaces parameter in your services.yml file:
parameters: pinto.namespaces: - 'MyProjectDs'Pinto Theme objects are registered via a PHP Enum inside the namespace defined above. This Enum must implement \Pinto\List\ObjectListInterface. The Enum should also use the Pinto library’s ObjectListTrait which contains logic for asset discovery and automatically registering theme definitions from your Theme objects.
The enum will look something like this. We recommend placing it inside a module dedicated to your design system. For this demo, we’ll call it my_project_ds.
namespace Drupal\my_project_ds\MyProjectDs; use Pinto\List\ObjectListInterface; use Pinto\List\ObjectListTrait; enum MyProjectList: string implements ObjectListInterface { use ObjectListTrait; }You’ll need to implement at least three methods on this Enum:
- templateDirectory - This tells Pinto where to look for the twig template for the specific theme object it is registering.
- cssDirectory - This tells Pinto where to find css files. For this demonstration, we’ll assume your design system outputs all CSS and JS files into a libraries directory inside the project's web root.
- jsDirectory - As above, but for JS files!
For the latter two methods, it’s as simple as defining the root directory where your compiled CSS and JS files are output. We usually just define these as:
/** * {@inheritdoc} */ public function cssDirectory(): string { return '/libraries/my_project'; } /** * {@inheritdoc} */ public function jsDirectory(): string { return '/libraries/my_project'; }The templateDirectory method must return the directory in which a specific component’s template lives, which can be complicated since, in a Storybook setup, each component will most likely live in its own directory. For this logic, we can use Attributes on the Enum case to tell Pinto where the template is for each Theme object.
Before we talk about Attributes, let’s look at an example of how to define a Theme Object in the Enum itself.
Each Theme object must be defined in the Enum as a case.
NOTE: Clear the cache after adding new cases for Pinto to discover newly added theme objects.
In this example, we will define a Card Theme object:
namespace Drupal\my_project_ds\MyProjectDs; use Drupal\my_project_ds\ThemeObject\Card; use Pinto\List\ObjectListTrait; enum MyProjectList: string implements ObjectListInterface { use ObjectListTrait; #[Definition(Card::class)] case Card = 'card';This definition uses the Pinto library’s Definition attribute to tie the "Card" case to our Card theme object. By default (via the ObjectListTrait), the backed-value of the case (i.e. the string value assigned to it) is used as the template name, library name, and theme definition name.
Now, back to our templateDirectory. We can define our own Attributes to make it easy to specify which directory a component’s template is in.
In a perfect world, we want to reuse our frontender’s twig templates in the component’s Storybook directory. Storybook generally lives outside of your web root, but with a few helpers we can easily target these templates. Let’s assume your Storybook directory structure looks something like this, where components is at the root of your repository:
We can utilise the Components module to give us a handy twig namespace to use. Let’s define this in our my_project_ds.info.yml file:
name: My Project Design System description: 'Provides Pinto theme objects for my project.' core_version_requirement: '>=10' type: module components: namespaces: my_project_components: - ../../../../components/srcThis means Drupal’s theme engine will be able to use @my_project_components to target the root of your Storybook components directory.
NOTE: This assumes the module is inside app/modules/custom/my_project_ds, hence the four parent directories.
Next, we need to define an attribute that takes a component path and will be used to wire up our Theme object with the directory it lives in.
The Attribute class:
namespace Drupal\my_project_ds\MyProjectDs; #[\Attribute(flags: \Attribute::TARGET_CLASS_CONSTANT)] class MyProjectComponent { public function __construct( public readonly string $componentPath, ) { } }Now on the Enum case, we can add the attribute:
#[Definition(Card::class)] #[MyProjectComponent('Components/Card')] case Card = 'card';Then we just need a sprinkle of reflection in the templateDirectory function, and we’re done!
/** * {@inheritdoc} */ public function templateDirectory(): string { $reflection = new \ReflectionEnumUnitCase($this::class, $this->name); $definition = ($reflection->getAttributes(MyProjectComponent::class)[0] ?? NULL)?->newInstance() ?? throw new \LogicException('All component cases must have a `' . MyProjectComponent::class . '.'); return \sprintf('@my_project_components/%s', $definition->componentPath); }While this may look scary, it’s not! We’re simply getting the MyProjectComponent attribute from the case and appending the componentPath (i.e. the string "Components/Card" parameter above) to our custom twig namespace.
After this setup, it becomes extremely easy to add new theme objects, vastly speeding up your theming development. Let’s look at how to do that now!
An example Pinto componentFollowing on from the previous example, let’s set up a Card component. A Card is a fairly universal component in almost every project. In this example, a Card has:
- A title
- An image
- An optional description
The twig template in Storybook might look something like this (reminder that this would be inside the components/src/Components/Card/card.html.twig file):
<div class="card"> <div class="image"> {{ image }} </div> <div class="card__content"> <div class="card__title">{{ title }}</div> {% if description %} <div class="card__description"> {{ description }} </div> {% endif %} </div> </div>At its most basic level (don’t worry, we’ll get more advanced in the next blog post!), all we need for this theme object is something like this:
namespace Drupal\my_project_ds\ThemeObject; use Drupal\Core\Cache\CacheableDependencyInterface; use Drupal\my_project_ds\MyProjectDs\MyProjectObjectTrait; use Pinto\Attribute\ThemeDefinition; #[ThemeDefinition([ 'variables' => [ 'title' => '', 'description' => '', 'image' => '', ], ])] final class Card implements CacheableDependencyInterface { use MyProjectObjectTrait; private function __construct( private readonly string $title, private readonly array $image, private readonly ?string $description, ) {} protected function build(mixed $build): mixed { return $build + [ '#title' => $this->title, '#description' => $this->description, '#image' => $this->image, ]; } }Let’s go through each part to understand what’s going on.
ThemeDefinition attribute
This is essentially Pinto's version of hook_theme. It takes whatever is inside the theme definition and uses it when registering the Theme object as a Drupal theme hook. In this example, we simply define the variables we need to pass through. Pinto will even throw exceptions when any of these variables are missing from the resulting render array!
MyProjectObjectTrait
This is another helper trait that will be used across all components. It provides convenience functions and wraps other traits to make adding new Theme objects a breeze.
namespace Drupal\my_project_ds\MyProjectDs; use Drupal\Core\Cache\CacheableDependencyInterface; use Drupal\Core\Cache\CacheableMetadata; use Drupal\Core\Cache\RefinableCacheableDependencyTrait; use Drupal\pinto\Object\DrupalObjectTrait; trait MyProjectObjectTrait { use DrupalObjectTrait; use RefinableCacheableDependencyTrait; public function __invoke(): mixed { return $this->pintoBuild(function (mixed $build): mixed { if (!$this instanceof CacheableDependencyInterface) { throw new \LogicException(static::class . ' must implement CacheableDependencyInterface'); } (new CacheableMetadata())->addCacheableDependency($this)->applyTo($build); return $this->build($build); }); } abstract protected function build(mixed $build): mixed; }First up is the __invoke function. This is a PHP magic method that is becoming more and more common in PHP codebases (including Drupal!). It’s run when calling an object as a function. The pattern lets us “invoke” Pinto Theme objects like this (note the brackets at the end):
$card = new Card('Title', 'Description', $image); $build = $card();We then have an abstract build function, which you can see in the Card example above. We simply take the properties passed to the card and output them into the theme variables.
Our object trait also extends Pinto traits and core's trait for adding cacheable metadata to a Theme object—more on this in the next blog post!
Constructor
The constructor on the Theme object lets us define strictly typed properties for what we need for each theme variable. Generally speaking, we use a mix of constructors and factory methods to create Theme objects and then invoke them, as we’ve seen above.
What about CSS and JS?
Pinto has built-in attributes that automatically include CSS and JS when a theme object is invoked. This is done by adding the attributes to the Theme object class.
use Pinto\Attribute\Asset\Css; #[Css('card.css', preprocess: TRUE)] final class Card implements CacheableDependencyInterface {Based on the cssDirectory method on our MyProjectListenum, this will include the /libraries/my_project/card.css file automatically whenever a Card Theme object is rendered. There is also an equivalent Js Attribute.
How to render Pinto Theme objectsIt may seem like a lot of set up upfront, but hopefully, you can see that once the initial enums and traits are established, it’s very easy to add new Theme objects.
Now that we’re all set up, we can invoke this Theme object anywhere on our Drupal site! We can even chain/nest these Theme Objects together!
You may have noticed that the $image parameter for the Card was an array. Invoked Theme objects output a render array, so we could do something like this:
$image = new Image('path/to/image.png'); $card = new Card('My Card Title', 'My Description', $image()); return $card();Where Image is another Theme object. Or, you can simply use Drupal’s existing render arrays to theme an image!
Next upIn this blog post, we focused on the basic principles of Pinto. We also looked at how to hit the ground running with some nice helper functions and integration with a design system such as Storybook.
In the next blog, we’ll look at integrating this with bundle classes to streamline theming and really make Pinto sing! Following that, we'll also be doing a comparison with Single Directory Components (SDC) and discuss why we prefer to use Pinto instead.
Drupalize.Me: Drupal AI: How to Set It Up and Try It Out
After watching the Driesnote earlier this week, I wanted to try and play around with the AI tools that were demonstrated. Here's my notes so far. And instructions on how you can set it all up to experiment with the new AI tools in Drupal.
joe Thu, 09/26/2024 - 14:47Horizontal Digital Blog: Add an icon for your custom field type in Drupal's Field UI
Acquia Developer Portal Blog: Project View: Realizing the Power of Drupal's Constraint Validation
I have been working with Drupal for quite some time (from the days of Drupal-7 🙂). I was always up to-date with the new changes in Drupal APIs (at least in theory 😅 ). Whenever a new change was introduced in APIs, I checked them and tried them out.
I did the same thing for the new ValidationAPI. I checked the documentation, tried one basic Hello World type of scenario with some example code and thought it was all good.
Is “Open Source” ever hyphenated?
No! Open Source is never hyphenated when referring to software. If you’re familiar with English grammar you may have more than an eyebrow raised: read on, we have an explanation. Actually, we have two.
We asked Joseph P. De Veaugh-Geiss, a linguist and KDE’s project manager, to provide us with an explanation. If that’s not enough, we have one more argument at the end of this post.
Why Open Source is not hyphenatedIn summary:
- “open source” (no hyphen) is a lexicalized compound noun which is no longer transparent with respect to its meaning (i.e., open source is not just about being source-viewable, but also about defining user freedoms) which can then be further compounded (with for example “open source license”);
- by contrast, “open-source” (with a hyphen) is a compound modifier modifying the head noun (e.g. “intelligence”) with open having a standard dictionary meaning (i.e., “transparent” or “open to or in view of all”).
“Open source” is a lexicalized compound noun. Although it originates with the phrase “open source software”, today “open source” is itself a unique lexeme. An example, in Red Hat’s article:
Open source has become a movement and a way of working that reaches beyond software production.
The word open in “open source” does not have the meaning “open” as one would find in the dictionary. Instead, “open source” also entails user freedoms, inasmuch as users of the software for any purpose do not have to negotiate with the rights owners to enjoy (use/improve/share/monetise) the software. That is, it is not only about transparency.
A natural example of this usage, in which the phrase open source license is clearly about more than just licensing transparency:
Because Linux is released under an open source license, which prevents restrictions on the use of the software, anyone can run, study, modify, and redistribute the source code, or even sell copies of their modified code, as long as they do so under the same license.” (from Red Hat website https://www.redhat.com/en/topics/open-source/what-is-open-source)
Note that “open source license” is itself a compound noun phrase made up of the lexicalized compound noun “open source” + the noun “license”; same for “open source movement”, etc.
What is lexicalization?According to the Lexicon of linguistics (Utrecht University), ‘lexicalization’ is a “phenomenon by which a morphologically complex word starts to behave like an underived word in some respect, which means that at least one feature (semantic, syntactic, or phonological) becomes unpredictable”.
Underived word here means the phrase has a specific, unique meaning not (necessarily) transparent from its component parts. For instance, a “black market” is not a market which is black but rather a specific kind of market: an illegal one. A “blackboard” can be green. In other words, the entire complex phrase can be treated as a single unit of meaning stored in the mental lexicon. The meaning of the phrase is not derived using grammatical rules.
Today, the meaning of open source is unpredictable or semantically intransparent given its usage (at least by a subset of speakers) and meaning, i.e., open source is about user freedoms, not just transparency.
Other examples of lexicalized compound nouns include “yellow journalism”, “purple prose”, “dirty bomb”, “fat chance”, “green card”, “blackbird”, “greenhouse”, “high school”, etc. I tried to think of examples which are composed of adjectives + nouns but with a specific meaning not derivable by the combination of the two. I am sure you can come up with many more!
In some cases, lexicalization results in writing the compound noun phrase together as a single word (‘blackboard’), in other cases not (‘green card’). One can also build larger phrases by combining the lexicalized compound noun with another noun (e.g., black market dealer, green card holder).
Hyphenated open-source is a compound modifierBy contrast, open in “open-source intelligence” is the dictionary meaning of “open”, i.e., “open to or in view of all” or “transparent”. In this case, open-source is a compound modifier/compound adjective with a meaning comparable to “source-viewable”, “source-available”, “source-transparent”.
For compound modifiers, the hyphenation, though not obligatory, is common and can be used to disambiguate. The presence of a head noun like “intelligence” or “journalism” is obligatory for the compound-modifier use of open-source, unlike in lexicalized compounds.
Examples of other compound modifiers + a head noun: “long-term contract”, “single-word modifier”, “high-volume printer”, etc.
ExamplesThere are some examples of the compound-modifier use on Wikipedia where I think the difference between meanings lexicalized compound noun and compound modifier becomes clear:
“Open-source journalism, a close cousin to citizen journalism or participatory journalism, is a term coined in the title of a 1999 article by Andrew Leonard of Salon.com.” (from Wikipedia)
“Open-source intelligence” is intelligence “produced from publicly available information that is collected, exploited, and disseminated in a timely manner to an appropriate audience for the purpose of addressing a specific intelligence requirement” (from Wikipedia)
In these examples open-source is clearly referring to transparent, viewable-to-all sources and not to something like ‘guaranteeing user freedoms’. Moreover, my intuition for these latter examples is that removing the hyphen would change the meaning, however subtle it may be, and the change could make the original sentences incoherent (without implicit internal modification while reading):
- “open source journalism” would refer to journalism about open source software (in sense I above), not transparent, participatory journalism;
- “open source intelligence” would refer to intelligence about open source software (in sense I above, whatever that would mean!), not intelligence from publicly available information.
If that explanation still doesn’t convince you, we invoke the rules of branding and “pull a Twitter”, who vandalized English with their Who To Follow : we say no hyphen!
Luckily others have already adopted the “no hyphen” camp, like the CNCF style guide. Debate closed.
If you like debates, let’s talk about capitalization: OSI in its guidelines chose to always capitalize Open Source because it is a proper noun with a specific definition. Which camp are you on?
health @ Savannah: Time to take back the Internet
It’s no news. They’re stealing the Internet from us and we must do something about it. What it used to be a fun, collaborative hacking space is now ruled by corporations and narcissistic billionaires. Proprietary centralized social networks have become a space for hate, discrimination and propaganda. The messages that you see are those that they want you to see. Your data is no longer yours. They have become a massive thought control machine. You read what they want you to read and, in the end, you will end up writing and doing what they want you to write and to do. It’s a matter of time and money, and they have both.
These corporate-driven social networks are deceiving. They make us fall into false assumptions in a distorted reality. This delusion hits both individuals and organizations. For instance, in GNU Solidario and GNU Health, we fight for Social Medicine and for the rights of human and non-human animals. When we want to share an event, to make a fundraising campaign or to denounce human or animal rights violations we want the message to reach out as many people as possible. We could think, why not share it with our followers on Twitter / X? Experience has it, corporate social networks have not really made a difference in the outcomes. They will promote or “shadow ban” the message depending on who wrote it. You can guess the results for those who fight against neoliberal capitalism.
Social pressure exists, and is not trivial to overcome. Many fear that leaving proprietary centralized social networks that have been using for years will result in losing the status and contacts they’ve built throughout the years. Again, it’s not really a big deal. And we have great news, there are decentralized, community-driven alternatives! Some of those alternatives are Mastodon, Friendica or Diaspora. Not only social networks, today there is an free software alternative to pretty much any proprietary solution (search engines, scientific programs, multimedia, office suites, databases, games…)
There is a correlation between Free Software, freedom and privacy. The more Free Software, the more freedom and privacy you enjoy. The contrary also applies: Proprietary software is inversely proportional to our freedom, both at individual and collective level. There is no transparency, no privacy, no control, no rights in proprietary applications, networks or clouds.
In the last decades, the tech giants have been busy in a campaign to dismantle the Free Software philosophy and community. The “open source” euphemism is one of them. Richard Stallman (creator of the GNU project and the Free Software Foundation) has been warning us about the dangers of “Open Source”. Free societies are built with free software, not with open source. I know some members in the free software community use both terms interchangeably, but I am convinced using the “Free Software” terms not only delivers software, but also freedom to our society.
Internet is no longer fun or empathetic. It has become a hostile and toxic environment, the medium for corporations and elites that increase concentration of power, social gradient and create very unjust societies. They use our data to control individuals and governments. We certainly don’t want to be part of that.
It is our moral duty to bring back spirit of solidarity that RMS delivered in the late 80’s, and that made possible the GNU movement, the best operating systems, programming languages, web servers and database engines for everyone. The GNU project was the inspiration for projects like GNU Health, helping millions around the globe, delivering freedom and equity in healthcare.
In the end, it is up to us to embrace federated, community driven social networks and free software applications. Millions of individuals, activists, free software projects, NGOs and even the European Union have already joined the Fediverse and Mastodon. It only takes an initial push to break the social pressure to set ourselves and our societies free.
Citing our friends from GNUnet: “You broke the Internet… we’ll build a GNU one”.
Happy hacking!
Follow us in Mastodon: https://mastodon.social/@gnuhealth
Original post: https://my.gnusolidario.org/2024/09/26/time-to-take-back-the-internet/
Drupalize.Me: Adopt a Document: Sponsor Drupal CMS Documentation
Vasudev Kamath: Disabling Lockdown Mode with Secure Boot on Distro Kernel
In my previous post, I mentioned that Lockdown mode is activated when Secure Boot is enabled. One way to override this was to use a self-compiled upstream kernel. However, sometimes we might want to use the distribution kernel itself. This post explains how to disable lockdown mode while keeping Secure Boot enabled with a distribution kernel.
Understanding Secure Boot DetectionTo begin, we need to understand how the kernel detects if Secure Boot is enabled. This is done by the efi_get_secureboot function, as shown in the image below:
Disabling Kernel LockdownThe kernel code uses the value of MokSBStateRT to identify the Secure Boot state, assuming that Secure Boot can only be enabled via shim. This assumption holds true when using the Microsoft certificate for signature validation (as Microsoft currently only signs shim). However, if we're using our own keys, we don't need shim and can sign the bootloader ourselves. In this case, the Secure Boot state of the system doesn't need to be tied to the MokSBStateRT variable.
To disable kernel lockdown, we need to set the UEFI runtime variable MokSBStateRT. This essentially tricks the kernel into thinking Secure Boot is disabled when it's actually enabled. This is achieved using a UEFI initializing driver.
The code for this was written by an anonymous colleague who also assisted me with various configuration guidance for setting up UKI and Secure Boot on my system. The code is available here.
ImplementationDetailed instructions for compiling and deploying the code are provided in the repository, so I won't repeat them here.
ResultsI've tested this method with the default distribution kernel on my Debian unstable system, and it successfully disables lockdown while maintaining Secure Boot integrity. See the screenshot below for confirmation:
GNU Health: Time to take back the Internet
It’s no news. They’re stealing the Internet from us and we must do something about it. What it used to be a fun, collaborative hacking space is now ruled by corporations and narcissistic billionaires. Proprietary centralized social networks have become a space for hate, discrimination and propaganda. The messages that you see are those that they want you to see. Your data is no longer yours. They have become a massive thought control machine. You read what they want you to read and, in the end, you will end up writing and doing what they want you to write and to do. It’s a matter of time and money, and they have both.
These corporate-driven social networks are deceiving. They make us fall into false assumptions in a distorted reality. This delusion hits both individuals and organizations. For instance, in GNU Solidario and GNU Health, we fight for Social Medicine and for the rights of human and non-human animals. When we want to share an event, to make a fundraising campaign or to denounce human or animal rights violations we want the message to reach out as many people as possible. We could think, why not share it with our followers on Twitter / X? Experience has it, corporate social networks have not really made a difference in the outcomes. They will promote or “shadow ban” the message depending on who wrote it. You can guess the results for those who fight against neoliberal capitalism.
“The many branches of the Fediverse” (credits: Axbom)
Social pressure exists, and is not trivial to overcome. Many fear that leaving proprietary centralized social networks that have been using for years will result in losing the status and contacts they’ve built throughout the years. Again, it’s not really a big deal. And we have great news, there are decentralized, community-driven alternatives! Some of those alternatives are Mastodon, Friendica or Diaspora. Not only social networks, today there is an free software alternative to pretty much any proprietary solution (search engines, scientific programs, multimedia, office suites, databases, games…)
The GNU head, symbol of the GNU project
There is a correlation between Free Software, freedom and privacy. The more Free Software, the more freedom and privacy you enjoy. The contrary also applies: Proprietary software is inversely proportional to our freedom, both at individual and collective level. There is no transparency, no privacy, no control, no rights in proprietary applications, networks or clouds.
In the last decades, the tech giants have been busy in a campaign to dismantle the Free Software philosophy and community. The “open source” euphemism is one of them. Richard Stallman (creator of the GNU project and the Free Software Foundation) has been warning us about the dangers of “Open Source”. Free societies are built with free software, not with open source. I know some members in the free software community use both terms interchangeably, but I am convinced using the “Free Software” terms not only delivers software, but also freedom to our society.
Internet is no longer fun or empathetic. It has become a hostile and toxic environment, the medium for corporations and elites that increase concentration of power, social gradient and create very unjust societies. They use our data to control individuals and governments. We certainly don’t want to be part of that.
It is our moral duty to bring back spirit of solidarity that RMS delivered in the late 80’s, and that made possible the GNU movement, the best operating systems, programming languages, web servers and database engines for everyone. The GNU project was the inspiration for projects like GNU Health, helping millions around the globe, delivering freedom and equity in healthcare.
In the end, it is up to us to embrace federated, community driven social networks and free software applications. Millions of individuals, activists, free software projects, NGOs and even the European Union have already joined the Fediverse and Mastodon. It only takes an initial push to break the social pressure to set ourselves and our societies free.
Collage with some members of the GNU Health community around the world
Citing our friends from GNUnet: “You broke the Internet… we’ll build a GNU one”.
Happy hacking!
Follow us in Mastodon: https://mastodon.social/@gnuhealth
The Drop Times: 1xINTERNET Shares Community-Driven Updates for Drupal CMS Search Functionality
Melissa Wen: Reflections on 2024 Linux Display Next Hackfest
Hey everyone!
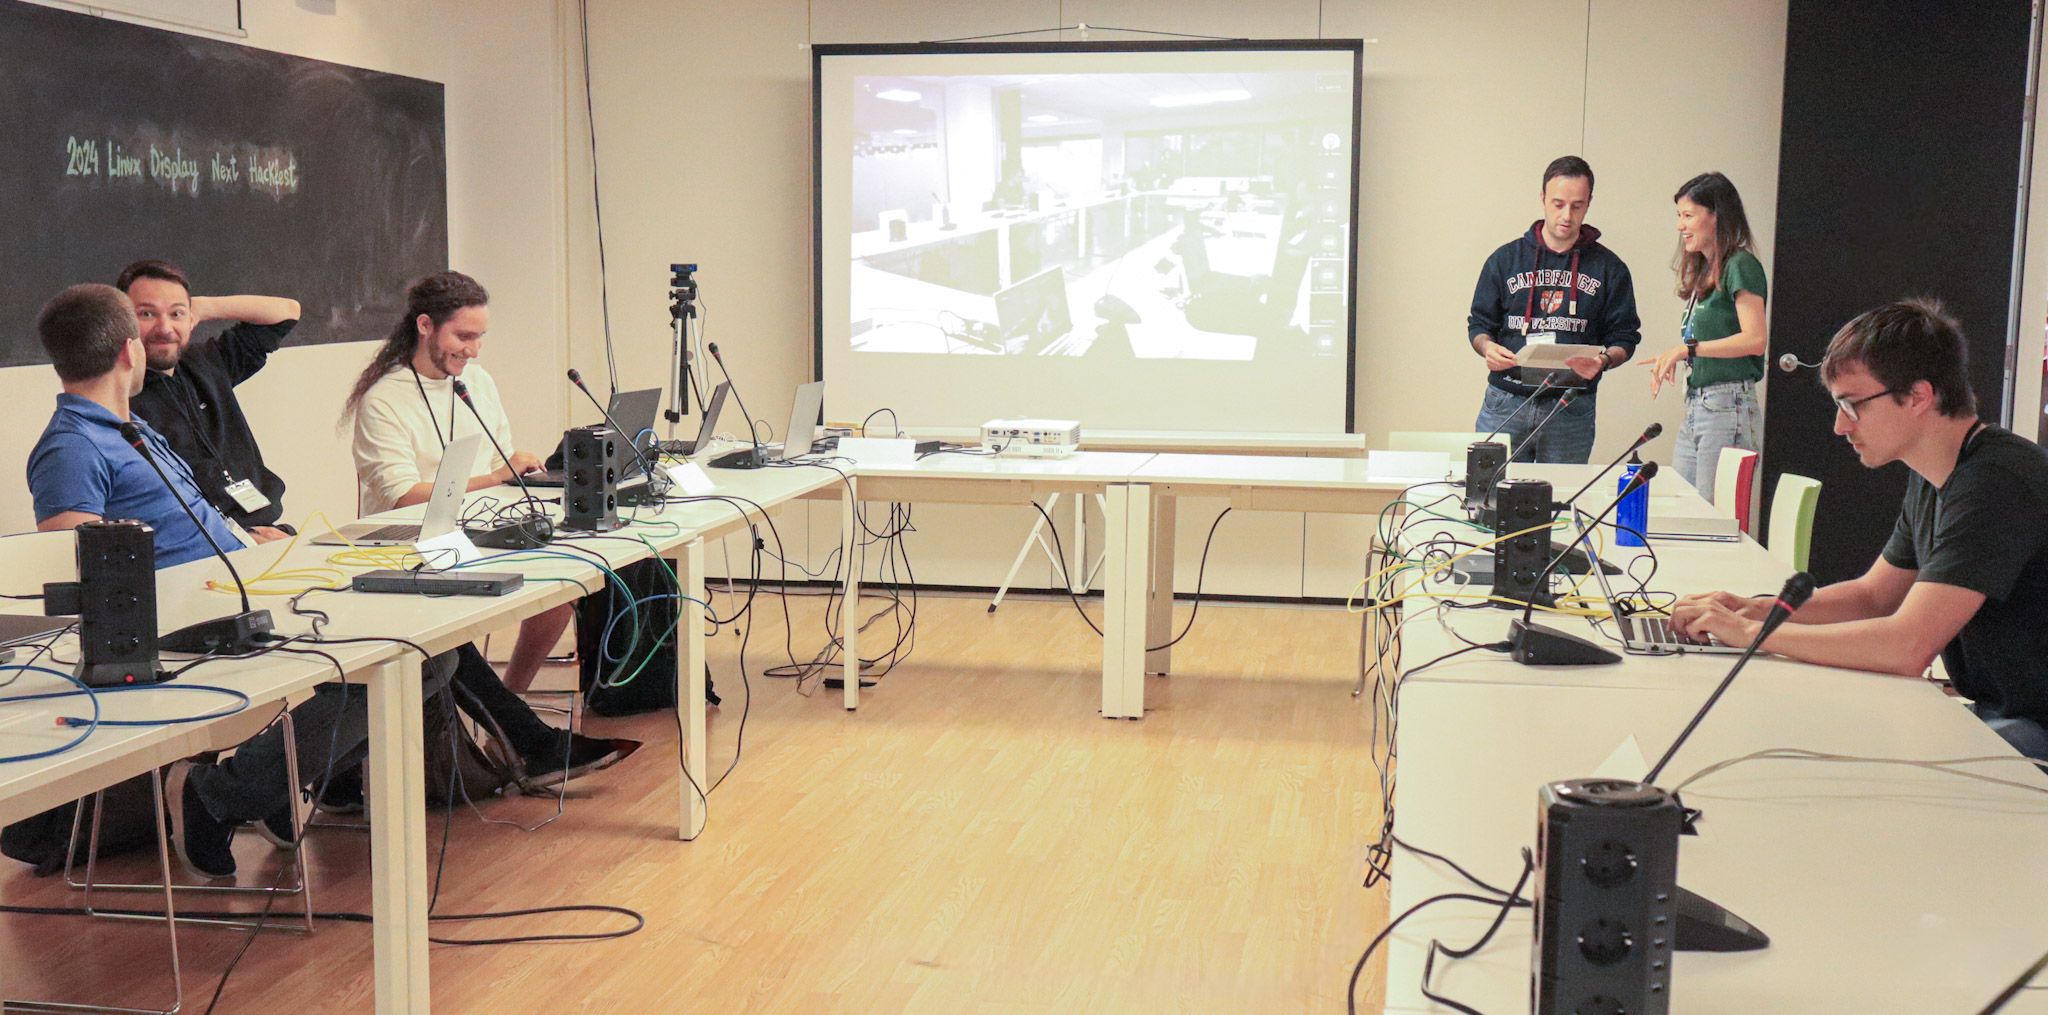
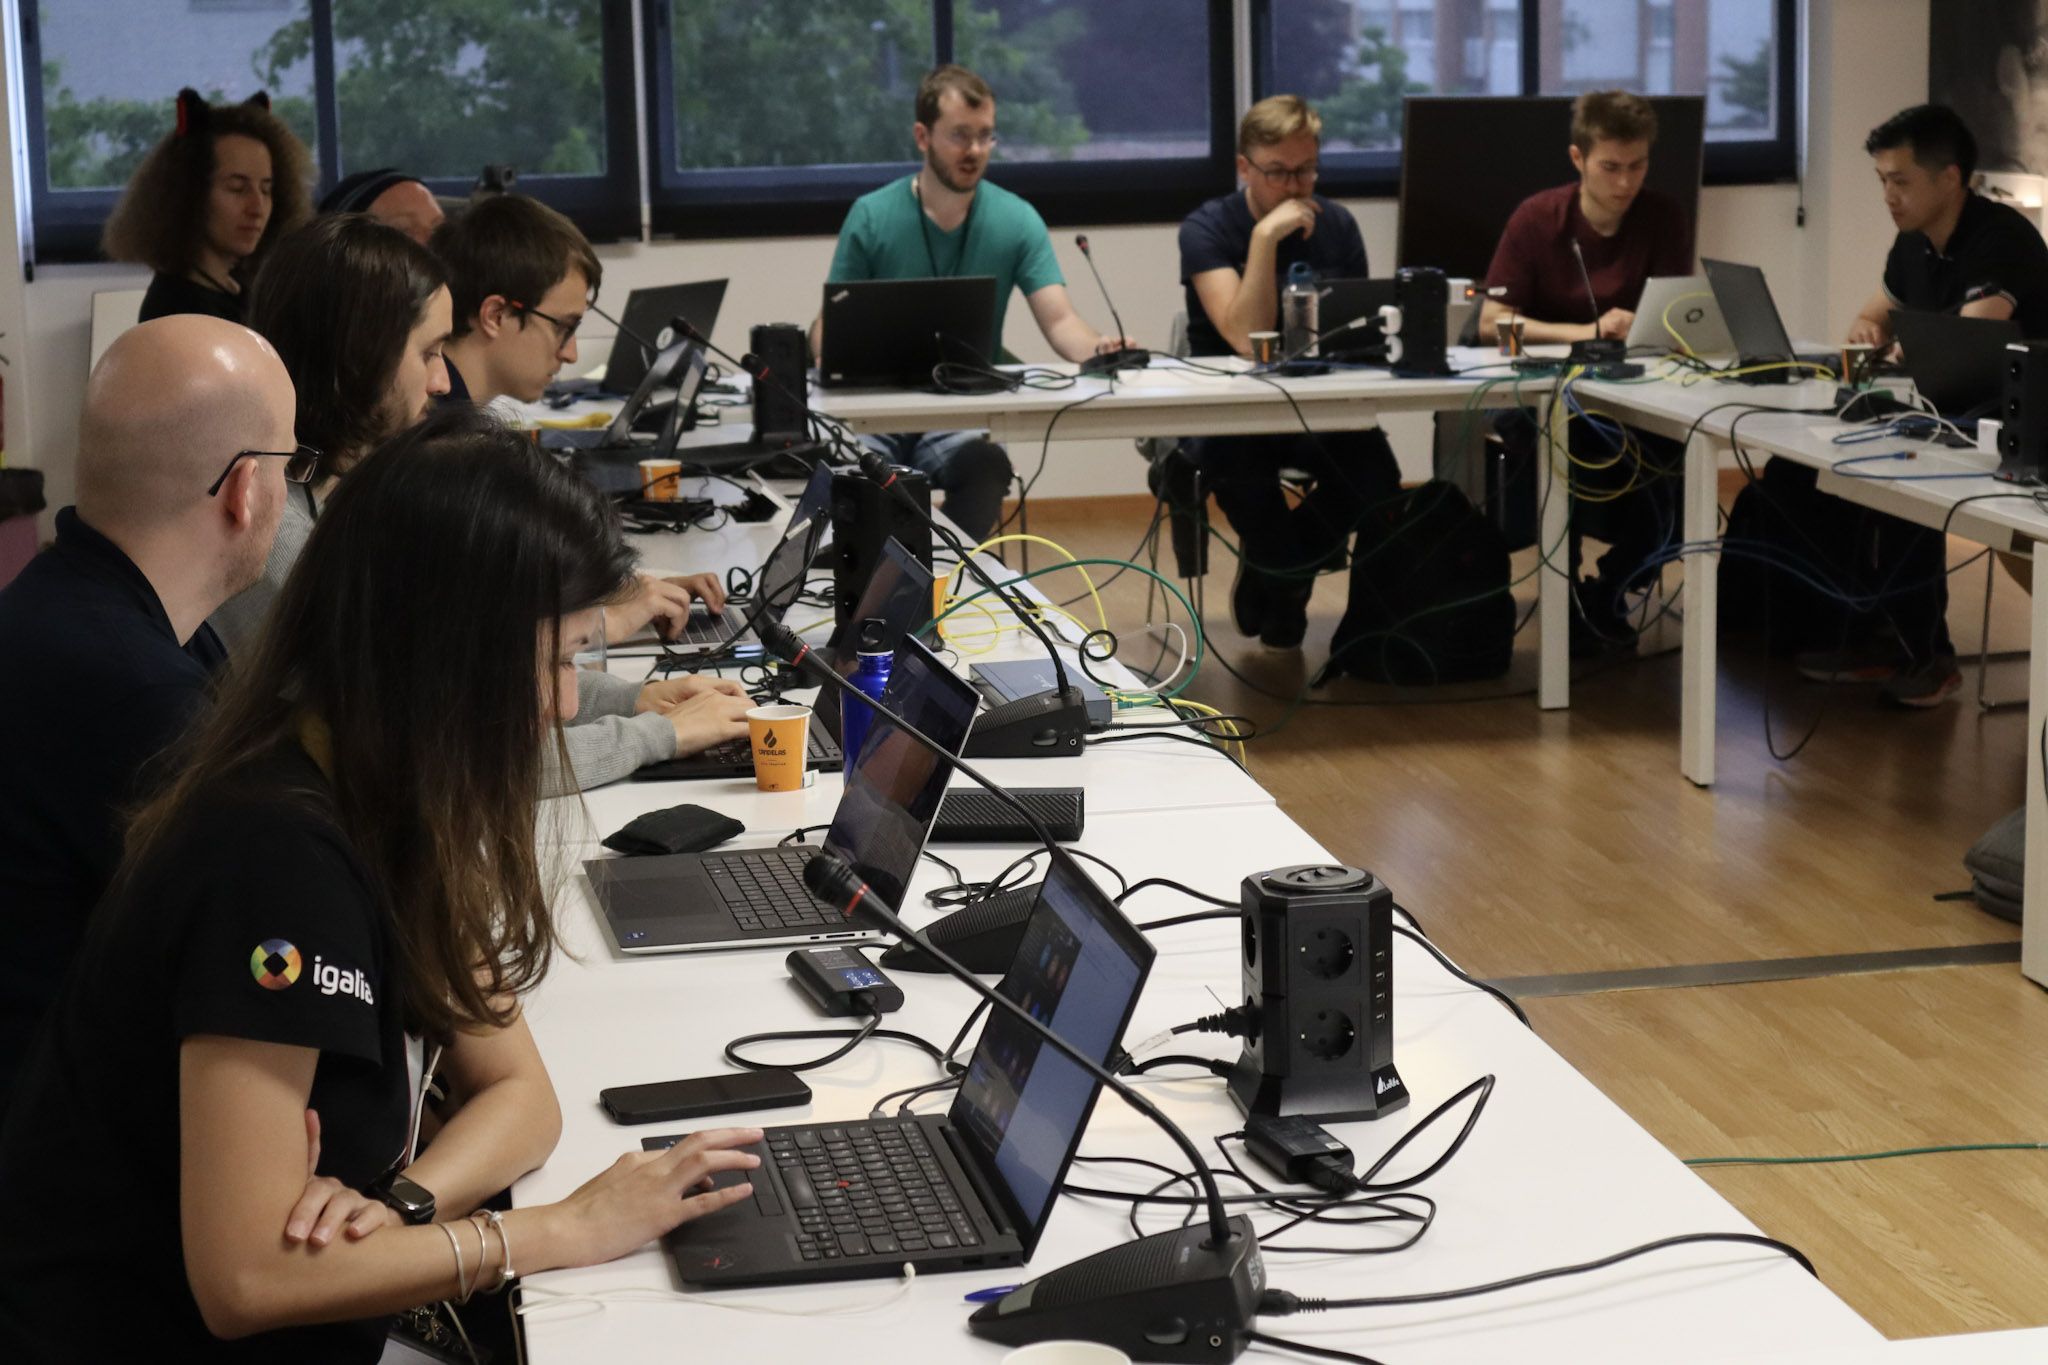
The 2024 Linux Display Next hackfest concluded in May, and its outcomes continue to shape the Linux Display stack. Igalia hosted this year’s event in A Coruña, Spain, bringing together leading experts in the field. Samuel Iglesias and I organized this year’s edition and this blog post summarizes the experience and its fruits.
One of the highlights of this year’s hackfest was the wide range of backgrounds represented by our 40 participants (both on-site and remotely). Developers and experts from various companies and open-source projects came together to advance the Linux Display ecosystem. You can find the list of participants here.
The event covered a broad spectrum of topics affecting the development of Linux projects, user experiences, and the future of display technologies on Linux. From cutting-edge topics to long-term discussions, you can check the event agenda here.
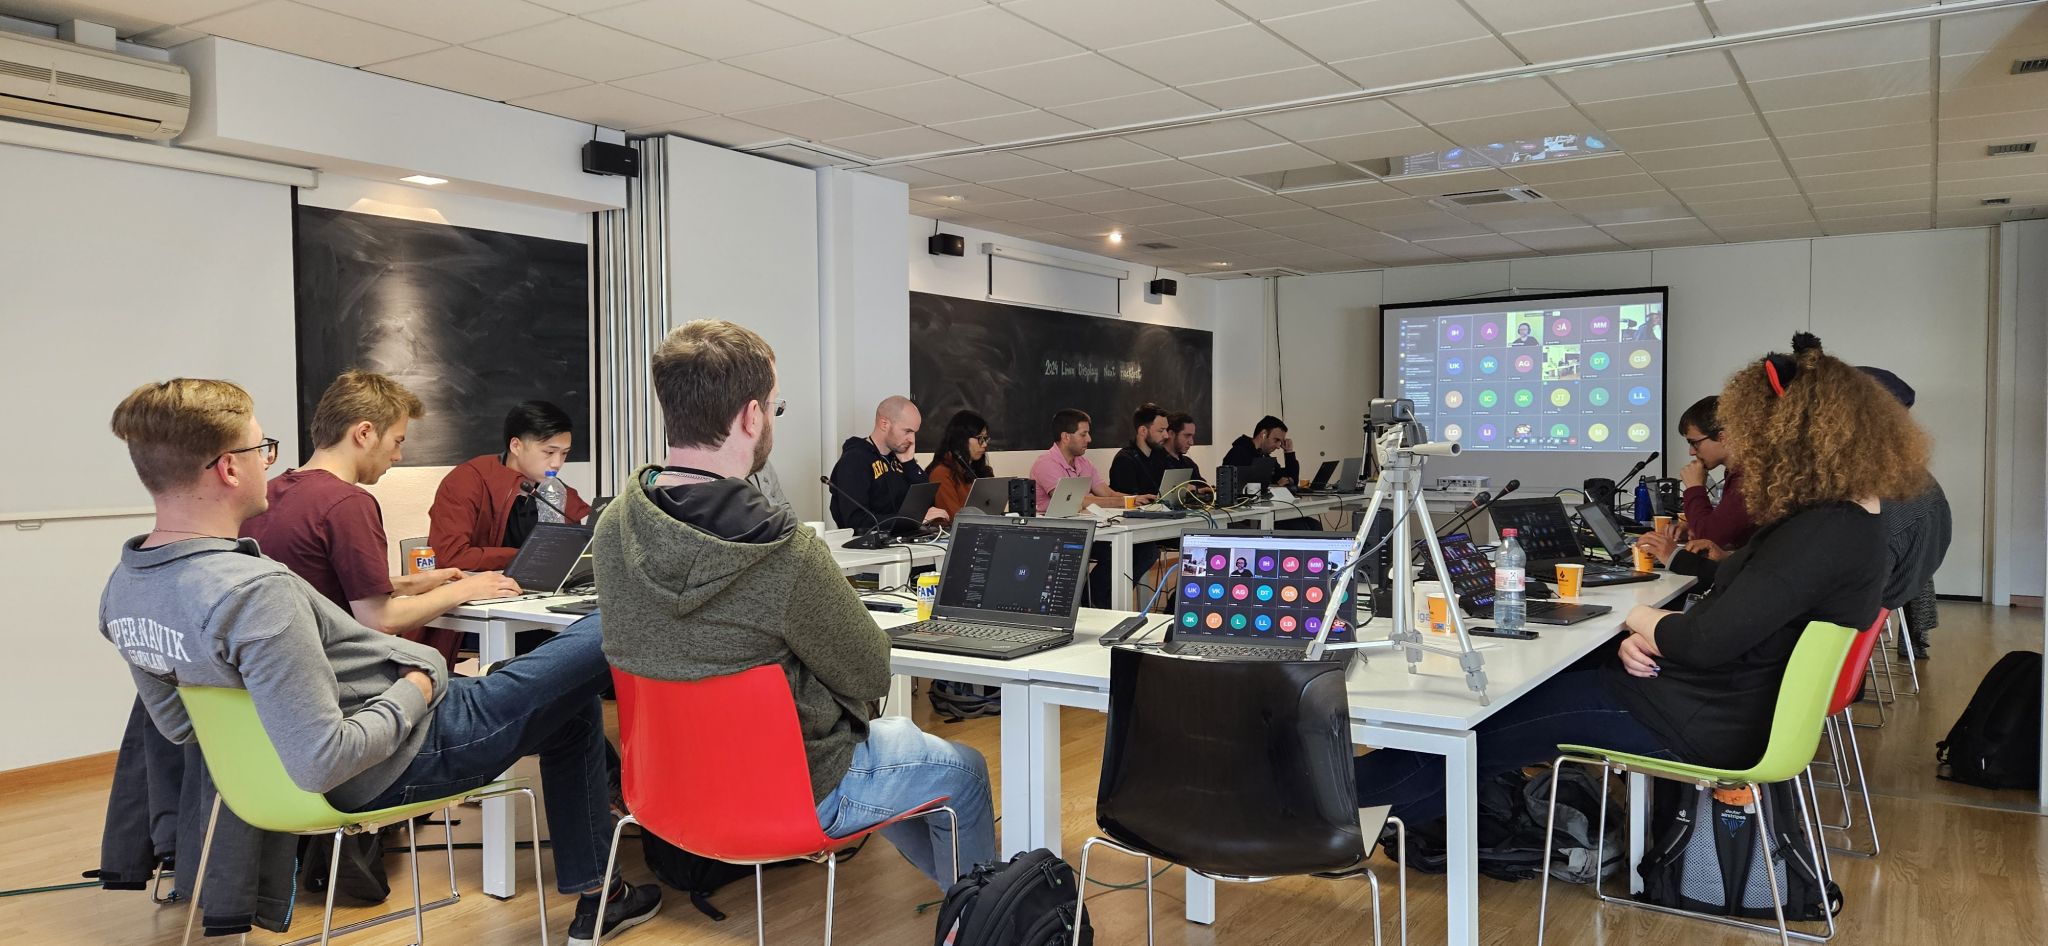
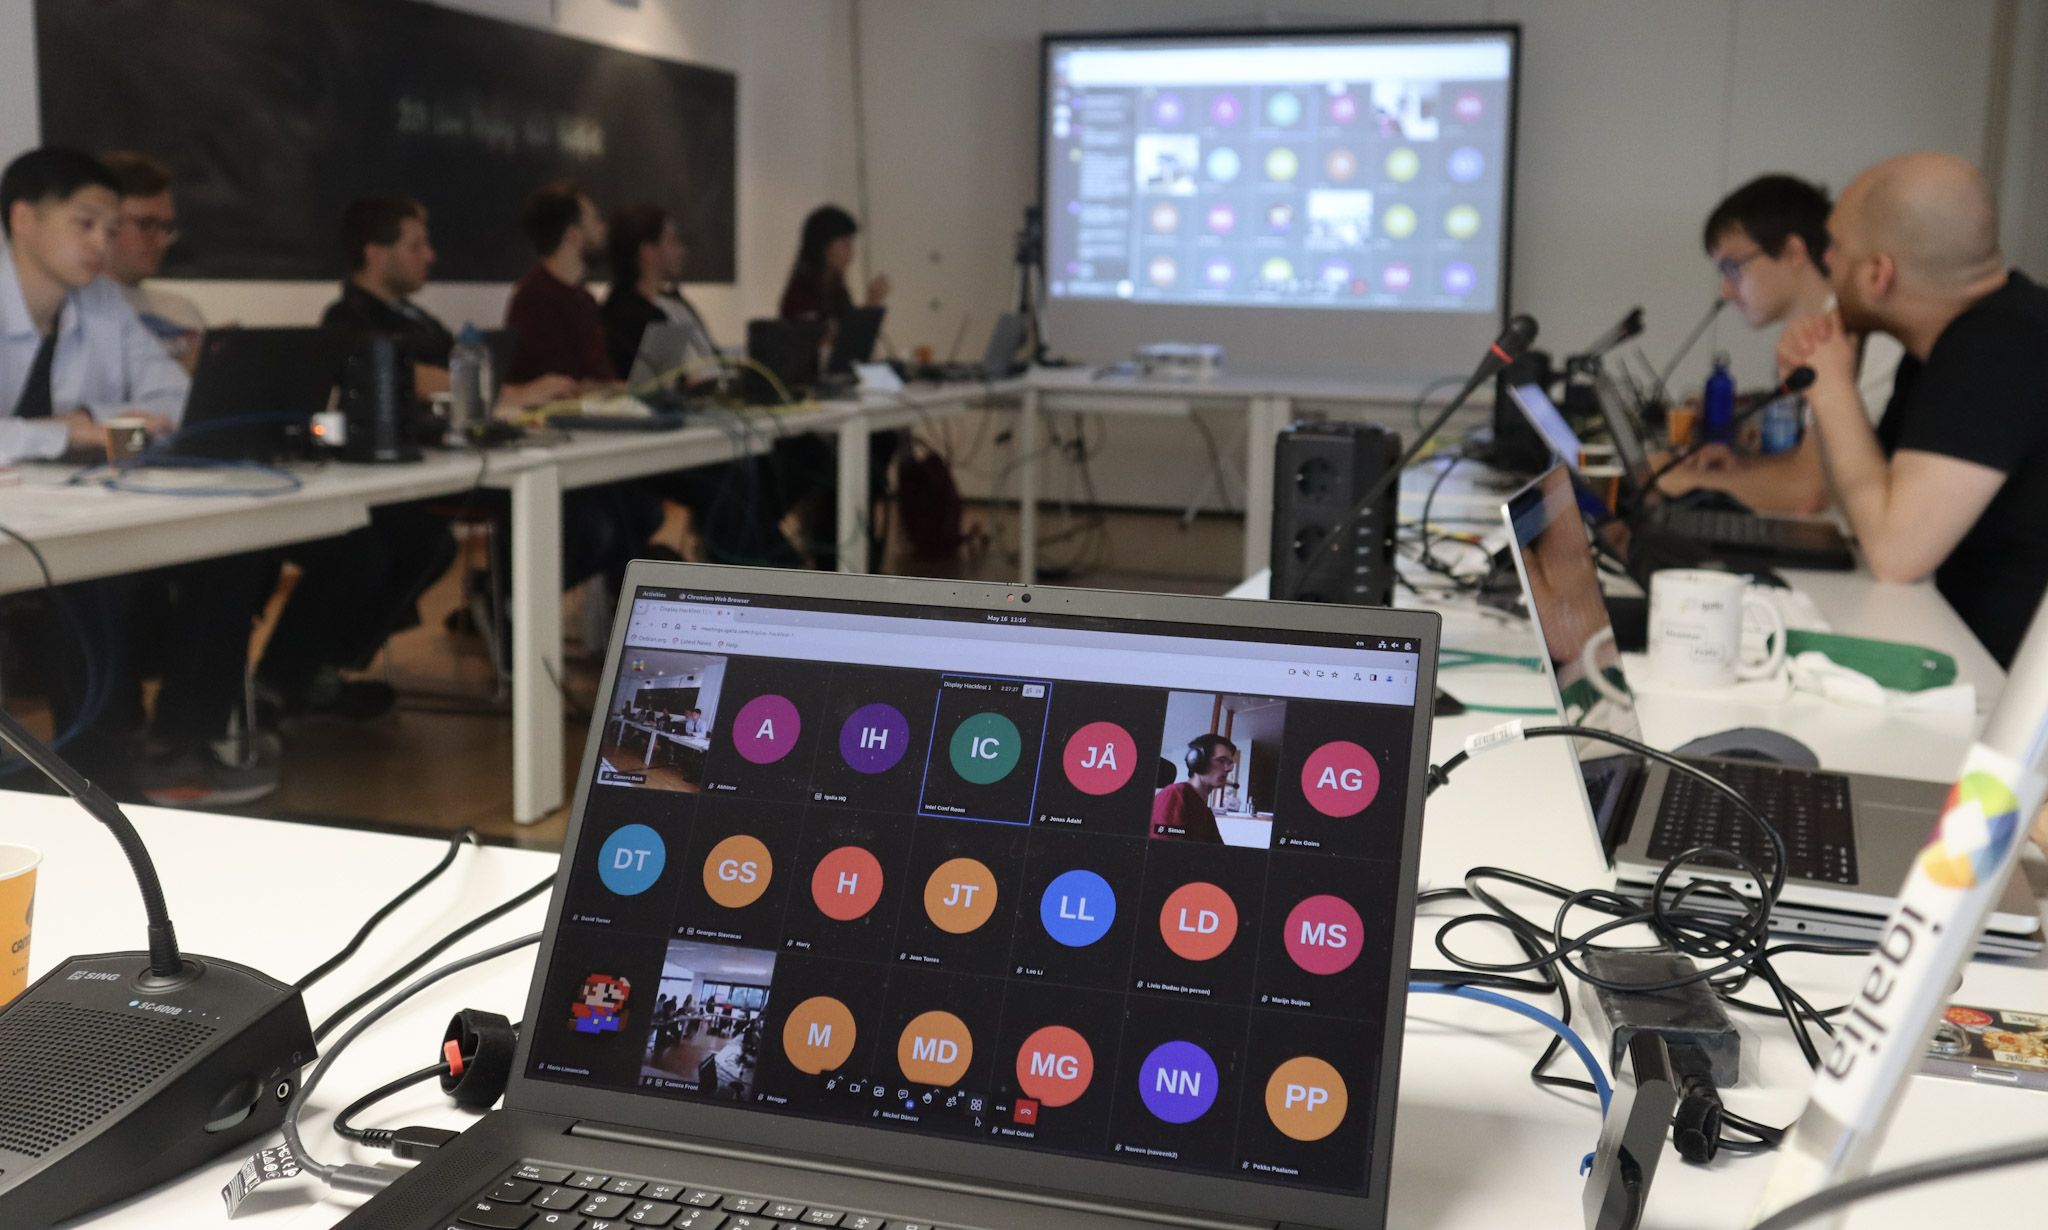
Organization HighlightsThe hackfest was marked by in-depth discussions and knowledge sharing among Linux contributors, making everyone inspired, informed, and connected to the community. Building on feedback from the previous year, we refined the unconference format to enhance participant preparation and engagement.
Structured Agenda and Timeboxes: Each session had a defined scope, time limit (1h20 or 2h10), and began with an introductory talk on the topic.
- Participant-Led Discussions: We pre-selected in-person participants to lead discussions, allowing them to prepare introductions, resources, and scope.
- Transparent Scheduling: The schedule was shared in advance as GitHub issues, encouraging participants to review and prepare for sessions of interest.
Engaging Sessions: The hackfest featured a variety of topics, including presentations and discussions on how participants were addressing specific subjects within their companies.
- No Breakout Rooms, No Overlaps: All participants chose to attend all sessions, eliminating the need for separate breakout rooms. We also adapted run-time schedule to keep everybody involved in the same topics.
- Real-time Updates: We provided notifications and updates through dedicated emails and the event matrix room.
Strengthening Community Connections: The hackfest offered ample opportunities for networking among attendees.
-
Social Events: Igalia sponsored coffee breaks, lunches, and a dinner at a local restaurant.
-
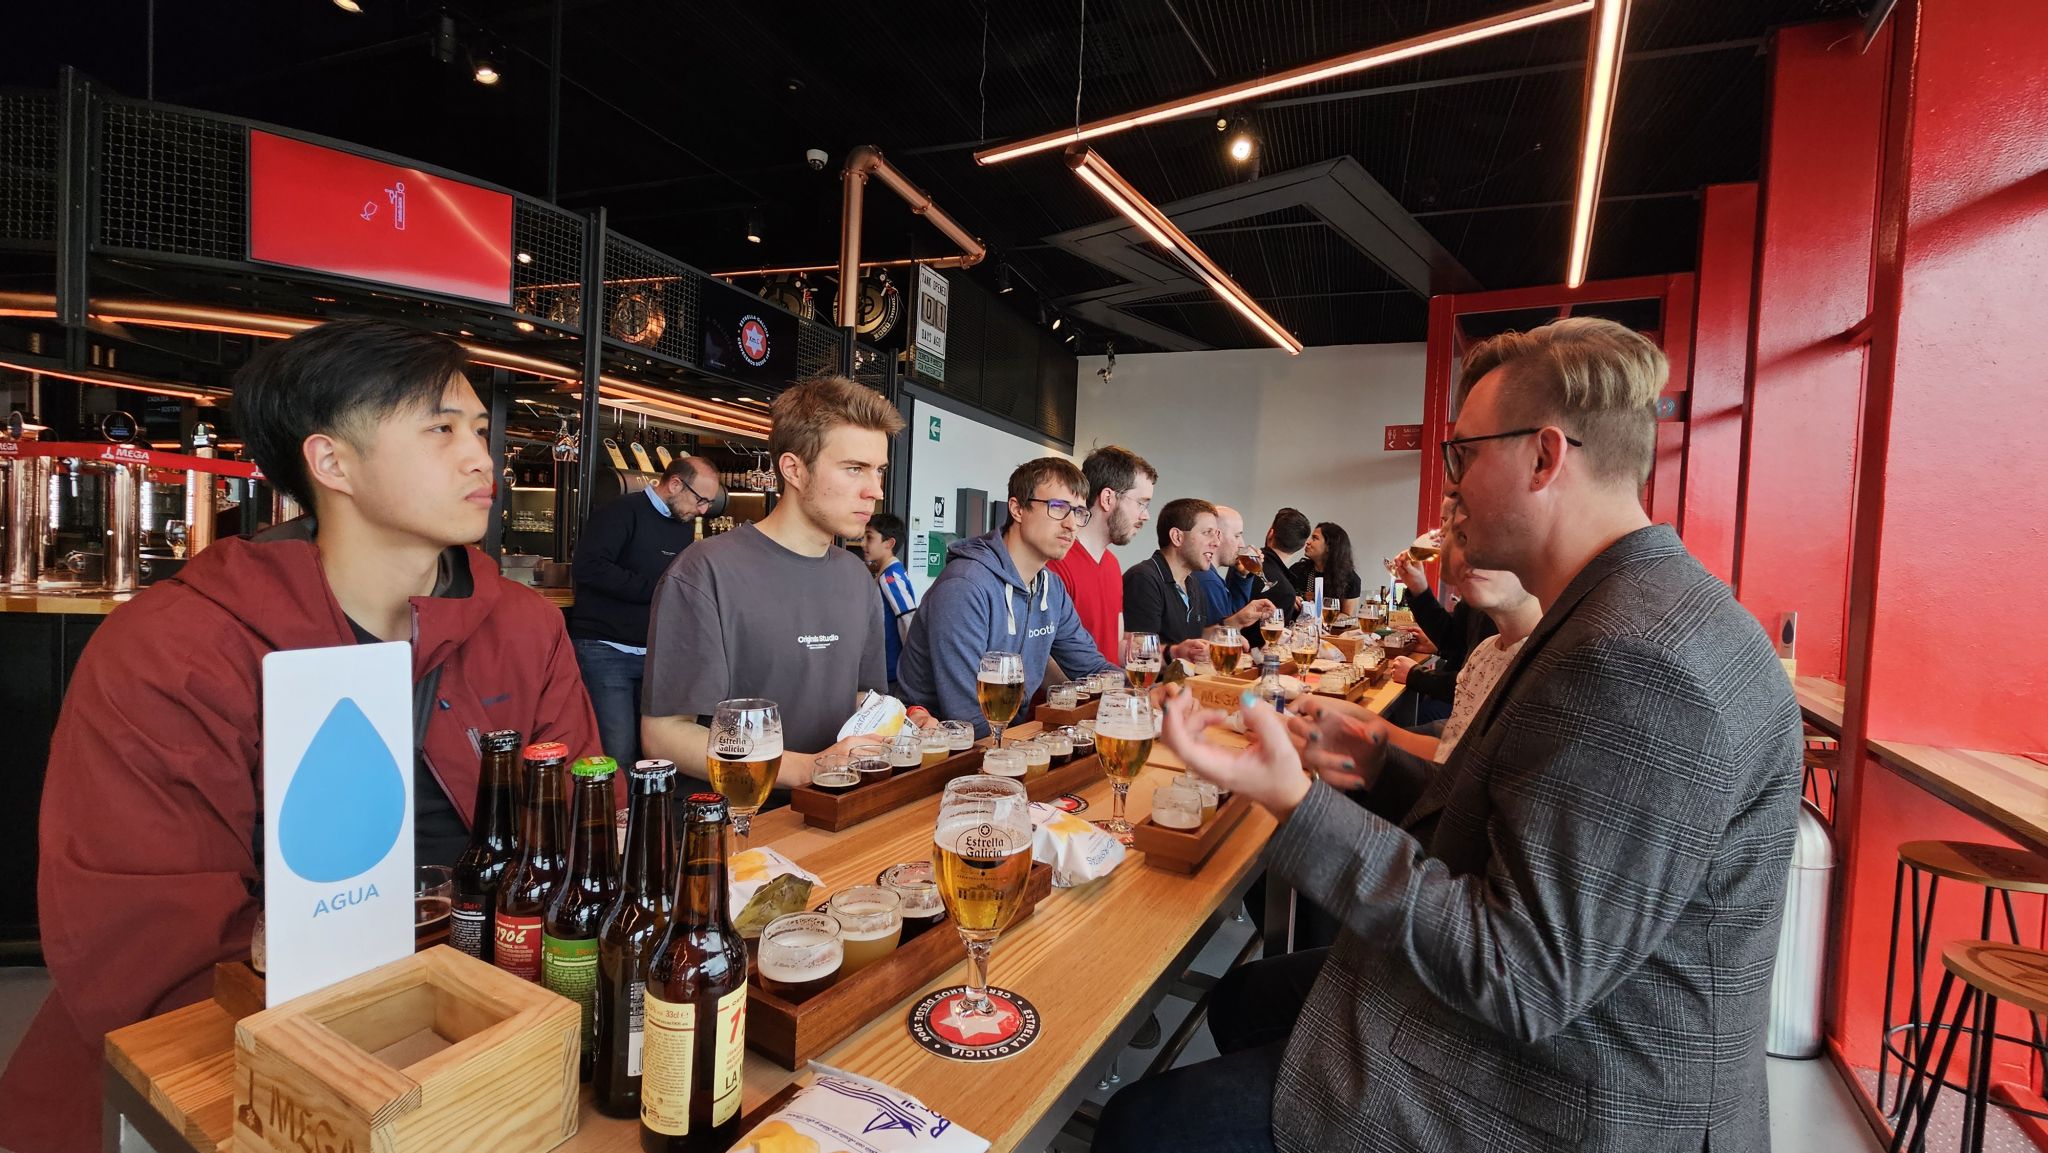
Museum Visit: Participants enjoyed a sponsored visit to the Museum of Estrela Galicia Beer (MEGA).
The structured agenda and breaks allowed us to cover multiple topics during the hackfest. These discussions have led to new display feature development and improvements, as evidenced by patches, merge requests, and implementations in project repositories and mailing lists.
With the KMS color management API taking shape, we discussed refinements and best approaches to cover the variety of color pipeline from different hardware-vendors. We are also investigating techniques for a performant SDR<->HDR content reproduction and reducing latency and power consumption when using the color blocks of the hardware.
Color Management/HDRColor Management and HDR continued to be the hottest topic of the hackfest. We had three sessions dedicated to discuss Color and HDR across Linux Display stack layers.
Color/HDR (Kernel-Level)Harry Wentland (AMD) led this session.
Here, kernel Developers shared the Color Management pipeline of AMD, Intel and NVidia. We counted with diagrams and explanations from HW-vendors developers that discussed differences, constraints and paths to fit them into the KMS generic color management properties such as advertising modeset needs, IN\_FORMAT, segmented LUTs, interpolation types, etc. Developers from Qualcomm and ARM also added information regarding their hardware.
Upstream work related to this session:
- KMS color management properties (new version - v5);
- IGT Tests;
- drm_info draft support of v4 DRM/KMS plane color properties;
- gamescope draft support of v4 DRM/KMS plane color properties;
- Kwin WIP implementation of DRM/KMS plane color properties.
Sebastian Wick (RedHat) led this session.
It started with Sebastian’s presentation covering Wayland color protocols and compositor implementation. Also, an explanation of APIs provided by Wayland and how they can be used to achieve better color management for applications and discussions around ICC profiles and color representation metadata. There was also an intensive Q&A about LittleCMS with Marti Maria.
Upstream work related to this session:
- Wayland color management protocol;
- Wayland color representation protocol;
- HDR support merged on Mutter;
- Color management protocol on Mutter;
- Color management protocol on GTK.
Christopher Cameron (Google) and Melissa Wen (Igalia) led this session.
In contrast to the other sessions, here we focused less on implementation and more on brainstorming and reflections of real-world SDR and HDR transformations (use and validation) and gainmaps. Christopher gave a nice presentation explaining HDR gainmap images and how we should think of HDR. This presentation and Q&A were important to put participants at the same page of how to transition between SDR and HDR and somehow “emulating” HDR.
We also discussed on the usage of a kernel background color property.
Finally, we discussed a bit about Chamelium and the future of VKMS (future work and maintainership).
Power Savings vs Color/Latency
Mario Limonciello (AMD) led this session.
Mario gave an introductory presentation about AMD ABM (adaptive backlight management) that is similar to Intel DPST. After some discussions, we agreed on exposing a kernel property for power saving policy. This work was already merged on kernel and the userspace support is under development.
Upstream work related to this session:
- Kernel series: Add support for ‘power saving policy’ property (merged)
- Mutter: issue: support for “power saving policy” property
- Kwin: MR Draft: backends/drm: add support for the “power saving policy” property
Leo Li (AMD) led this session.
Miguel Casas (Google) started this session with a presentation of Overlays in Chrome/OS Video, explaining the main goal of power saving by switching off GPU for accelerated compositing and the challenges of different colorspace/HDR for video on Linux.
Then Leo Li presented different strategies for video and gaming and we discussed the userspace need of more detailed feedback mechanisms to understand failures when offloading. Also, creating a debugFS interface came up as a tool for debugging and analysis.
Real-time scheduling and async KMS APIXaver Hugl (KDE/BlueSystems) led this session.
Compositor developers have exposed some issues with doing real-time scheduling and async page flips. One is that the Kernel limits the lifetime of realtime threads and if a modeset takes too long, the thread will be killed and thus the compositor as well. Also, simple page flips take longer than expected and drivers should optimize them.
Another issue is the lack of feedback to compositors about hardware programming time and commit deadlines (the lastest possible time to commit). This is difficult to predict from drivers, since it varies greatly with the type of properties. For example, color management updates take much longer.
In this regard, we discusssed implementing a hw_done callback to timestamp when the hardware programming of the last atomic commit is complete. Also an API to pre-program color pipeline in a kind of A/B scheme. It may not be supported by all drivers, but might be useful in different ways.
VRR/Frame Limit, Display Mux, Display Control, and more… and beerWe also had sessions to discuss a new KMS API to mitigate headaches on VRR and Frame Limit as different brightness level at different refresh rates, abrupt changes of refresh rates, low frame rate compensation (LFC) and precise timing in VRR more.
On Display Control we discussed features missing in the current KMS interface for HDR mode, atomic backlight settings, source-based tone mapping, etc. We also discussed the need of a place where compositor developers can post TODOs to be developed by KMS people.
The Content-adaptive Scaling and Sharpening session focused on sharpening and scaling filters. In the Display Mux session, we discussed proposals to expose the capability of dynamic mux switching display signal between discrete and integrated GPUs.
In the last session of the 2024 Display Next Hackfest, participants representing different compositors summarized current and future work and built a Linux Display “wish list”, which includes: improvements to VTTY and HDR switching, better dmabuf API for multi-GPU support, definition of tone mapping, blending and scaling sematics, and wayland protocols for advertising to clients which colorspaces are supported.
We closed this session with a status update on feature development by compositors, including but not limited to: plane offloading (from libcamera to output) / HDR video offloading (dma-heaps) / plane-based scrolling for web pages, color management / HDR / ICC profiles support, addressing issues such as flickering when color primaries don’t match, etc.
After three days of intensive discussions, all in-person participants went to a guided tour at the Museum of Extrela Galicia beer (MEGA), pouring and tasting the most famous local beer.
Feedback and Future Directions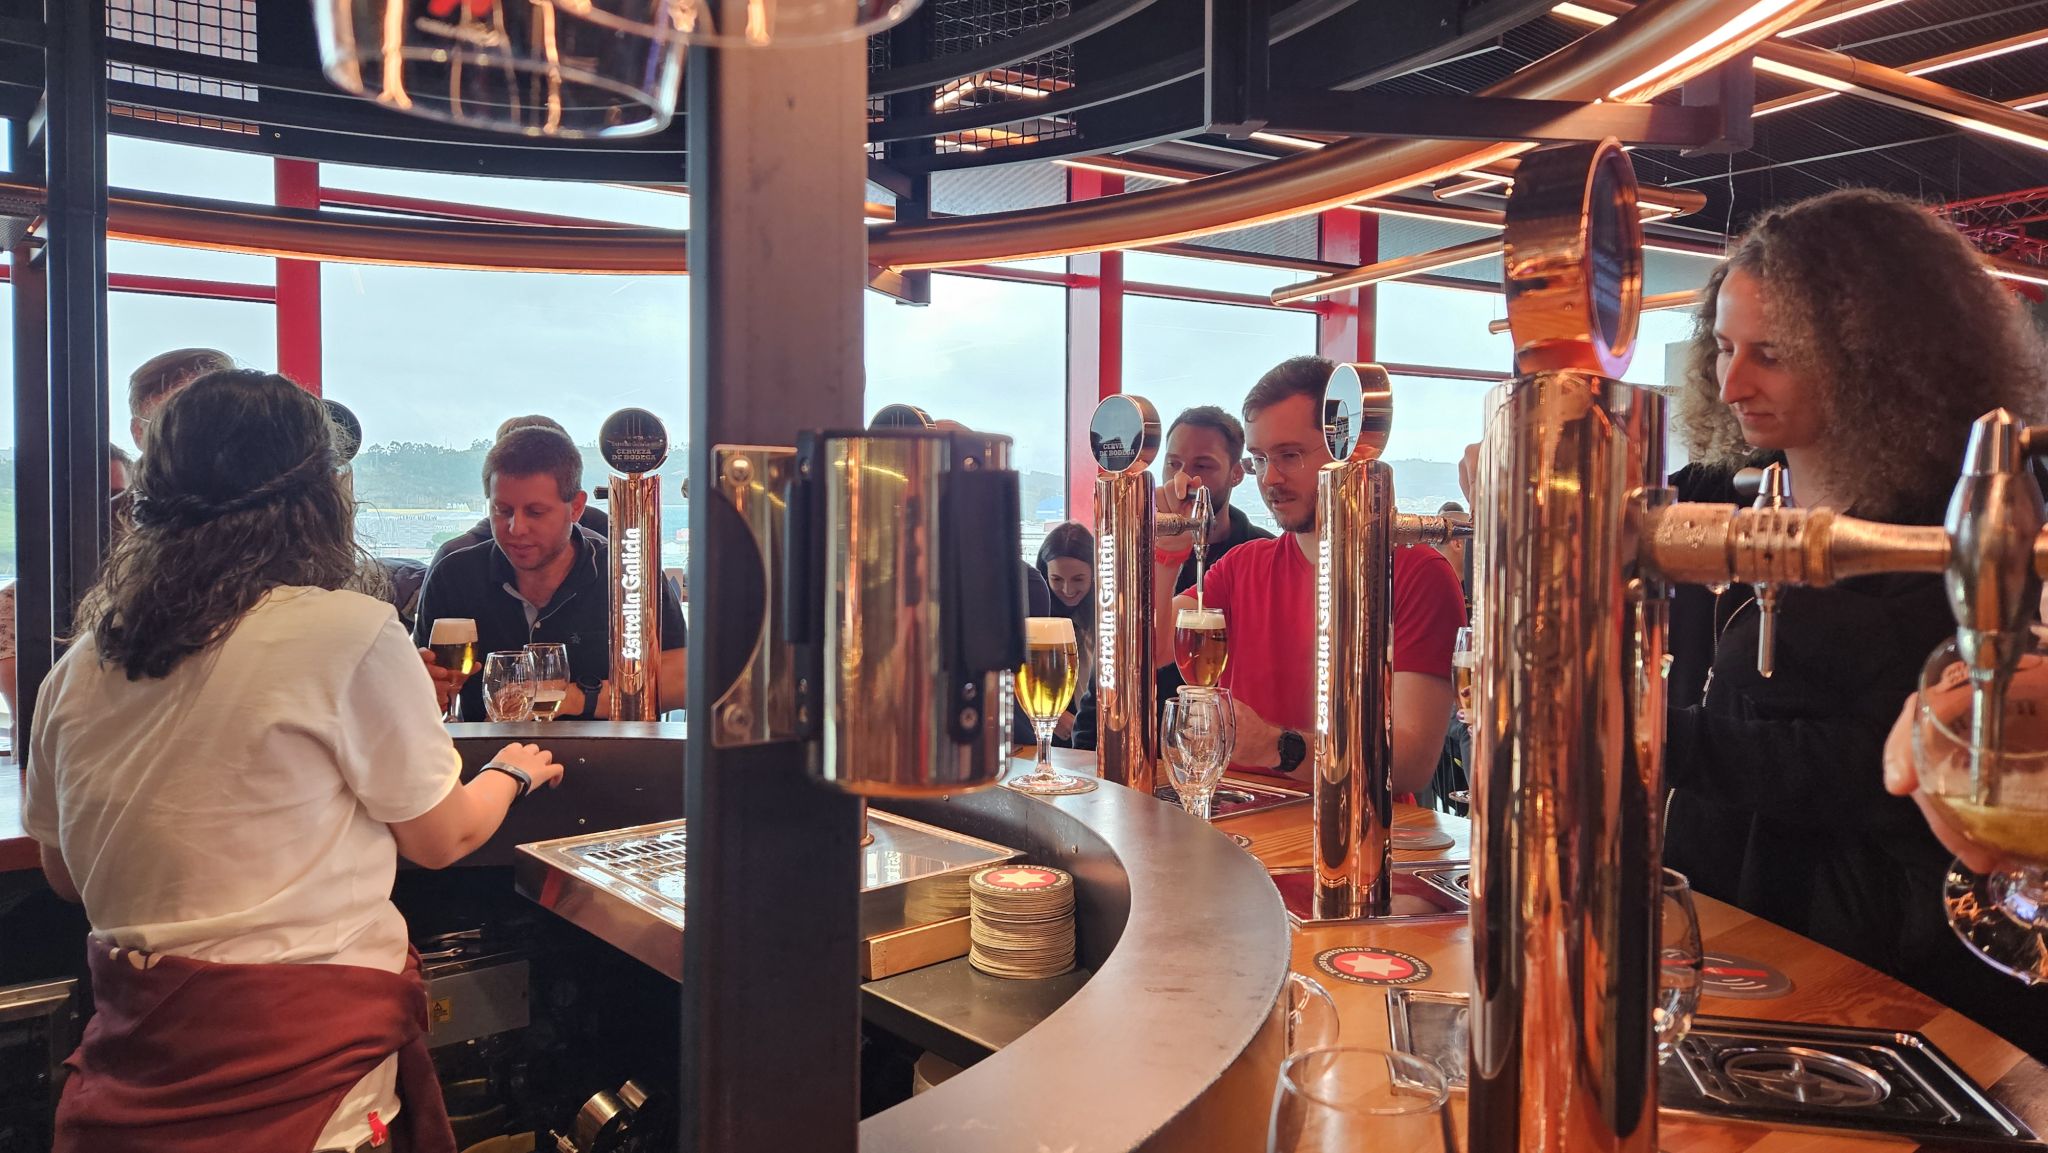
Participants provided valuable feedback on the hackfest, including suggestions for future improvements.
- Schedule and Break-time Setup: Having a pre-defined agenda and schedule provided a better balance between long discussions and mental refreshments, preventing the fatigue caused by endless discussions.
- Action Points: Some participants recommended explicitly asking for action points at the end of each session and assigning people to follow-up tasks.
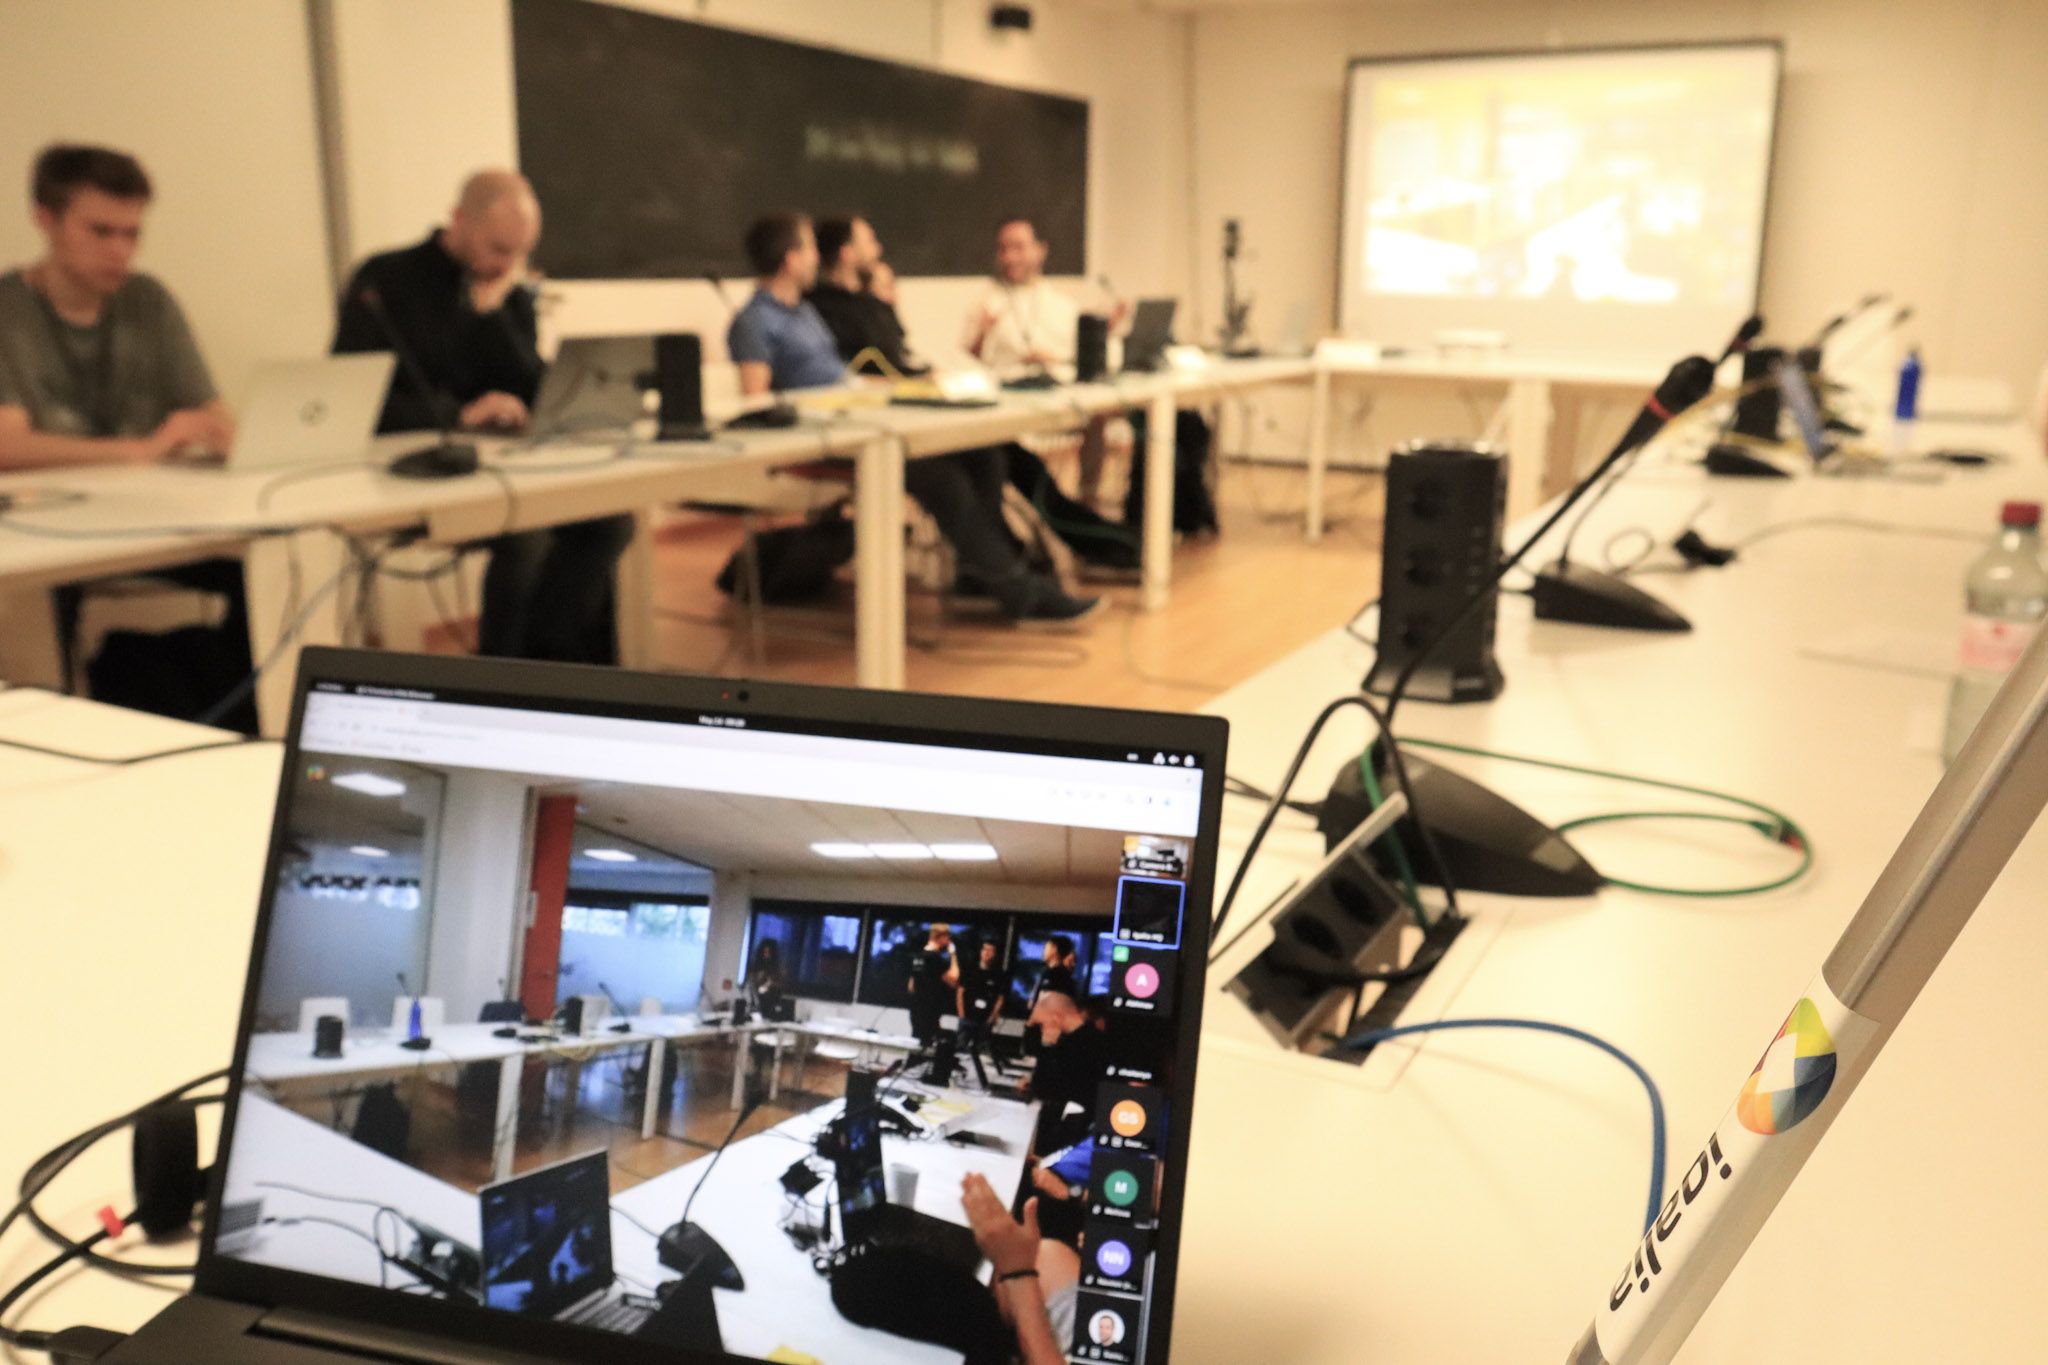
- Remote Participation: Remote attendees appreciated the inclusive setup and opportunities to actively participate in discussions.
- Technical Challenges: There were bandwidth and video streaming issues during some sessions due to the large number of participants.
We can’t help but thank the 40 participants, who engaged in-person or virtually on relevant discussions, for a collaborative evolution of the Linux display stack and for building an insightful agenda.
A big thank you to the leaders and presenters of the nine sessions: Christopher Cameron (Google), Harry Wentland (AMD), Leo Li (AMD), Mario Limoncello (AMD), Sebastian Wick (RedHat) and Xaver Hugl (KDE/BlueSystems) for the effort in preparing the sessions, explaining the topic and guiding discussions. My acknowledge to the others in-person participants that made such an effort to travel to A Coruña: Alex Goins (NVIDIA), David Turner (Raspberry Pi), Georges Stavracas (Igalia), Joan Torres (SUSE), Liviu Dudau (Arm), Louis Chauvet (Bootlin), Robert Mader (Collabora), Tian Mengge (GravityXR), Victor Jaquez (Igalia) and Victoria Brekenfeld (System76). It was and awesome opportunity to meet you and chat face-to-face.
Finally, thanks virtual participants who couldn’t make it in person but organized their days to actively participate in each discussion, adding different perspectives and valuable inputs even remotely: Abhinav Kumar (Qualcomm), Chaitanya Borah (Intel), Christopher Braga (Qualcomm), Dor Askayo (Red Hat), Jiri Koten (RedHat), Jonas Ådahl (Red Hat), Leandro Ribeiro (Collabora), Marti Maria (Little CMS), Marijn Suijten, Mario Kleiner, Martin Stransky (Red Hat), Michel Dänzer (Red Hat), Miguel Casas-Sanchez (Google), Mitulkumar Golani (Intel), Naveen Kumar (Intel), Niels De Graef (Red Hat), Pekka Paalanen (Collabora), Pichika Uday Kiran (AMD), Shashank Sharma (AMD), Sriharsha PV (AMD), Simon Ser, Uma Shankar (Intel) and Vikas Korjani (AMD).
We look forward to another successful Display Next hackfest, continuing to drive innovation and improvement in the Linux display ecosystem!
drunomics: Lupus Decoupled Drupal: Bridging Drupal’s Backend Strength with Frontend Freedom
Metadrop: Optimizing Drupal Performance - Internal Page Cache
The Internal Page Cache is a core module in Drupal responsible for caching pages requested by anonymous users.
When a page is cached and an anonymous user makes a new request, Drupal does not need to perform any rendering or page-building processes. It simply retrieves the rendered page from the cache and sends it to the client.
The reason it only applies to anonymous users and not authenticated users is that the page returned to the client must have exactly the same content for all users.
In the case of authenticated users, although part of the content may be the same for everyone, there are always elements that can vary, such as the user block displaying the user's name or other user-specific information.
For these cases, there is the Dynamic Page Cache module, which handles caching for both anonymous and authenticated users.
Functionality Cache BinFor storing and managing cached pages, the Internal Page Cache defines its own cache bin called “Page,” meaning that cached objects are stored independently of other existing cache systems in Drupal.
…Drupal Association blog: The Drupal Association Announces 2024 Board Election Winner and 2 Additional New Board Members
The Drupal Association is saying goodbye to two board members and welcoming three new board members who will join the Drupal Association Board.
The Drupal Association extends a sincere thank you to Nikki Flores and Nick Veenhof for their service and dedication, not only to Drupal, but to the Drupal community. Thank you for everything you both have done while on the Drupal Association Board! Your time spent on the board made such a difference to the future of the Drupal project, and we thank you all for participating with grace, thoughtfulness, and insightful contributions.
The Drupal Association would now like to congratulate our newest board members, officially announced during the recent public board meeting at DrupalCon Barcelona:
An additional congratulations to Alejandro Moreno for winning the community-elected seat during our 2024 At-Large Board Election! We cannot wait to see what amazing things Alejandro will accomplish while on the Drupal Association Board. We invite you to get to know Alejandro and learn more about his background.
I'm deeply honored to have been elected to the Drupal Association Board. Thank you to everyone for your trust and support—I look forward to serving our incredible community! - Alejandro Moreno
We extend our gratitude to all the candidates who participated in the 2024 election. On behalf of all the staff and board of the Drupal Association, a heartfelt Drupal Thanks to all of you who stood for the election this year. It truly is a big commitment to contribution, the Drupal Association, and the community, and we are so grateful for all of your voices. Thank you for your willingness to serve, and we hope you’ll consider participating again in 2025!
Detailed Voting ResultsThere were 7 candidates in this year’s At-Large board member election.
707 voters cast their ballots out of a pool of 2741 eligible voters.
Under Approval Voting, each voter can give a vote to one or more candidates. The final total of votes was as follows.
Candidate
Votes
Albert Hughes 197 Will Huggins 154 Alejandro Moreno 282 Janna Malikova 234 Kevin Quillen 189 Matthew Saunders 188 Dominique De Cooman 208PyCharm: Django Project Ideas
Ready to get started on your Django project? Whether you want to build a personal project, improve your portfolio, or just experiment with a new technology, Django provides the perfect foundation.
We’ve compiled a list of Django project ideas that will help you expand your competence, whether you’re new to the framework or looking to advance your existing skills.
In this guide, we’ll explore a range of Django project ideas to help you get hands-on experience, ranging from simple apps to more advanced, full-stack applications.
When should I use Django?Known as the “web framework for perfectionists with deadlines”, Django is a great choice for building robust, production-ready websites, apps, or services.
It’s an open-source and highly versatile Python web framework that can be used for everything from blogs and social media platforms to e-commerce sites, content management systems, and fitness trackers.
First released in 2005, Django continues to receive regular updates and enjoys a considerable following. Its “batteries included” design means you get what you need to build a full-stack web app right out of the box. You can also pair Django with a front-end JavaScript framework for projects that demand richly interactive user interfaces.
- Learn more about Django in our blog, including its key components and benefits.
- Still trying to figure out whether Django is the right framework for you? Read our comparison of Django and Flask – the two most popular Python web frameworks.
Working on a real-world project is one of the best ways to get to grips with Django. You can start with something simple and extend it as you learn more about the framework. In the process, you’ll develop your skills and build a portfolio of work showcasing your abilities.
Stuck for ideas? Previous projects (both professional and personal), forums, dev meetups and hackathons, as well as platforms like GitHub, can all provide sources of inspiration.
GitHub is also useful for hosting and collaborating on open-source projects – this is where the source code or design documents are made publicly available for anyone to access, modify, and distribute. You can use and build upon various software, making them a great jumping-off point for a Django project.
Some GitHub open-source Django projects include:
- Django packages: a directory of reusable apps, sites, tools, and more for your Django projects.
- Django project: source code for djangoproject.com.
- Django social: code for a social network or community site built using Django.
Are you unfamiliar with a particular area, such as routing or database design? You could choose to design a project that addresses this knowledge gap while learning Django simultaneously.
Django project ideas for beginnersIf this is your first time building with Django, look no further. We’ve compiled a list of project ideas that are ideal for anyone using Django for the first time. These will help you find your feet as you explore what Django offers.
Before you start, reading this Django tutorial for beginners is useful. It walks through building a simple but non-trivial project by starting with a single file. The tutorial is an excellent starting point for anyone new to Django, as it introduces core concepts and helps you build a functional project from the ground up.
Once you’re familiar with Django’s principal elements and are comfortable building within the framework, you can get going with these more dynamic yet straightforward projects.
Air temperature appThis tutorial will walk you through creating a simple Django app using PyCharm that displays the current air temperature at your location. The app also allows users to explore weather conditions at random locations to add interactivity.
By following this guide, you’ll learn to:
- Set up a Django project.
- Develop models, views, and templates.
- Make and process API calls.
- Connect to and populate databases.
This hands-on task will give you practical experience with core Django concepts and show how PyCharm can help you develop more efficiently while working with Django. It’s a great place to begin building web applications and sets you up for further starter projects.
Follow the step-by-step tutorial BlogRequired tech stack:
- Django admin: for managing blog posts.
- Django templates: for rendering HTML pages.
- TinyMCE or CKEditor (optional): for rich text editing.
Building your own blogging platform with Django is a great way to cover the basics of create, read, update, and delete (CRUD), setting up routes, and serving a site locally. To keep things simple, use the Django Admin site to add and update blog posts. To explore further, extend the basic blog functionality by implementing tags and filters, adding a search option, or enabling comments.
We highly recommend the Django Girls Tutorial for beginners, which takes you through creating a small blog.
To-do list appRequired tech stack:
- Django templates: for rendering the UI.
- Single-page applications (SPA)/JavaScript: for updating the status of pages and components without reloading the page.
A simple task list with an option to check items off when complete is an excellent way to learn the basics of developing with Django. You’ll need a UI to add tasks and update their status and a simple database to record each entry. You can also add the ability to record due dates or set priorities.
Recipe organizerRequired tech stack:
- Django templates: for rendering the frontend.
- Django ORM: for database interactions.
- JavaScript (optional): for additional security.
Familiarize yourself with Django’s ORM (object-relational mapper) and database support by building an app to keep track of your favorite recipes. Add a web-based frontend with options to filter recipes by category, ingredients, and user ratings so you can easily browse for inspiration.
Quiz appRequired tech stack:
- Django templates: for rendering the UI.
- Django ORM: for managing the question bank and user scores.
- JavaScript: for interactive quiz elements.
Create a quiz app or website to familiarize yourself with each layer of Django’s architecture. Build a question bank, give players a simple UI to select their answer, and calculate the score. Enhance the functionality by sorting questions into categories and adding options to choose topics or change the number of questions asked. You could also add a leaderboard to celebrate your highest scorers.
Authentication systemRequired tech stack:
- Django built-in authentication: for handling login, registration, and password resetting.
- Email service: for email validation and password reset (e.g. SMTP server).
Login systems are a feature of most websites and apps. Fortunately, adding authentication and authorization to a web app is easier with Django’s built-in authentication system. Creating one as a practice project helps familiarize yourself with the functionality and provides a reusable pattern for future projects. Don’t forget to include key features such as email validation and a password reset option.
URL shortenerRequired tech stack:
- Django templates: for the frontend.
- Django ORM: for storing URLs.
- Bitly API (optional): if using an external shortening service.
You can approach this project in a couple of ways, depending on your interests. One option is to build a simple app that sends requests to an existing URL-shortening service, such as Bitly’s API. Alternatively, create your own service by generating shortened URLs, storing the URLs in a database, and defining routing logic to match incoming requests to the appropriate URL. Add a simple frontend so you can generate new shortened URLs on demand.
Expense trackerRequired tech stack:
- Django templates: for the UI.
- Django ORM: for managing expense data.
- Chart.js or D3.js: for visualizing expense trends.
Expense management apps provide an opportunity to define different data models for expenses, such as invoices, payroll, and cash expenditures. As well as creating forms for users to enter the costs, you might have existing data to import. Consider creating graphs to show expense trends in each category.
Simple social networkRequired tech stack:
- Django templates: for rendering the UI.
- Django ORM: for managing user data and posts.
- Media storage: for images and videos (e.g. Amazon S3 or local storage).
- JavaScript: For interactive elements.
Use Django to create your version of Instagram or Facebook and learn about user account management, security, and privacy along the way. Users will need to be able to manage connections, share images and videos, and view each other’s posts.
Personal portfolioRequired tech stack:
- Django templates: for the frontend.
- Django ORM: for managing project data.
- Deployment tools: for deploying the website (e.g. Heroku, AWS, or DigitalOcean).
Sharing personal projects on your website enables you to showcase your skills as a developer. Create an engaging website for users to browse your work and view the source code. This project will also allow you to try deploying Django to a production web server.
Learn how to build a personal portfolio using Django with this helpful guide.
Event calendarRequired tech stack:
- Django templates: for rendering the frontend.
- JavaScript libraries: for interactive calendar functionalities (e.g. FullCalendar).
- Django ORM: for storing event data.
An enjoyable beginner project with a frontend focus, building an event calendar gives you a reason to work with Django’s built-in templates or Jinja2. You can also combine Django with JavaScript libraries to make your calendar interactive.
Survey toolRequired tech stack:
- Django templates: for the frontend.
- Django forms: for creating and submitting surveys.
- Django ORM: for storing survey data.
- Chart.js or D3.js: for visualizing survey results.
An online survey tool requires UIs for building and responding to surveys, storage of the responses, and logic to aggregate answers. This project is an ideal opportunity to try out Django forms. If you want to extend it, add user authentication and/or visualizations for the survey data.
Advanced Django projectsIf you’re familiar with Django or looking for more advanced project ideas, the following suggestions are for you. Get ideas to help you use more of Django’s rich capabilities and grow your developer skills.
Multi-user classifieds siteBuild a site where multiple users can post classified ads. You’ll need to create pages for listing, creating, and editing ads. Since the site supports multiple users, you’ll also need to create and manage user accounts, manage permissions so only the ad owner can edit their ads, and create paginated ad listings to avoid overloading the browser.
For the full experience, include a self-sign-up page and password reset management. For additional practice, consider adding an API to the site and/or using a frontend library like HTMX or Vue.js to make your pages more dynamic.
The book “Django In Action” guides you through building a musicians’ classified ad site called RiffMates. It also covers deeper topics such as testing, management commands, and Django power tools.
Chat appBuilding a messaging app is an excellent way to explore real-time two-way communication using WebSockets and Django Channels.
You’ll also need to create and manage user accounts, add contacts, and view message history. You can model the functionality on existing chat platforms like WhatsApp, X, or Telegram. Adding support for audio messages helps to extend your project further.
This tutorial on Django Channels will help you create your chat app, going beyond the basics for a more comprehensive application. For an extra challenge, consider incorporating WebRTC and webcam video chat.
E-commerce storeBuilding an online retail site is a sizable project that demonstrates various skills. In addition to a database of products and a website that lets customers browse and search, you’ll need to handle user accounts, shopping carts, payments, and order updates.
There is plenty to consider, from generating product image thumbnails to managing abandoned checkout processes. This project will help you understand advanced Django features like signals, middleware, and caching.
Medical records systemThis project requires you to consider user authentication and authorization to ensure only those with the correct permissions can view a patient’s records.
When defining your templates, ensure you present the data reverse chronologically (most recent first). You will also need to provide forms for authorized users to add new patients and update patients’ records.
You may even connect to another system to import test results and associate them with the right patient, integrating third-party APIs for extended functionality.
Financial dashboardDashboards make fantastic projects for combining Django with a frontend JavaScript framework. You can pull in data from an API or add an option to import data manually from .csv files. For real-time data, use Django Channels.
Leverage Django to manipulate the data in different ways and JavaScript to create visually appealing UIs. This project can also integrate with data visualization libraries such as D3.js or Chart.js for dynamic, interactive charts.
Property management systemBuilding a system to keep track of rented properties, record rent payments, and manage maintenance tasks and inspections is ideal for Django.
This project gives you a chance to work with multiple data sources, implement complex business logic, and handle common functionality such as user authentication and notifications. Consider using the Django REST framework to create APIs that mobile apps or other systems can consume.
Interactive dashboardsDeveloping an interactive dashboard with Django is perfect for visualizing data from various sources. It also allows you to handle large datasets, perform real-time data updates, and integrate frontend visualization libraries with Django.
Use libraries like Plotly or Bokeh to create dynamic charts and graphs. Implement data filtering, time range selection, and report exporting. Add user authentication to provide personalized dashboards based on roles and permissions.
Stock exchange analysisBuild a stock market analysis platform using Django, a project that combines data science, machine learning, and the Django REST framework. It also offers more practical experience in handling lots of real-time data.
Import historical stock prices, run technical analyses, and generate predictions using machine learning. Create RESTful APIs for data retrieval and analysis results, and integrate external APIs for real-time market data. Implement visualization tools to display trends, predictions, and alerts.
Processing large volumes of dataUse Django with Celery and Redis to process large datasets. This project will involve setting up task queues with Celery and managing them with Redis, helping you understand task scheduling and big data processing.
Implement features to handle server failures and ensure data integrity throughout the pipeline. Demonstrate how to scale the system by running Redis in cluster mode and balancing loads across multiple servers. Create dashboards to monitor task progress and performance metrics.
Generative AI RAG-based applicationDjango projects are a great way to gain practical experience working with language models. This project involves natural language processing and AI, helping to deepen your understanding.
Build a Django application for advanced AI-driven solutions using retrieval-augmented generation (RAG) techniques. Integrate pre-trained language models like GPT-3 or GPT-4 with a retrieval system to fetch relevant documents. Develop features for generating contextual responses, automated content creation, and personalized recommendations. Implement a feedback loop to continuously improve the system’s accuracy.
AIOps for server scalingTake on this assignment to help enhance your skills in AI, cloud computing, and automation.
Develop an AI-based system for predicting traffic and scaling servers automatically. Use machine learning models to analyze historical traffic data and forecast future loads. Integrate this system with cloud platforms like AWS or GCP to automatically provision and de-provision servers based on the predictions. Implement features for monitoring system performance, generating alerts, and providing dashboards for administrators.
Customized dashboard for MLOps pipelineCreate a dashboard to manage and monitor machine learning pipelines, integrating tools like TensorFlow or PyTorch with Django.
Allow users to track experiments, visualize training progress, and compare model performance. Implement features for managing datasets, configuring training parameters, and deploying models to production. Provide tools for monitoring model drift and triggering re-training when necessary.
By the end of the project, you should understand the end-to-end machine learning lifecycle and how to operationalize ML models using Django.
Location-based food recommendationLevel up your skills in recommendation systems, geolocation services, and user personalization. This task involves using machine learning algorithms to recommend food options based on user location and preferences.
Integrate with mapping services like Google Maps or OpenStreetMap to provide location-based search and routing. Implement user profiles to store preferences, dietary restrictions, and past interactions. Use collaborative filtering or content-based filtering techniques to generate recommendations. Provide a user-friendly interface to browse and rate food options.
Langchain-based projectsBuild applications utilizing Langchain for advanced natural language processing tasks.
Create use cases such as automated summarization, question answering, or text generation. Integrate with Django to provide a web-based interface for users to interact with the system. Implement features for fine-tuning models on specific domains, evaluating model performance, and giving real-time predictions.
Building these apps will help you explore the capabilities of state-of-the-art language models and how to integrate them with web applications.
Birthday message reminderDeveloping a birthday message reminder is a fantastic project for helping to understand chatbot development and automating workflows with Django. You will implement a system using ChatGPT to generate unique birthday messages and send them to employees via Slack.
Integrate with Slack’s API to send or direct messages to the appropriate channels. Use Django’s scheduling features to automate the message-sending process. Allow administrators to configure message templates, personalize messages based on employee data, and track message delivery.
Cloud server managementDeveloping cloud servers is an ideal way to build your skills in cloud computing, infrastructure as code, and DevOps practices. You could begin by creating and managing cloud servers using Django and Pulumi.
Allow users to provision and configure infrastructure as code, including virtual machines, databases, and networking resources. Implement features for monitoring resource usage, scaling infrastructure based on demand, and generating cost reports. Provide a web-based interface for administrators to manage cloud resources and view infrastructure status.
Ready to get started?We hope these project ideas have provided some inspiration to help you start building web apps with Django. Whatever your experience level, using an IDE optimized for your chosen language and framework makes software development more accessible and enjoyable.
PyCharm Professional is a Python IDE with built-in support for Django, Flask, FastAPI, and more. Intelligent coding assistance, streamlined navigation, and powerful debugging are just some of the features that PyCharm offers to help you code faster and smarter.
Using PyCharm, you will also benefit from:
- Advanced database management (including PostgreSQL, SQLite, Redis, and more).
- Frontend support for various languages and frameworks (such as JavaScript, React, Node.js, Tailwind CSS, and more).
- A built-in HTTP Client – essential for developing Django web applications.
- The Endpoints tool window – to visualize and navigate through your application’s endpoints.
Use PyCharm’s full-stack development features and database tools to help you build powerful Django projects.
Get started with PyCharm now More tutorials and guidesPages
Recent Publications
- Managing Hidden Dependencies in OO Software: a Study Based on Open Source Projects
- Open Source Communities as Liminal Ecosystems
- Investigating developers' email discussions during decision-making in Python language evolution
- Developers, Quality Control and Download Volume in Open Source Software (OSS) Projects