
Feeds
Tales from the Akademy
This being my first post on the KDE sphere (or any other sphere), it was supposed to be just a touch of contact with the world of blogging. But since time pass by in a blast, let's just summarize how I lived my third one in-person Akademy 2024.
Würzbug. Back to GermanyThis year's Akademy happily got me back to Germany, which has become like a second home and a place I like to visit at least once a year (yeah, I missed the Dürüms).
I had bought the D-Ticket, which allowed my to board any public transport immaginable (well, except for ICE trains, but I haven't heard much good about them either) for bare 49€. It brought me some memories back as a student in Dresden, enjoying the same perks with the Semesterticket, just on a regional scope. Thanks to Itinerary and its route planner I was able to make it to Würzburg even an hour earlier than anticipated (less 20min train delay which I've heard it's currently quite a good metric).
After having my hotel booking cancelled last minute due to needed repair works, I had booked an appartment because the hotel prices were a bit over the top. I was really lucky to find that just around the corner I had a bus stop to go to the venue, and also Andy Betts and Richard Wagner as ilustrious neighbors. And one of the best rated Dönner places in the city. Very lucky indeed!
The TalksIt's hard to make a better summary of the Talks days that our very own Promo Team's report, which I agree with on many points.
What I particulary felt on these Akademy's talks was a high focus into the future. Some words were thematically present along most of the talks: story, product, and impact.
The story we as the KDE community want to tell is not just a bunch of code packages that live in an ethereal world to be grabbed by a few enthusiasts or distros, but a full useful product for the end users, an inviting environment for fellow developers, and a reliable asset for manufactures on their very concrete hardware.
There were many reveals and surprises to achieve this goal. Projects that had been incubating for some time, were now made public on this Akademy: the KDE OS Codename Banana by Harald Sitter, the Next Project and design system by Andy Betts and the Union theme engine by Arjen Hiemstra.
Some talks addressed the social and environmental impact of the technology we create. The one that specially got to me was the small story Nicole Teal told at her lightning talk. How a group of kids gave many "older" PCs a new life installing KDE, while learning new skills and making community, felt really true and a spur to continue contributing to FOSS. It really matters.
From the technical talks, I enjoyed "What is color, anyway" by Xaver Hugl, and unfortunately had to miss some other ones (Python and Rust integration with Qt). This is the hardest part, where you cannot just .clone() yourself and attend to two talks at the same time. Maybe I would have learnt to do that if I had attended the Rust presentation? (yeah, sorry bad Rust dad joke)
It was also on Sunday when Aniqa and Carl took me by surprise to agains my will happily answer to a small video interview. Just joking, it was fun. Just preemptively preparing myself for when the final video comes out and I can see what words I did babble :D.
The BoFsAfter a very intense weekend of talks and the social event and post-event on Sunday, I took the Monday's morning off to have some rest. In the evening, Andy and Manuel showed me a bit more about the design system they're using and the icon exporter Manuel has been developing to streamline the process between designers and the final product. Amazing stuff!
I also started a draft of this very blog post, which wasn't much successful as you can imagine by its final release date.
The big BoF day for me was mostly Tuesday, where I focussed on the Plasma and the VDG ones, though I missed those on KWin's roadmap and window tiling, due to competing schedules. During the Plasma BoF, we could experiment in real time, the step-by-step process of realeasing the Plasma 6.1.5 version, thanks to Jonathan, our Plasma release manager.
Finally, on Thursday I got to enjoy the brand new Sticker BoF. Besides me not having any stickers on my own to share, and being mostly minimalistic when it comes to decoration, I had a great time and ended up sticking my laptop up and about, including an very limited unit of the Sticker BoF's sticker. Thanks Kieryn for organizing it. Of course, Carl won the sticker's award 😄.
On a more personal level, I regret a bit not having participated more on some of the BOFs. Most of my KDE's contributions this summer have been improvements on very niche aspects: the Weather widget and the tool to preview keyboard layouts (tastenbrett), so I felt a bit "out of the loop" on the more general and pressing matters in Plasma.
The SocialsWhere the Akademy really shines is in putting together some hundreds of amazing people with some common interests, that in the end happen to make the best software products and computing ecosystem out there.
It is a real warp of space and time. On the Welcome Event I got to meet Eva Brucherseifer, one of the attendants and founders of the very first Akademys, and also recent joiners to the community I only knew via chat or MR interactions.
When the Biergarten that was booked for the Sunday Social Event did cancel due to a storm warning, I could immediately check two things:
- that the Weather Widget did correctly report the Warnung vor starkem Gewitter
- and that the local organizing team went the extra mile to make the Akademy a success, even against the elements. Beer, pizzas and good people was all required to have an enjoyable evening.
Finally I was really happy to meet again with friends from the previous Akademys and the Plasma Sprint in 2023, sharing opinions on widespread topics, suchs as immovable OSes, ingenuous ways to open a beer bottle, keyboard input methods, or the torture and punishment customs of German cities in medieval times.
Thanks to the organizing team, the speakers, the attendants, the patrons and the whole KDE Community which made possible yet another amazing Akademy!
PreviousNext: Vite and Storybook frontend tooling for Drupal
We’ve just completed an extensive overhaul of our frontend tooling, with Vite and Storybook at the centre. Let’s go over it piece by piece.
by jack.taranto / 2 October 2024The goal of the overhaul was to modernise all aspects of the build stack, remove legacy dependencies and optimise development processes.
Tooling is split into four pieces: asset building, styleguide, linting and testing.
Asset building for Drupal with ViteWe have always utilised two separate tools to build CSS and JS assets. Until now, this was PostCSS and Rollup, in the past Sass and Webpack have been in the mix.
With Vite it’s one tool to build both types of assets. To introduce Vite to anyone not already familiar with it, I would say it’s a super fast version of Rollup without the configuration headaches.
Moving to Vite sped up our development build times and production build times (in CI), simplified our config files and removed a huge number of NPM dependencies.
Vite library modeA typical Vite build pipeline is most suitable for single-page apps. It involves an index.html file where Vite dynamically adds CSS and JS assets. However, with Drupal, we do not have an index.html file; we have the Drupal libraries system to load assets, with which Vite has no way of communicating.
Luckily, Vite ships with something called Library mode, which is seemingly tailor-made for Drupal assets! Library mode allows us to output all our frontend assets to a single directory, where we can include them in a libraries.yml file or via a Pinto Theme Object.
To use our config, you’ll first need a few dependencies.
npm i -D vite postcss-preset-env tinyglobby browserslist-to-esbuildOur vite.config.js looks like this:
import { defineConfig } from 'vite' import { resolve } from 'path' import { globSync } from 'tinyglobby' import browserslist from 'browserslist-to-esbuild' import postcssPresetEnv from 'postcss-preset-env' const entry = globSync(['**/*.entry.js', '**/*.css'], { ignore: [ '**/_*.css', 'node_modules', 'vendor', 'web/sites', 'web/core', 'web/libraries', '**/contrib', 'web/storybook', ], }) export default defineConfig(({ mode }) => ({ build: { lib: { entry, formats: ['es'], }, target: browserslist(), cssCodeSplit: true, outDir: resolve(import.meta.dirname, './web/libraries/library-name'), sourcemap: mode === 'development', }, css: { postcss: { plugins: [ postcssPresetEnv(), ], map: mode === 'development', }, }, }))We define entry points as any *.css file and any *.entry.js file. We exclude certain directories, so we aren’t building assets that are included with core or contrib. Additionally, we exclude CSS partials, which use an underscore prefix. This allows us to add asset source files anywhere in our project. They could be added in the theme, a module, or (as we have been doing recently) inside a /components directory in the project root.
The Vite config itself enables library mode using build.lib, passing all source assets through using build.lib.entry and building JS assets using the es format.
build.cssCodeSplit is required when passing CSS files through to build.lib.entry.
build.outDir specifies a folder inside the Drupal libraries directory where all built assets will be sent. Drupal libraries.yml definitions are then updated to include files from this directory.
build.sourcemap will output JS sourcemaps in development mode only.
Finally, we pass through any PostCSS plugins with css.postcss.plugins. Vite includes postcss-import by default, so you do not need to add that. It will also handle resolving to custom directories without including resolve options for postcss-import, meaning you’ll only need to add your specific plugins. In this case, we reduced ours to just postcss-preset-env. Add more as needed!
We also enable CSS sourcemaps with css.postcss.map.
This config allowed us to completely remove the PostCSS config file, PostCSS CLI, Rollup, its config and all Rollup plugins.
The config file above is a starting point—a minimum viable setup you’ll need to build assets using Vite’s library mode. Add to it as you need to, and familiarise yourself with Vite’s documentation.
Using Browerslist with ViteVite uses ESBuild to determine the output feature set based on the build.target. For many years now, we have used Browserslist to determine feature sets for both PostCSS and Rollup, and it works really well. We weren’t ready to lose this functionality by moving to Vite.
This is where the browserslist-to-esbuild dependency comes in. We added the following .browserlistrc file to our project root:
> 1% in AUBy calling browserslist() in build.target we get our browser feature set provided by Browserslist instead of ESBuild.
NPM scripts for development mode and production buildsWe use NPM scripts for consistent usage of non-standard commands both locally and on CI for production builds.
"scripts": { "dev-vite": "vite build -w -m development", "build-vite": "vite build" },To watch and build source assets whilst developing locally, we use npm run dev-vite. Unlike Vite’s dev command, this still uses Rollup under the hood (instead of ESBuild), so we miss out on the extreme speed of Vite’s dev mode. However, it’s still very fast—faster than default Rollup. It’s a tradeoff that provides what we need, which is building our assets while we are editing them in a way that works with Drupal. We lose hot reloading, but that’s less important when we have Storybook at our disposal.
Production builds happen on CI using npm run build-vite.
Using Storybook with DrupalAlthough we had been using Storybook in our projects for some time now, we hadn’t yet standardised on it or provided a default setup. And with Vite now baked into Storybook, it seemed like an excellent time to provide this.
If you have a spare 15 minutes, I would first suggest checking out Lee Rowland’s lightning talk from Drupal South to see just how fluid a frontend development experience Storybook brings to Drupal.
Storybook is easy to setup using its wizard with:
npx storybook@latest initIt will present you with a few choices. Just make sure you choose HTML and Vite for your project type. When using Vite with Storybook, Storybook provides its necessary config to Vite; however, it will still read your projects vite.config.js file for any additional config. This includes the PostCSS config we setup above and any additional functionality you provide.
Now, install Lee’s Twig plugin. This plugin will allow us to write components using Twig that can be imported into our stories.js files. First, install the plugin:
npm i -D vite-plugin-twig-drupalThen register the plugin by adding the following lines to the vite.config.js default export:
plugins: [ twig(), ],See the vite-plugin-twig-drupal documentation for more details, including how to set up Twig namespaces.
Writing storiesTo use Twig in Storybook, it’s quite similar to any other framework. Here’s an example story of a card component:
import Component from './card.html.twig' const meta = { component: Component, args: { title: `<a href="#">Card title</a>`, description: 'Lorem ipsum dolor sit amet, consectetur adipiscing elit. Etiam eu turpis molestie, dictum est a, mattis tellus. Sed dignissim, metus nec fringilla accumsan, risus sem sollicitudin lacus.', }, } export default meta export const Card = {}We import the twig file as Component and then add that to the stories meta. We can pass through args, which will show up in the Twig file as variables, and we can use HTML here.
Writing stories is covered in more detail in our front-end nirvana blog post.
NPM scripts for developing with Vite and Storybook at onceOur standard development practice involves building and testing components in Storybook and then integrating them with Drupal using Pinto. To do this, we need to run Storybook and our Vite tooling at once so we have both Storybook dev mode and our built frontend assets available to us.
Running two NPM scripts in parallel can be a pain, so we have implemented concurrently to streamline this approach.
npm i -D concurrentlyThen we use the following in our NPM scripts:
{ "scripts": { "dev": "concurrently -k -n \"VITE,STORYBOOK\" -c \"#636cff,#ff4785\" \"npm run dev-vite\" \"npm run dev-storybook\"", "build": "concurrently -n \"VITE,STORYBOOK\" -c \"#636cff,#ff4785\" \"npm run build-vite\" \"npm run build-storybook\"", "dev-storybook": "storybook dev -p 6006 --no-open", "build-storybook": "storybook build -o web/storybook", "dev-vite": "vite build -w -m development", "build-vite": "vite build" },With npm run dev we get coloured output so we can see which tool is running and what it’s doing. npm run build is used on CI.
Linting with Prettier, Stylelint and ESLintThese three tools have been a staple on our projects for a long time, but with ESLint introducing a new flat configuration method, it seemed like a good time to review the tooling.
First, we’ll need some more dependencies.
npm i -D prettier stylelint stylelint-config-standard eslint@8.57.0 @eslint/js@8.57.0 eslint-config-prettier eslint-config-drupalFormatting source assets with PrettierWe are using Prettier to format both CSS and JS files. With PHPStorm, you can set this to happen on file save. We also have an NPM script to do this on demand and before committing. NPM commands are at the end of this section.
Reducing Stylelint configurationPast iterations of our Stylelint tooling involved extensive configuration on each project. Using Stylelints latest standard configuration, it sets sensible defaults, which lets us remove most config options. We’re left with the following:
const config = { extends: ['stylelint-config-standard'], rules: { 'custom-property-empty-line-before': null, 'no-descending-specificity': null, 'import-notation': 'string', 'selector-class-pattern': [ '^([a-z])([a-z0-9]+)(-[a-z0-9]+)?(((--)?(__)?)([a-z0-9]+)(-[a-z0-9]+)?)?$', { message: 'Expected class selector to be BEM selector matching either .block__element or .block--modifier', }, ], 'selector-nested-pattern': '^&', }, } export default configWe added a custom rule to ensure project BEM selectors are used.
Like prettier, we also use a .stylelintignore file to exclude core and contrib folders.
Moving to ESLint flat configThe new config format isn’t yet supported by all plugins (there’s a compatibility tool to help with this), but where it is, it’s much simpler.
The following config can be used in conjunction with Prettier.
import js from '@eslint/js' import globals from 'globals' import prettier from 'eslint-config-prettier' import drupal from 'eslint-config-drupal' export default [ js.configs.recommended, prettier, { languageOptions: { globals: { ...globals.browser, ...globals.node, ...drupal.globals, dataLayer: true, google: true, once: true, }, }, }, { rules: { 'no-console': 'error', 'no-unused-expressions': [ 'error', { allowShortCircuit: true, allowTernary: true, }, ], 'consistent-return': 'warn', 'no-unused-vars': 'off', }, }, { ignores: [ 'node_modules', 'vendor', 'bin', 'web/core', 'web/sites', 'web/modules/contrib', 'web/themes/contrib', 'web/profiles/contrib', 'web/libraries', 'web/storybook', ], }, ]This includes linting for Storybook files and tests as well. Additionally, it ignores core and contrib files.
NPM scripts for lintingWe use the following NPM scripts to run our linting commands locally and on CI.
"scripts": { "format": "prettier --write \"**/*.{css,ts,tsx,js,jsx,json}\"", "lint": "npm run lint-prettier && npm run lint-css && npm run lint-js", "lint-prettier": "prettier --check \"**/*.{css,ts,tsx,js,jsx,json}\"", "lint-css": "stylelint \"**/*.css\"", "lint-js": "eslint ." },These commands work so well because we have excluded all Drupal core and contrib folders using ignore files.
Testing using Storybook test runnerStorybook test runner provides the boilerplate-free ability to run automated snapshot and accessibility tests on each story in Storybook. Our previous test tooling involved using Jest and Axe to handle this, but we needed to manually write tests for each component. With Storybook test runner, this is handled automatically.
To set it up, first, install some dependencies.
npm i -D @storybook/test-runner axe-playwrightThen create the following test-runner.js file inside your .storybook directory.
import { waitForPageReady } from '@storybook/test-runner' import { injectAxe, checkA11y } from 'axe-playwright' import { expect } from '@storybook/test'; /* * See https://storybook.js.org/docss/writing-tests/test-runner#test-hook-api * to learn more about the test-runner hooks API. */ const config = { async preVisit(page) { await injectAxe(page) }, async postVisit(page) { await waitForPageReady(page) // Automated snapshot testing for each story. const elementHandler = await page.$('#storybook-root') const innerHTML = await elementHandler.innerHTML() expect(innerHTML).toMatchSnapshot() // Automated accessibility testing for each story. await checkA11y(page, '#storybook-root', { detailedReport: true, detailedReportOptions: { html: true, }, }) }, } export default configThis config will loop through all your stories, wait for them to be ready, then snapshot them and run Axe against them. You’ll get great output from the command, so you can see exactly what’s going on.
NPM scripts for testing Storybook locally and on CIFirst, install a few more dependencies:
npm i -D http-server wait-onThe following scripts will run the complete Storybook test base and update snapshots as needed.
"scripts": { "test-storybook": "test-storybook", "test-storybook:update": "test-storybook -u", "test-storybook:ci": "concurrently -k -s first -n \"SERVER,TEST\" -c \"magenta,blue\" \"npm run http-server\" \"wait-on tcp:6006 && npm run test-storybook\"", "http-server": "http-server web/storybook -p 6006 --silent" },To run tests on CI we use http-server to serve the built version of Storybook and wait-on to delay the test run until the server is ready. The concurrently command smooths the output of both these commands.
Wrapping upSee the complete workflow, including all config and ignore files in the pnx-frontend-build-tools-blog repository I've setup for this post.
The repository and this blog post have been designed to provide the necessary pieces so you can implement this workflow on your existing (or new) projects. However, a lot more functionality can be gained, including easily adding support for Typescript, React and Vitest.
Tagged Storybook, ViteKraft Version 1.2.2
Kraft (Github) is the desktop app making it easy to create offers and invoices quickly and beautifully in small companies. It is targetted to the free desktop and runs on Linux.
This is the release announcement of the new Kraft version 1.2.2. This is a small service release that fixes a few bugs and CI issues.
Right after this release, the branch with significant changes for Kraft 2.0 will be merged to master. These changes will make Kraft ready for sharing documents across private file clouds and with that enable use cases for distributed use via internet, along with other significant feature updates.
Details about the next big release with version number 2.0 can be read on the Github Discussion page.
Any feedback and contribution is highly appreciated.
PyCoder’s Weekly: Issue #649 (Oct. 1, 2024)
#649 – OCTOBER 1, 2024
View in Browser »
In this tutorial, you’ll learn about the new features in Python 3.13. You’ll take a tour of the new REPL and error messages and see how you can try out the experimental free threading and JIT versions of Python 3.13 yourself.
REAL PYTHON
Some last minute performance considerations are delaying the release of Python 3.13 with one of the features being backed out. The new target is next week.
PYTHON.ORG
Python ships with a command-line based debugger called pdb. To set a breakpoint, you call the breakpoint() function in your code. This post introduces you to pdb and debugging from the command-line.
JUHA-MATTI SANTALA
Don’t miss out on your chance to register for DevSecCon 2024! From the exciting lineup of 20+ sessions, here’s one that you can’t skip: Ali Diamond, from Hak5: “I’m A Software Engineer, and I Have to Make Bad Security Decisions—why?” Save your spot →
SNYK.IO sponsor
Looking to experiment or build your portfolio? Discover creative Django project ideas for all skill levels, from beginner apps to advanced full-stack projects.
EVGENIA VERBINA
In this tutorial, you’ll explore one of Python 3.13’s new features: a new and modern interactive interpreter, also known as a REPL.
REAL PYTHON
This post talks about the pros and cons of upgrading to Python 3.13 and why you might do it immediately or wait for the first patch release in December.
ITAMAR TURNER-TRAURING
Jack was toying around with a refactor where he wanted to replace a variable name across a large number of files. His usual tools of grep and sed weren’t sufficient, so he tried tree-sitter instead. Associated HN Discussion.
JACK EVANS
Information retrieval often uses a two-stage pipeline, where the first stage does a quick pass and the second re-ranks the content. This post talks about re-ranking, the different methods out there, and introduces a Python library to help you out.
BENJAMIN CLAVIE
A code contract is a way of specifying how your code is supposed to perform. They can be useful for tests and to generally reduce the number of bugs in your code. This article introduces you to the concept and the dbc library.
LÉO GERMOND
Technical debt is the accumulation of design decisions that eventually slow teams down. This post talks about two ways to pay it down: using tech debt payments to get into the flow, and what you need before doing a big re-write.
GERGELY OROSZ
The asyncio.gather() method works as the meeting point for multiple co-routines, but it doesn’t have to be a synchronous call. This post teaches you how to use .gather() in the background.
JASON BROWNLEE
The Python import system is as powerful as it is useful. In this in-depth video course, you’ll learn how to harness this power to improve the structure and maintainability of your code.
REAL PYTHON course
Ryan just finished his second round mentoring with the Djangonaut.Space program. This post talks about both how you can help your mentor help you, and how to be a good mentor.
RYAN CHELEY
The dunder method __new__ is used to customise object creation and is a core stepping stone in understanding metaprogramming in Python.
RODRIGO GIRÃO SERRÃO
This short post shows you how to prompt your users for input with Python’s built-in input() function.
TREY HUNNER
Talk Python interviews Anna-Lena Popkes and they talk about how and when to teach coding to children.
TALK PYTHON podcast
October 2, 2024
REALPYTHON.COM
October 3 to October 5, 2024
PYCON.ORG
October 3, 2024
MEETUP.COM
October 3, 2024
SYPY.ORG
October 4 to October 6, 2024
PYCON.ORG
October 4 to October 5, 2024
DJANGODAY.DK
October 9 to October 14, 2024
PYCON.ORG
October 10 to October 11, 2024
PYCON.ORG
Happy Pythoning!
This was PyCoder’s Weekly Issue #649.
View in Browser »
[ Subscribe to 🐍 PyCoder’s Weekly 💌 – Get the best Python news, articles, and tutorials delivered to your inbox once a week >> Click here to learn more ]
Dominique De Cooman: Drupal and the Sagrada Família
Dries mentioned the comparison towards the Sagrada Familia in the Driesnote in Barcelona and this really resonated with me. Especially after visiting it after Drupalcon. I thought I'd take the comparison a little further, you know, for the fun of it :)
Here we go:
Drupal and the Sagrada FamíliadrupalTuesday, October 1, 2024 - 21:26PyCharm: Python 3.13 and the Latest Trends: A Developer’s Guide to 2025
We invite you to join us in just two days time, on October 3 at 5:00 pm CEST (11:00 am EDT), for a livestream shining a spotlight on Python 3.13 and the trends shaping its development.
Our speakers:
- Łukasz Langa, CPython Developer in Residence, release manager for Python 3.8–3.9, and creator of Black.
- Tania Allard, Vice-chair of the PSF board, PSF fellow, and Director at Quansight Labs.
They will discuss the most notable features of Python 3.13 and examine the industry trends likely to influence its future. This is a great opportunity to get ahead of the release and ask your questions directly to the experts.
Don’t forget to enable YouTube notifications and mark your calendar.
A Journey toward defining Open Source AI: presentation at Open Source Summit Europe
A few weeks ago I attended Open Source Summit Europe 2024, an event organized by the Linux Foundation, that brought together brilliant developers, technologists and leaders from all over the world, reinforcing what Open Source is truly about—collaboration, innovation and community.
I had the honor of leading a session that tackled one of the most critical challenges in the Open Source movement today—defining what it means for AI to be “Open Source.” Along with OSI Board Director Justin Colannino, we presented the v.0.0.9 for the Open Source AI Definition. This session marked an important milestone for both the Open Source Initiative (OSI) and the broader community, a moment that encapsulated years of collaboration, learning and exploration.
The story behind the Open Source AI DefinitionOur session, titled “The Open Source AI Definition Is (Almost) Ready” was more than just a talk—it was an interactive dialogue. As Justin kicked off the session, he captured the essence of the journey we’ve been on. OSI has been grappling with what it means to call AI systems, models and weights “Open Source.” This challenge comes at a time when companies and even regulations are using the term without a clear, agreed-upon definition.
From the outset, we knew we had to get it right. The Open Source values that have fueled so much software innovation—transparency, collaboration, freedom—needed to be the foundation for AI as well. But AI isn’t like traditional software, and that’s where our challenge began.
The origins: a podcast and a visionWhen I first became Executive Director of OSI, I pitched the idea of exploring how Open Source principles apply to AI. We spent months strategizing, and the more we dove in, the more we realized how complex the task would be. We didn’t know much about AI at the time, but we were eager to learn. We turned to experts from various fields—a copyright lawyer, an ethicist, AI pioneers from Eleuther AI and Debian ML, and even an AI security expert from DARPA. Those conversations culminated in a podcast we created called Deep Dive AI, which I highly recommend to anyone interested in this topic.
Through those early discussions, it became clear that AI and machine learning are not software in the traditional sense. Concepts like “source code,” which had been well-defined in software thanks to people like Richard Stallman and the GNU GPL, didn’t apply 1:1 to AI. We didn’t even know what the “program” was in AI, nor could we easily determine the “preferred form for making modifications”—a cornerstone of Open Source licensing.
This realization sparked the need to adapt the Open Source principles we all know so well to the unique world of AI.
Co-designing the future of Open Source AIOnce we understood the scope of the challenge, we knew that creating this definition couldn’t be a solo endeavor. It had to be co-designed with the global community. At the start of 2023, we had limited resources—just two full-time staff members and a small budget. But that didn’t stop us from moving forward. We began fundraising to support a multi-stakeholder, global conversation about what Open Source AI should look like.
We brought on Mer Joyce, a co-design expert who introduced us to creative methods that ensure decisions are made with the community, not for it. With her help, we started breaking the problem into smaller pieces and gathering insights from volunteers, AI experts and other stakeholders. Over time, we began piecing together what would eventually become v.0.0.9 of the Open Source AI Definition.
By early 2024, we had outlined the core principles of Open Source AI, drawing inspiration from the free software movement. We relied heavily on foundational texts like the GNU Manifesto and the Four Freedoms of software. From there, we built a structure that mirrored the values of freedom, collaboration and openness, but tailored specifically to the complexities of AI.
Addressing the unique challenges of AIOf course, defining the freedoms was only part of the battle. AI and machine learning systems posed new challenges that we hadn’t encountered in traditional software. One of the key questions we faced was: What is the preferred form for making modifications in AI? In traditional software, this might be source code. But in AI, it’s not so straightforward. We realized that the “weights” of machine learning models—those parameters fine-tuned by data—are crucial. However, data itself doesn’t fit neatly into the Open Source framework.
This was a major point of discussion during the session. Code and weights need to be covered by an OSI-approved license because they represent the modifiable core of AI systems. However, data doesn’t meet the same criteria. Instead, we concluded that while data is essential for understanding and studying the system, it’s not the “preferred form” for making modifications. Instead, the data information and code requirements allow Open Source AI systems to be forked by third-party AI builders downstream using the same information as the original developers. These forks could include removing non-public or non-open data from the training dataset, in order to retrain a new Open Source AI system on fully public or open data. This insight was shaped by input from the community and experts who joined our study groups and voted on various approaches.
The road ahead: a collaborative futureAs we wrap up this phase, the next step is gathering even more feedback from the community. The definition isn’t final yet, and it will continue to evolve as we incorporate insights from events like this summit. I’m incredibly grateful for the thoughtful comments we’ve already received from people all over the world who have helped guide us along this journey.
At the core of this project is the belief that Open Source AI should reflect the same values that have made Open Source a force for good in software development. We’re not there yet, but together, we’re building something that will have a lasting impact—not just on AI, but on the future of technology as a whole.
I want to thank everyone who has contributed to this project so far. Your dedication and passion are what make Open Source so special. Let’s continue to shape the future of AI, together.
PyCharm: PyCharm’s Interactive Tables for Data Science
Data cleaning, exploration, and visualization are some of the most time-consuming tasks for data scientists. Nearly 50% of data specialists dedicate 30% or more of their time to data preparation. The pandas and Polars libraries are widely used for these purposes, each offering unique advantages. PyCharm supports both libraries, enabling users to efficiently explore, clean, and visualize data, even with large datasets.
In this blog post, you’ll discover how PyCharm’s interactive tables can enhance your productivity when working with either Polars or pandas. You will also learn how to perform many different data exploration tasks without writing any code and how to use JetBrains AI Assistant for data analysis.
Getting startedTo start using pandas for data analysis, import the library and load data from a file using pd.read_csv(“FileName”), or drag and drop a CSV file into a Jupyter notebook. If you’re using Polars, import the library and use pl.read_csv(“FileName/path to the file”) to load data into a DataFrame. Then, print the dataset just by using the name of the variable.
PyCharm’s interactive tables – key features and uses Browse, sort, and view datasetsInteractive tables offer a wide range of features that allow you to easily explore your data. For example, you can navigate through your data with infinite horizontal and vertical scrolling, use single and multiple column sorting, and many other features.
This feature allows you to sort columns alphabetically or maintain the existing column order. You can also find specific columns by typing the column name in the Column List menu. Through the context menu or Column List, you can selectively hide or display columns. For deeper analysis, you can hide all but the essential columns or use the Hide Other Columns option to focus on a single column.
Finally, you can open your dataframe in a separate window for even more in-depth analysis.
Explore your dataYou can easily understand data types directly from column headers. For example, is used for a data type object, while indicates numeric data.
Additionally, you can access descriptive statistics by hovering over column headers in Compact mode or view them directly in Detailed mode, where distribution histograms are also available.
Create code-free data visualizationsInteractive tables also offer several features available in the Chart view section.
- No-code chart creation, allowing you to visualize data effortlessly.
- Ability to compare graphs.
- Ability to save your charts with one click.
You can access the AI Assistant in the upper-left corner of the tables for the following purposes:
- To access insights about your data quickly with AI Assistant.
- Use AI Assistant to visualize your data.
Exploratory Data Analysis (EDA) is a crucial step in data science, as it allows data scientists to understand the underlying structure and patterns within a dataset before applying any modeling techniques. EDA helps you identify anomalies, detect outliers, and uncover relationships among variables – all of which are essential for making informed decisions.
Interactive tables offer many features that allow you to explore your data faster and get reliable results.
Spotting statistics, patterns, and outliers Viewing the dataset informationLet’s look at a real-life example of how the tables could boost the productivity of your EDA. For this example, we will use the Bengaluru House Dataset. Normally we start with an overview of our data. This includes just viewing it to understand the size of the dataset, data types of the columns, and so on. While you can certainly do this with the help of code, using interactive tables allows you to get this data without code. So, in our example, the size of the dataset is 13,320 rows and 9 columns, as you can see in the table header.
Our dataset also contains different data types, including numeric and string data. This means we can use different techniques for working with data, including correlation analysis and others.
And of course you can take a look at the data with the help of infinite scrolling and other features we mentioned above.
Performing statistical analysisAfter getting acquainted with the data, the next step might be more in-depth analysis of the statistics. PyCharm provides a lot of important information about the columns in the table headers, including missing data, mode, mean, median, and so on.
For example, here we see that many columns have missing data. In the “bath” column, we obviously have an outlier, as the max value significantly exceeds the 95th percentile.
Additionally, data type mismatches, such as “total_sqft” not being a float or integer, indicate inconsistencies that could impact data processing and analysis.
After sorting, we notice one possible reason for the problem: the use of text values in data and ranges instead of normal numerical values.
Analyzing the data using AIAdditionally, if our dataset doesn’t have hundreds of columns, we can use the help of AI Assistant and ask it to explain the DataFrame. From there, we can prompt it with any important questions, such as “What data problems in the dataset should be addressed and how?”
Visualizing data with built-in chartingIn some cases, data visualization can help you understand your data. PyCharm interactive tables provide two options for that. The first is Chart View and the second is Generate Visualizations in Chat.
Let’s say my hypothesis is that the price of a house should be correlated with its total floor area. In other words, the bigger a house is, the more expensive it should be. In this case, I can use a scatter plot in Chart View and discover that my hypothesis is likely correct.
Wrapping upPyCharm Professional’s interactive tables offer numerous benefits that significantly boost your productivity in data exploration and data cleaning. The tables allow you to work with the most popular data science library, pandas, and the fast-growing framework Polars, without writing any code. This is because the tables provide features like browsing, sorting, and viewing datasets; code-free visualizations; and AI-assisted insights.
Interactive tables in PyCharm not only save your time but also reduce the complexity of data manipulation tasks, allowing you to focus on deriving meaningful insights instead of writing boilerplate code for basic tasks.
Download PyCharm Professional and get an extended 60-day trial by using the promo code “PyCharmNotebooks”. The free subscription is available for individual users only.
Activate your 60-day trialFor more information on interactive tables in PyCharm, check out our related blogs, guides, and documentation:
Ravi Dwivedi: State of the Map Conference in Kenya
Last month, I traveled to Kenya to attend a conference called State of the Map 2024 (“SotM” for short), which is an annual meetup of OpenStreetMap contributors from all over the world. It was held at the University of Nairobi Towers in Nairobi, from the 6th to the 8th of September.
University of Nairobi.I have been contributing to OpenStreetMap for the last three years, and this conference seemed like a great opportunity to network with others in the community. As soon as I came across the travel grant announcement, I jumped in and filled the form immediately. I was elated when I was selected for the grant and couldn’t wait to attend. The grant had an upper limit of €1200 and covered food, accommodation, travel and miscellaneous expenses such as visa fee.
Pre-travel tasks included obtaining Kenya’s eTA and getting a yellow fever vaccine. Before the conference, Mikko from the Humanitarian OpenStreetMap Team introduced me to Rabina and Pragya from Nepal, Ibtehal from Bangladesh, and Sajeevini from Sri Lanka. We all booked the Nairobi Transit Hotel, which was within walking distance of the conference venue. Pragya, Rabina, and I traveled together from Delhi to Nairobi, while Ibtehal was my roommate in the hotel.
Our group at the conference.The venue, University of Nairobi Towers, was a tall building and the conference was held on the fourth, fifth and sixth floors. The open area on the fifth floor of the building had a nice view of Nairobi’s skyline and was a perfect spot for taking pictures. Interestingly, the university had a wing dedicated to Mahatma Gandhi, who is regarded in India as the Father of the Nation.
View of Nairobi's skyline from the open area on the fifth floor. A library in Mahatma Gandhi wing of the University of Nairobi.The diversity of the participants was mind-blowing, with people coming from a whopping 54 countries. I was surprised to notice that I was the only participant traveling from India, despite India having a large OpenStreetMap community. That said, there were two other Indian participants who traveled from other countries. I finally got to meet Arnalie (from the Phillipines) and Letwin (from Zimbabwe), both of whom I had only met online before. I had met Anisa (from Albania) earlier during DebConf 2023. But I missed Mikko and Honey from the Humanitarian OpenStreetMap Team, whom I knew from the Open Mapping Guru program.
I learned about the extent of OSM use through Pragya and Rabina’s talk; about the logistics of running the OSM Board, in the OSMF (OpenStreetMap Foundation) session; about the Youth Mappers from Sajeevini, about the OSM activities in Malawi from Priscilla Kapolo, and about mapping in Zimbabwe from Letwin. However, I missed Ibtehal’s lightning session. The ratio of women speakers and participants at the conference was impressive, and I hope we can get such gender representation in our Delhi/NCR mapping parties.
One of the conference halls where talks took place.Outside of talks, the conference also had lunch and snack breaks, giving ample time for networking with others. In the food department, there were many options for a lacto-ovo vegetarian like myself, including potatoes, rice, beans, chips etc. I found out that the milk tea in Kenya (referred to as “white tea”) is usually not as strong compared to India, so I switched to coffee (which is also called “white coffee” when taken with milk). The food wasn’t spicy, but I can’t complain :) Fruit juices served as a nice addition to lunch.
One of the lunch meals served during the conference.At the end of the second day of the conference, there was a surprise in store for us — a bus ride to the Bao Box restaurant. The ride gave us the experience of a typical Kenyan matatu (privately-owned minibuses used as share taxis), complete with loud rap music. I remember one of the songs being Kraff’s Nursery Rhymes. That day, I was wearing an original Kenyan cricket jersey - one that belonged to Dominic Wesonga, who represented Kenya in four ODIs. This confused Priscilla Kapolo, who asked if I was from Kenya! Anyway, while it served as a good conversation starter, it didn’t attract as much attention as I expected :) I had some pizza and chips there, and later some drinks with Ibtehal. After the party, Piyush went with us to our hotel and we played a few games of UNO.
Minibus which took us from the university to Bao Box restaurant. This minibus in the picture gave a sense of a real matatu.I am grateful to the organizers Laura and Dorothea for introducing me to Nikhil when I was searching for a companion for my post-conference trip. Nikhil was one of the aforementioned Indian participants, and a wildlife lover. We had some nice conversations; he wanted to go to the Masai Maara Natural Reserve, but it was too expensive for me. In addition, all the safaris were multi-day affairs, and I wasn’t keen on being around wildlife for that long. Eventually I chose to go my own way, exploring the coastal side and visiting Mombasa.
While most of the work regarding the conference was done using free software (including the reimbursement form and Mastodon announcements), I was disappointed by the use of WhatsApp for coordination with the participants. I don’t use WhatsApp and so was left out. WhatsApp is proprietary software (they do not provide the source code) and users don’t control it. It is common to highlight that OpenStreetMap is controlled by users and the community, rather than a company - this should apply to WhatsApp as well.
My suggestion is to use XMPP, which shares similar principles with OpenStreetMap, as it is privacy-respecting, controlled by users, and powered by free software. I understand the concern that there might not be many participants using XMPP already. Although it is a good idea to onboard people to free software like XMPP, we can also create a Matrix group, and bridge it with both the XMPP group and the Telegram group. In fact, using Matrix and bridging it with Telegram is how I communicated with the South Asian participants. While it’s not ideal - as Telegram’s servers are proprietary and centralized - but it’s certainly much better than creating a WhatsApp-only group. The setup can be bridged with IRC as well. On the other hand, self-hosted mailing lists for participants is also a good idea.
Finally, I would like to thank SotM for the generous grant, enabling me to attend this conference, meet the diverse community behind OSM and visit the beautiful country of Kenya. Stay tuned for the blog post on Kenya trip.
Thanks to Sahilister, Contrapunctus, Snehal and Badri for reviewing the draft of this blog post before publishing.
Real Python: Differences Between Python's Mutable and Immutable Types
As a Python developer, you’ll have to deal with mutable and immutable objects sooner or later. Mutable objects are those that allow you to change their value or data in place without affecting the object’s identity. In contrast, immutable objects don’t allow this kind of operation. You’ll just have the option of creating new objects of the same type with different values.
In Python, mutability is a characteristic that may profoundly influence your decision when choosing which data type to use in solving a given programming problem. Therefore, you need to know how mutable and immutable objects work in Python.
In this video course, you’ll:
- Understand how mutability and immutability work under the hood in Python
- Explore immutable and mutable built-in data types in Python
- Identify and avoid some common mutability-related gotchas
- Understand and control how mutability affects your custom classes
[ Improve Your Python With 🐍 Python Tricks 💌 – Get a short & sweet Python Trick delivered to your inbox every couple of days. >> Click here to learn more and see examples ]
The Drop Times: Unlock Advanced Drupal Content Editing: Join Our CKEditor Webinar
Colin Watson: Free software activity in September 2024
Almost all of my Debian contributions this month were sponsored by Freexian.
You can also support my work directly via Liberapay.
PydanticMy main Debian project for the month turned out to be getting Pydantic back into a good state in Debian testing. I’ve used Pydantic quite a bit in various projects, most recently in Debusine, so I have an interest in making sure it works well in Debian. However, it had been stalled on 1.10.17 for quite a while due to the complexities of getting 2.x packaged. This was partly making sure everything else could cope with the transition, but in practice mostly sorting out packaging of its new Rust dependencies. Several other people (notably Alexandre Detiste, Andreas Tille, Drew Parsons, and Timo Röhling) had made some good progress on this, but nobody had quite got it over the line and it seemed a bit stuck.
Learning Rust is on my to-do list, but merely not knowing a language hasn’t stopped me before. So I learned how the Debian Rust team’s packaging works, upgraded a few packages to new upstream versions (including rust-half and upstream rust-idna test fixes), and packaged rust-jiter. After a lot of waiting around for various things and chasing some failures in other packages I was eventually able to get current versions of both pydantic-core and pydantic into testing.
I’m looking forward to being able to drop our clunky v1 compatibility code once debusine can rely on running on trixie!
OpenSSHI upgraded the Debian packaging to OpenSSH 9.9p1.
YubiHSMI upgraded python-yubihsm, yubihsm-connector, and yubihsm-shell to new upstream versions.
I noticed that I could enable some tests in python-yubihsm and yubihsm-shell; I’d previously thought the whole test suite required a real YubiHSM device, but when I looked closer it turned out that this was only true for some tests.
I fixed yubihsm-shell build failures on some 32-bit architectures (upstream PRs #431, #432), and also made it build reproducibly.
Thanks to Helmut Grohne, I fixed yubihsm-connector to apply udev rules to existing devices when the package is installed.
As usual, bookworm-backports is up to date with all these changes.
Python teamsetuptools 72.0.0 removed the venerable setup.py test command. This caused some fallout in Debian, some of which was quite non-obvious as packaging helpers sometimes fell back to different ways of running test suites that didn’t quite work. I fixed django-guardian, manuel, python-autopage, python-flask-seeder, python-pgpdump, python-potr, python-precis-i18n, python-stopit, serpent, straight.plugin, supervisor, and zope.i18nmessageid.
As usual for new language versions, the addition of Python 3.13 caused some problems. I fixed psycopg2, python-time-machine, and python-traits.
I fixed build/autopkgtest failures in keymapper, python-django-test-migrations, python-rosettasciio, routes, transmissionrpc, and twisted.
buildbot was in a bit of a mess due to being incompatible with SQLAlchemy 2.0. Fortunately by the time I got to it upstream had committed a workable set of patches, and the main difficulty was figuring out what to cherry-pick since they haven’t made a new upstream release with all of that yet. I figured this out and got us up to 4.0.3.
Adrian Bunk asked whether python-zipp should be removed from trixie. I spent some time investigating this and concluded that the answer was no, but looking into it was an interesting exercise anyway.
On the other hand, I looked into flask-appbuilder, concluded that it should be removed, and filed a removal request.
I upgraded some embedded CSS files in nbconvert.
I upgraded importlib-resources, ipywidgets, jsonpickle, pydantic-settings, pylint (fixing a test failure), python-aiohttp-session, python-apptools, python-asyncssh, python-django-celery-beat, python-django-rules, python-limits, python-multidict, python-persistent, python-pkginfo, python-rt, python-spur, python-zipp, stravalib, transmissionrpc, vulture, zodbpickle, zope.exceptions (adopting it), zope.i18nmessageid, zope.proxy, and zope.security to new upstream versions.
debmirrorThe experimental and *-proposed-updates suites used to not have Contents-* files, and a long time ago debmirror was changed to just skip those files in those suites. They were added to the Debian archive some time ago, but debmirror carried on skipping them anyway. Once I realized what was going on, I removed these unnecessary special cases (#819925, #1080168).
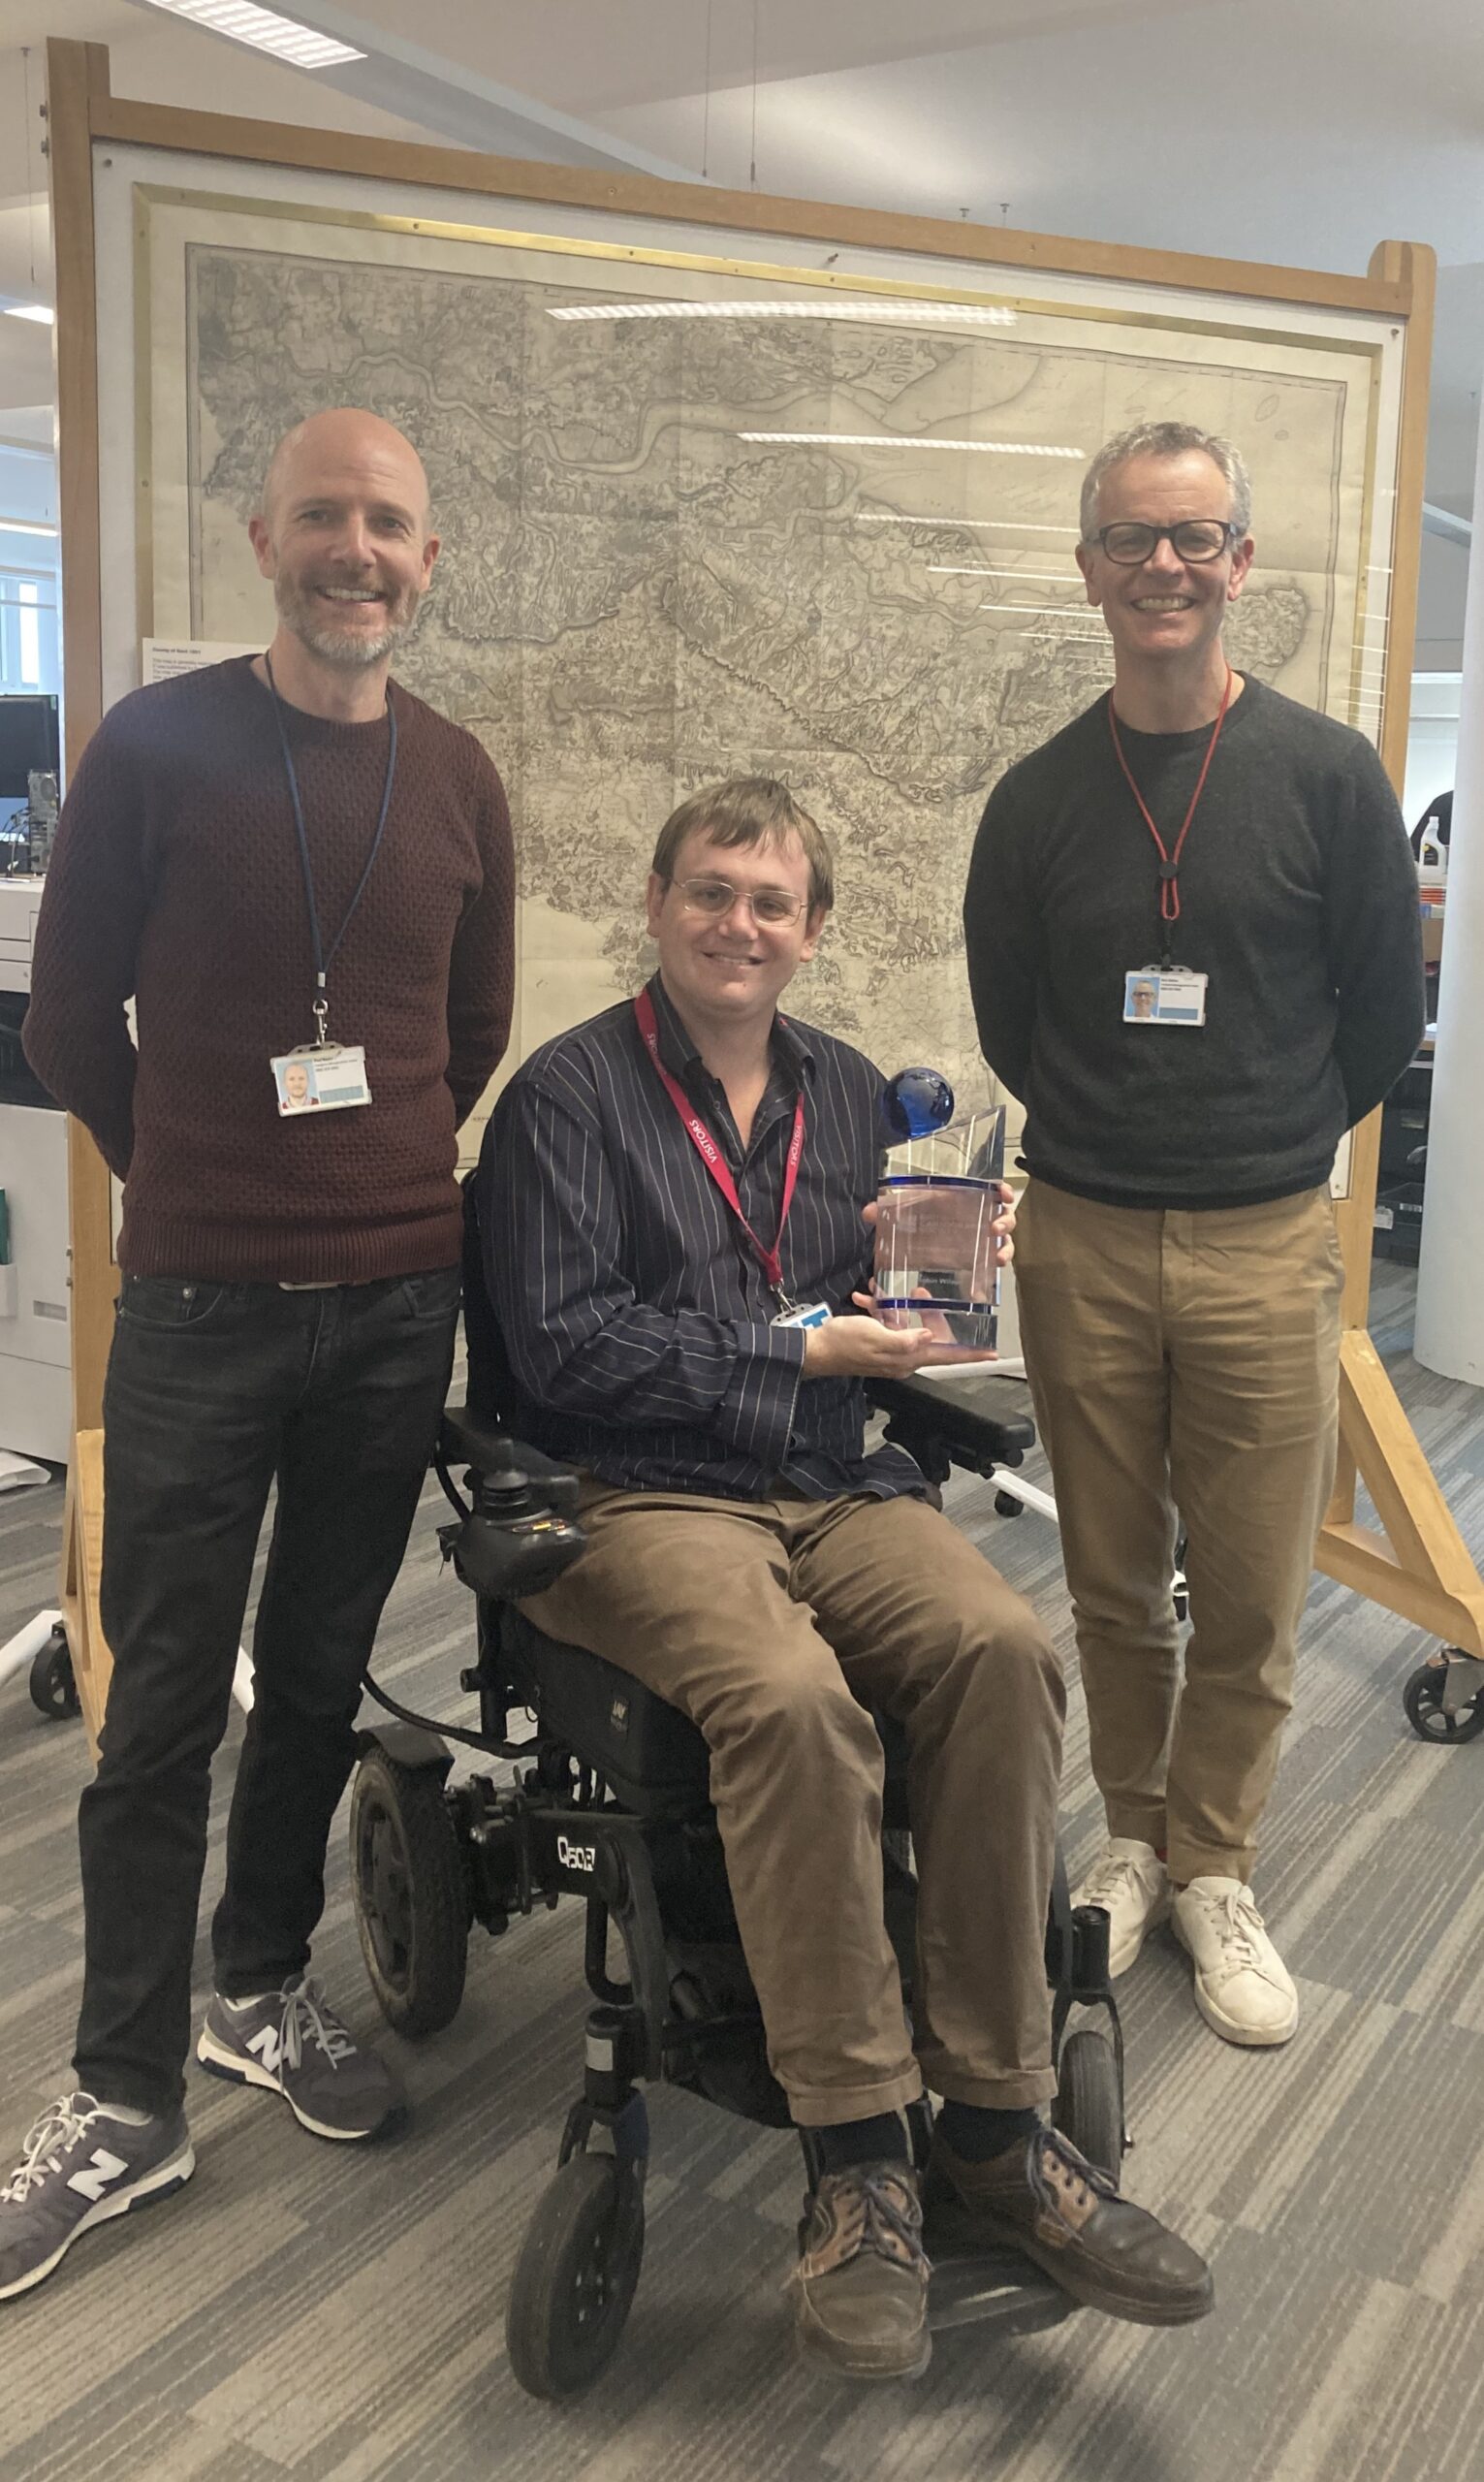
Robin Wilson: I won two British Cartographic Society awards!
It’s been a while since I posted here – I kind of lost momentum over the summer (which is a busy time with a school-aged child) and never really picked it up again.
Anyway, I wanted to write a quick post to tell people that I won two awards at the British Cartographic Society awards ceremony a few weeks ago.
They were both for my British Placename Mapper web app, which is described in more detail in this blog post. If you haven’t seen it already, I strongly recommend you check it out.
I won a Highly Commended certificate in the Avenza Award for Electronic Mapping, and the First Prize trophy for the Ordnance Survey Award (for any map using OS data).
The certificates came in a lovely frame, and the trophy is enormous – about 30cm high and weighing over 3kg!
I was presented with the trophy at the BCS Annual Conference in London, but they very kindly offered to keep the trophy to save me carrying it across London on my wheelchair and back on the train, so they invited me to Ordnance Survey last week to be presented with it again. I had a lovely time at OS – including 30 minutes with their Director General/CEO and was formally presented with my trophy again (standing in front of the first ever Ordnance Survey map!):
Full information on the BCS awards are available on their website and I strongly recommend submitting any appropriate maps you’ve made for next year’s awards. I need to get my thinking cap on for next year’s entry…
Junichi Uekawa: Hello October.
The Drop Times: A Note of Gratitude for all the Support!
Python Insider: Python 3.12.7 released
I'm pleased to announce the release of Python 3.12.7:
https://www.python.org/downloads/release/python-3127/
Python 3.12 is the newest major release of the Python programming language, and it contains many new features and optimizations. 3.12.7 is the latest maintenance release, containing more than 100 bugfixes, build improvements and documentation changes since 3.12.6.
Major new features of the 3.12 series, compared to 3.11 New features- More flexible f-string parsing, allowing many things previously disallowed (PEP 701).
- Support for the buffer protocol in Python code (PEP 688).
- A new debugging/profiling API (PEP 669).
- Support for isolated subinterpreters with separate Global Interpreter Locks (PEP 684).
- Even more improved error messages. More exceptions potentially caused by typos now make suggestions to the user.
- Support for the Linux perf profiler to report Python function names in traces.
- Many large and small performance improvements (like PEP 709 and support for the BOLT binary optimizer), delivering an estimated 5% overall performance improvement.
- New type annotation syntax for generic classes (PEP 695).
- New override decorator for methods (PEP 698).
- The deprecated wstr and wstr_length members of the C implementation of unicode objects were removed, per PEP 623.
- In the unittest module, a number of long deprecated methods and classes were removed. (They had been deprecated since Python 3.1 or 3.2).
- The deprecated smtpd and distutils modules have been removed (see PEP 594 and PEP 632. The setuptools package continues to provide the distutils module.
- A number of other old, broken and deprecated functions, classes and methods have been removed.
- Invalid backslash escape sequences in strings now warn with SyntaxWarning instead of DeprecationWarning, making them more visible. (They will become syntax errors in the future.)
- The internal representation of integers has changed in preparation for performance enhancements. (This should not affect most users as it is an internal detail, but it may cause problems for Cython-generated code.)
For more details on the changes to Python 3.12, see What’s new in Python 3.12.
More resources- Online Documentation.
- PEP 693, the Python 3.12 Release Schedule.
- Report bugs via GitHub Issues.
- Help fund Python directly or via GitHub Sponsors, and support the Python community.
Thanks to all of the many volunteers who help make Python Development and these releases possible! Please consider supporting our efforts by volunteering yourself or through organization contributions to the Python Software Foundation.
Your release team,
Thomas Wouters
Łukasz Langa
Ned Deily
Steve Dower
GSOC: Week 8 to Week 16
The End is here!
The long journey of GSoC (which got streched into 16 weeks) is nearing to an end. And in this blog, I will share a few of the things I have done, and some of the things I have left to do. Let’s start with the main works.
Snap KCM! It’s here!I have finally succeeded to create a KCM for snaps. This is written using C++, Qt (Qml), Kirigami, Snapd-Glib Api. The flow is something like this
Python Insider: Python 3.13.0 release candidate 3 released
I'm pleased to announce the release of Python 3.13 release candidate 3 (instead of the expected final release).
https://www.python.org/downloads/release/python-3130rc3/
This is the final release candidate of Python 3.13.0
This release, 3.13.0rc3, is the final release preview (no really) of 3.13. This release is expected to become the final 3.13.0 release, barring any critical bugs being discovered. The official release of 3.13.0 is now scheduled for Monday, 2024-10-07.
This extra, unplanned release candidate exists because of a couple of last minute issues, primarily a significant performance regression in specific workloads due to the incremental cyclic garbage collector (introduced in the alpha releases). We decided to roll back the garbage collector change in 3.13 (and continuing work in 3.14 to improve it), apply a number of other important bug fixes, and roll out a new release candidate.
There will be no ABI changes from this point forward in the 3.13 series (and there haven't been any since the beta releases).
Call to actionWe strongly encourage maintainers of Python projects to prepare their projects for 3.13 compatibilities during this phase, and where necessary publish Python 3.13 wheels on PyPI to be ready for the final release of 3.13.0. Any binary wheels built against Python 3.13.0rc1 and later will work with future versions of Python 3.13. As always, report any issues to the Python bug tracker.
Please keep in mind that this is a preview release and while it’s as close to the final release as we can get it, its use is not recommended for production environments.
Core developers: time to work on documentation now- Are all your changes properly documented?
- Are they mentioned in What’s New?
- Did you notice other changes you know of to have insufficient documentation?
Some of the new major new features and changes in Python 3.13 are:
New features- A new and improved interactive interpreter, based on PyPy’s, featuring multi-line editing and color support, as well as colorized exception tracebacks.
- An experimental free-threaded build mode, which disables the Global Interpreter Lock, allowing threads to run more concurrently. The build mode is available as an experimental feature in the Windows and macOS installers as well.
- A preliminary, experimental JIT, providing the ground work for significant performance improvements.
- The locals() builtin function (and its C equivalent) now has well-defined semantics when mutating the returned mapping, which allows debuggers to operate more consistently.
- A modified version of mimalloc is now included, optional but enabled by default if supported by the platform, and required for the free-threaded build mode.
- Docstrings now have their leading indentation stripped, reducing memory use and the size of .pyc files. (Most tools handling docstrings already strip leading indentation.)
- The dbm module has a new dbm.sqlite3 backend that is used by default when creating new files.
- The minimum supported macOS version was changed from 10.9 to 10.13 (High Sierra). Older macOS versions will not be supported going forward.
- WASI is now a Tier 2 supported platform. Emscripten is no longer an officially supported platform (but Pyodide continues to support Emscripten).
- iOS is now a Tier 3 supported platform
- Android is now a Tier 3 supported platform as well.
- Support for type defaults in type parameters.
- A new type narrowing annotation, typing.TypeIs.
- A new annotation for read-only items in TypeDicts.
- A new annotation for marking deprecations in the type system.
- PEP 594 (Removing dead batteries from the standard library) scheduled removals of many deprecated modules: aifc, audioop, chunk, cgi, cgitb, crypt, imghdr, mailcap, msilib, nis, nntplib, ossaudiodev, pipes, sndhdr, spwd, sunau, telnetlib, uu, xdrlib, lib2to3.
- Many other removals of deprecated classes, functions and methods in various standard library modules.
- C API removals and deprecations. (Some removals present in alpha 1 were reverted in alpha 2, as the removals were deemed too disruptive at this time.)
- New deprecations, most of which are scheduled for removal from Python 3.15 or 3.16.
(Hey, fellow core developer, if a feature you find important is missing from this list, let Thomas know.)
For more details on the changes to Python 3.13, see What’s new in Python 3.13. The next release of Python 3.13 will be the official 3.13.0 release, currently scheduled for Monday, 2024-10-07.
More resources- Online Documentation
- PEP 719, 3.13 Release Schedule
- Report bugs at Issues · python/cpython · GitHub.
- Help fund Python directly (or via GitHub Sponsors), and support the Python community.
Thanks to all of the many volunteers who help make Python Development and these releases possible! Please consider supporting our efforts by volunteering yourself or through organization contributions to the Python Software Foundation.
Your release team,
Thomas Wouters
Łukasz Langa
Ned Deily
Steve Dower
Real Python: Quiz: When to Use a List Comprehension in Python
In this quiz, you’ll test your understanding of List Comprehension in Python.
By working through this quiz, you’ll revisit how to rewrite loops as list comprehensions, how to choose when to use list comprehensions, how you can use conditional logic in your comprehensions, and how to profile your code to resolve performance questions.
[ Improve Your Python With 🐍 Python Tricks 💌 – Get a short & sweet Python Trick delivered to your inbox every couple of days. >> Click here to learn more and see examples ]
1xINTERNET blog: DrupalCon Barcelona - A seminal moment in Drupal’s history
DrupalCon is the biannual conference where leaders in Drupal gather to coordinate, collaborate and present the latest developments in digital and web technologies. This week 1xINTERNET attended DrupalCon Barcelona in full force. But this conference was like none before it, this was Starshots World Premier and it exceeded all expectations.
Pages
Recent Publications
- Managing Hidden Dependencies in OO Software: a Study Based on Open Source Projects
- Open Source Communities as Liminal Ecosystems
- Investigating developers' email discussions during decision-making in Python language evolution
- Developers, Quality Control and Download Volume in Open Source Software (OSS) Projects
FLOSS Project Planets
FLOSS Research
- Give Your Input on the State of Open Source Survey
- Open Data and Open Source AI: Charting a course to get more of both
- The Open Source Initiative and the Eclipse Foundation to Collaborate on Shaping Open Source AI (OSAI) Public Policy
- ClearlyDefined v2.0 adds support for LicenseRefs
- ClearlyDefined at SOSS Fusion 2024: a collaborative solution to Open Source license compliance