
FLOSS Project Planets
Thomas Lange: Using NIS (Network Information Service) in 2024
The topic of this posting already tells you that an old Unix guy tells stories about old techniques.
I'm a happy NIS (formerly YP) user since 30+ years. I started using it with SunOS 4.0, later using it with Solaris and with Linux since 1999.
In the past, a colleague wasn't happyly using NIS+ when he couldn't log in as root after a short time because of some well known bugs and wrong configs. NIS+ was also much slower than my NIS setup. I know organisations using NIS for more than 80.000 user accounts in 2024.
I know the security implications of NIS but I can live with them, because I manage all computers in the network that have access to the NIS maps. And NIS on Linux offers to use shadow maps, which are only accessible to the root account. My users are forced to use very long passwords.
Unfortunately NIS support for the PAM modules was removed in Debian in pam 1.4.0-13, which means Debian 12 (bookworm) is lacking NIS support in PAM, but otherwise it is still supported. This only affects changing the NIS password via passwd. You can still authenticate users and use other NIS maps.
But yppasswd is deprecated and you should not use it! If you use yppasswd it may generate a new password hash by using the old DES crypt algorithm, which is very weak and only uses the first 8 chars in your password. Do not use yppasswd any more! yppasswd only detects DES, MD5, SHA256 and SHA512 hashes, but for me and some colleagues it only creates weak DES hashes after a password change. yescrypt hashes which are the default in Debian 12 are not supported at all. The solution is to use the plain passwd program.
On the NIS master, you should setup your NIS configuration to use /etc/shadow and /etc/passwd even if your other NIS maps are in /var/yp/src or similar. Make sure to have these lines in your /var/yp/Makefile:
PASSWD = /etc/passwd SHADOW = /etc/shadowCall make once, and it will generate the shadow and passwd map. You may want to set the variable MINUID which defines which entries are not put into the NIS maps.
On all NIS clients you still need the entries (for passwd, shadow, group,...) that point to the nis service. E.g.:
passwd: files nis systemd group: files nis systemd shadow: files nisYou can remove all occurences of "nis" in your /etc/pam.d/common-password file.
Then you can use the plain passwd program to change your password on the NIS master. But this does not call make in /var/yp for updating the NIS shadow map.
Let's use inotify(7) for that. First, create a small shell script /usr/local/sbin/shadow-change:
#! /bin/sh PATH=/usr/sbin:/usr/bin # only watch the /etc/shadow file if [ "$2" != "shadow" ]; then exit 0 fi cd /var/yp || exit 3 sleep 2 makeThen install the package incron.
# apt install incron # echo root >> /etc/incron.allow # incrontab -eAdd this line:
/etc IN_MOVED_TO /usr/local/sbin/shadow-change $@ $# $%It's not possible to use IN_MODIFY or watch other events on /etc/shadow directly, because the passwd command creates a /etc/nshadow file, deletes /etc/shadow and then moves nshadow to shadow. inotify on a file does not work after the file was removed.
You can see the logs from incrond by using:
# journalctl _COMM=incrond e.g. Oct 01 12:21:56 kueppers incrond[6588]: starting service (version 0.5.12, built on Jan 27 2023 23:08:49) Oct 01 13:43:55 kueppers incrond[6589]: table for user root created, loading Oct 01 13:45:42 kueppers incrond[6589]: PATH (/etc) FILE (shadow) EVENT (IN_MOVED_TO) Oct 01 13:45:42 kueppers incrond[6589]: (root) CMD ( /usr/local/sbin/shadow-change /etc shadow IN_MOVED_TO)I've disabled the execution of yppasswd using dpkg-divert
# dpkg-divert --local --rename --divert /usr/bin/yppasswd-disable /usr/bin/yppasswd chmod a-rwx /usr/bin/yppasswd-disableDo not forget to limit the access to the shadow.byname map in ypserv.conf and general access to NIS in ypserv.securenets.
I've also discovered the package pamtester, which is a nice package for testing your pam configs.
Real Python: The Real Python Podcast – Episode #227: New PEPs: Template Strings & External Wheel Hosting
Have you wanted the flexibility of f-strings but need safety checks in place? What if you could have deferred evaluation for logging or avoiding injection attacks? Christopher Trudeau is back on the show this week, bringing another batch of PyCoder's Weekly articles and projects.
[ Improve Your Python With 🐍 Python Tricks 💌 – Get a short & sweet Python Trick delivered to your inbox every couple of days. >> Click here to learn more and see examples ]
Droptica: 7 Sessions to Attend at DrupalCamp Berlin 2024 - a Subjective Overview
DrupalCamp Berlin 2024 has officially started! More than 200 Drupal enthusiasts are gathering at the atmospheric Alte Münze in the heart of Berlin to explore the latest trends and share insights. Our CEO, Grzegorz Bartman, is representing Droptica there. To mark the occasion, we've teamed up with our developers to curate a handpicked list of seven sessions from the event program that are well worth attending during this two-day gathering.
PyBites: A Practical Example of the Pipeline Pattern in Python
The Pipeline design pattern (also known as Chain of Command pattern) is a flexible way to handle a sequence of actions, where each handler in the chain processes the input data and passes it to the next handler. This pattern is commonly used in scenarios involving data processing, web scraping, or middleware systems.
In this blog post, I’ll walk you through a specific example that leverages Python’s powerful functools.reduce and partial functions, along with the BeautifulSoup library for parsing HTML content. This code showcases the Pipeline pattern applied to HTML table extraction and processing.
What Does the Code Do?The code defines a pipeline of data parsing steps for extracting and cleaning tables from an HTML file. It follows a functional programming approach to compose several processing functions into a unified flow using the Chain of Command pattern.
Key Concepts- Functional Composition: Combining multiple functions into one that executes in a specific order.
- Data Parsing Pipeline: Sequential processing of HTML content into structured data (a DataFrame).
- Error Handling: Ensuring the pipeline gracefully handles missing or malformed data.
Let’s break down the code step by step:
1. Function Composition with composefrom functools import reduce, partial from typing import CallableThe pipeline is created by composing multiple parsing functions into a single unified function. The compose function uses reduce to chain these functions together:
def compose(*functions: ParsingPipeline) -> ParsingPipeline: """Composes functions into a single function""" return reduce(lambda f, g: lambda x: g(f(x)), functions, lambda x: x)This allows you to define an ordered flow of operations that process input data from one function to the next. Each function modifies the input data, which is then passed down the pipeline.
2. Reading HTML ContentThe first step in the pipeline is to read the contents of an HTML file. This is done by read_htm_from:
def read_htm_from(filename: T, mode: T = "r", encoding: T = "utf-8") -> T: with open(filename, mode, encoding=encoding) as file: html_content = file.read() return html_contentThis function opens an HTML file and returns its content as a string. It supports different file modes and encodings, making it flexible for various file formats.
Note that T is defined here as TypeVar("T"), see the typing docs.
3. Parsing the HTML TableNext, read_table_from uses BeautifulSoup to find the HTML table within the file:
from bs4 import BeautifulSoup def read_table_from(htm_file: T, parser: str = "html.parser") -> T: soup = BeautifulSoup(htm_file, parser) table = soup.find("table") return tableThis function converts the HTML content into a BeautifulSoup object and extracts the first table it finds. The parsed table is passed down the pipeline for further processing.
4. Extracting Rows and DataOnce the table is identified, the pipeline extracts the rows and applies filtering logic based on custom markers:
def extract_row_data_from( table_rows: T, start_markers: T, continue_markers: T, end_markers: T ) -> T: row_data: T = [] start_processing = False for row in table_rows: if any(marker in row.text for marker in start_markers) and not start_processing: start_processing = True continue if start_processing: if any(marker in row.text for marker in continue_markers): continue if any(marker in row.text for marker in end_markers): break row_data.append(row) return row_data[:-1]This function inspects each row in the table, checking if the row text matches specified start, continue, or end markers. Data extraction begins after encountering the start marker and ends when the end marker is found.
5. Converting Rows to DataFrameThe next steps involve transforming the extracted row data into a structured pandas DataFrame. First, the rows are separated into individual columns using separate_columns_in:
def separate_columns_in(rows: T) -> T: data_rows: T = [] try: for row in rows: columns = row.find_all(["td", "th"]) data = [col.text for col in columns] data_rows.append(data) return data_rows except Exception as e: print(f"An error occurred: {str(e)}") return []Then, convert_to_dataframe reshapes this data into a pandas DataFrame:
def convert_to_dataframe(data_rows: T) -> T: df = pd.DataFrame(data_rows) df = df.rename(columns=df.iloc[0]).drop(df.index[0]) df.columns = COLUMN_NAMES df.drop(columns=COLUMNS_TO_REMOVE, axis=1, inplace=True) df.set_index(df.columns[0], inplace=True, drop=True) return dfThe DataFrame is cleaned up by renaming columns, removing unnecessary columns, and setting the correct index.
6. Assigning Correct Data TypesFinally, assign_correct_data_type_to ensures that the DataFrame columns have the appropriate data types:
def assign_correct_data_type_to( df: T, dict_types: dict[str, str] = COLUMN_TYPES, datetime_columns: list[str] = DATETIME_COLUMN_NAMES, ) -> T: if not isinstance(df, pd.DataFrame): raise ValueError("Input `df` must be a pandas DataFrame.") df = df.copy() for column in datetime_columns: if column in df.columns: df[column] = pd.to_datetime(df[column]) for column, col_type in dict_types.items(): if column in df.columns: try: if col_type == "numeric": df[column] = pd.to_numeric(df[column], errors="coerce") else: df[column].astype(col_type) except Exception as e: print(f"Error converting column {column} to {col_type}: {e}") return dfThis function converts columns into numeric or datetime formats as needed, ensuring that the data is properly structured for analysis.
7. Putting It All TogetherAt the end of the code, the pipeline is composed by chaining all of the above functions together:
parse_gbx_bt: ParsingPipeline = compose( partial(read_htm_from, mode="r", encoding="utf-8"), read_table_from, read_rows_from, partial( extract_row_data_from, start_markers=["Closed Transactions:"], continue_markers=["Genbox", "balance", "Deposit"], end_markers=["Closed P/L:"], ), separate_columns_in, convert_to_dataframe, assign_correct_data_type_to, )This creates a fully automated pipeline that:
- Reads an HTML file.
- Extracts table data.
- Cleans and converts the data into a pandas DataFrame.
- Assigns the correct data types.
This implementation of the Chain of Command or Pipeline pattern in Python demonstrates how to apply functional programming principles to data parsing tasks. The use of functools.reduce and partial, and BeautifulSoup provides a flexible, reusable way to process HTML content and structure it into usable data.
If you’re looking to create complex data processing pipelines that need to handle dynamic data from HTML or other sources, this approach is a clean and maintainable solution.
You can find the code in the repo: https://github.com/jjeg1979/pyBacktestAnalyzer.
And if you want to watch the code clinic where I presented the tool, feel free to check it out at https://pybites.circle.so/c/circle-coaching-calls/python-for-the-trader-code-clinic.
If you cannot access…well, what are you waiting for to become a PDM member?
Drupal life hack's: Exposing External and Custom Data to Views with hook_views_data()
Freexian Collaborators: Debian Contributions: October’s report (by Anupa Ann Joseph)
Contributing to Debian is part of Freexian’s mission. This article covers the latest achievements of Freexian and their collaborators. All of this is made possible by organizations subscribing to our Long Term Support contracts and consulting services.
rebootstrap, by Helmut GrohneAfter significant changes earlier this year, the state of architecture cross bootstrap is normalizing again. More and more architectures manage to complete rebootstrap testing successfully again. Here are two examples of what kind of issues the bootstrap testing identifies.
At some point, libpng1.6 would fail to cross build on musl architectures whereas it would succeed on other ones failing to locate zlib. Adding --debug-find to the cmake invocation eventually revealed that it would fail to search in /usr/lib/<triplet>, which is the default library path. This turned out to be a bug in cmake assuming that all linux systems use glibc. libpng1.6 also gained a baseline violation for powerpc and ppc64 by enabling the use of AltiVec there.
The newt package would fail to cross build for many 32-bit architectures whereas it would succeed for armel and armhf due to -Wincompatible-pointer-types. It turns out that this flag was turned into -Werror and it was compiling with a warning earlier. The actual problem is a difference in signedness between wchar_t and FriBidChar (aka uint32_t) and actually affects native building on i386.
Miscellaneous contributions- Helmut sent 35 patches for cross build failures.
- Stefano Rivera uploaded the Python 3.13.0 final release.
- Stefano continued to rebuild Python packages with C extensions using Python 3.13, to catch compatibility issues before the 3.13-add transition starts.
- Stefano uploaded new versions of a handful of Python packages, including: dh-python, objgraph, python-mitogen, python-truststore, and python-virtualenv.
- Stefano packaged a new release of mkdocs-macros-plugin, which required packaging a new Python package for Debian, python-super-collections (now in NEW review).
- Stefano helped the mini-DebConf Online Brazil get video infrastructure up and running for the event. Unfortunately, Debian’s online-DebConf setup has bitrotted over the last couple of years, and it eventually required new temporary Jitsi and Jibri instances.
- Colin Watson fixed a number of autopkgtest failures to get ansible back into testing.
- Colin fixed an ssh client failure in certain cases when using GSS-API key exchange, and added an integration test to ensure this doesn’t regress in future.
- Colin worked on the Python 3.13 transition, fixing problems related to it in 15 packages. This included upstream work in a number of packages (postgresfixture, python-asyncssh, python-wadllib).
- Colin upgraded 41 Python packages to new upstream versions.
- Carles improved po-debconf-manager: now it can create merge requests to Salsa automatically (created 17, new batch coming this month), imported almost all the packages with debconf translation templates whose VCS is Salsa (currently 449 imported), added statistics per package and language, improved command line interface options. Performed user support fixing different issues. Also prepared an abstract for the talk at MiniDebConf Toulouse.
- Santiago Ruano Rincón continued the organization work for the DebConf 25 conference, to be held in Brest, France. Part of the work relates to the initial edits of the sponsoring brochure. Thanks to Benjamin Somers who finalized the French and English versions.
- Raphaël forwarded a couple of zim and hamster bugs to the upstream developers, and tried to diagnose a delayed startup of gdm on his laptop (cf #1085633).
- On behalf of the Debian Publicity Team, Anupa interviewed 7 women from the Debian community, old and new contributors. The interview was published in Bits from Debian.
Reproducible Builds (diffoscope): diffoscope 283 released
The diffoscope maintainers are pleased to announce the release of diffoscope version 283. This version includes the following changes:
[ Martin Abente Lahaye ] * Fix crash when objdump is missing when checking .EFI files.You find out more by visiting the project homepage.
Armin Ronacher: What if My Tribe Is Wrong?
I wrote in the past about how I'm a pessimist that strives for positive outcomes. One of the things that I gradually learned is is wishing others to succeed. That is something that took me a long time to learn. I did not see the value in positive towards other people's success, but there is. There is one thing to be sceptical to a project or initiative, but you can still encourage the other person and wish them well.
I think not wishing others well is a coping mechanism of sorts. For sure it was for me. As you become more successful in life, it becomes easier to be supportive, because you have established yourself in one way or another and you feel more secure about yourself.
That said, there is something I continue to struggle with, and that are morals. What if the thing the other person is doing seems morally wrong to me? I believe that much of this struggle stems from the fear of feeling complicit in another's choices. Supporting someone — even passively — can feel like tacit approval, and that can be unsettling. Perhaps encouragement doesn't need to imply agreement. Another angle to consider is that my discomfort may actually stem from my own insecurities and doubts. When someone's path contradicts my values, it can make me question my own choices. This reaction often makes it hard to wish them well, even when deep down I want to.
What if my tribe is just wrong on something? I grew up with the idea of “never again”. Anything that remotely looks like fascism really triggers me. There is a well known propaganda film from the US Army called “Don't Be a Sucker” which warns Americans about the dangers of prejudice, discrimination, and fascist rhetoric. I watched this a few times over the years and it still makes me wonder how people can fall for that kind of rhetoric.
But is it really all that hard? Isn't that happening today again? I have a very hard time supporting what Trump or Musk are standing for or people that align with them. Trump's rhetoric and plans are counter to everything I stand for and the remind me a lot of that film. It's even harder for me with Musk. His morals are completely off, he seems to a person I would not want to be friends with, yet he's successful and he's pushing humanity forward.
It's challenging to reconcile my strong opposition to their (and other's) rhetoric and policies with the need to maintain a nuanced view of them. Neither are “literal Hitler”. Equating them with the most extreme historical figures oversimplifies the situation and shuts down productive conversation.
Particularly watching comedy shows reducing Trump to a caricature feels wrong to me. Plenty of his supporters have genuine concerns. I find it very hard to engage with these complexities and it's deeply uncomfortable and quite frankly exhausting.
Life becomes simpler when you just pick a side, but it will strip away the deeper understanding and nuance I want to hold onto. I don’t want to fall into the trap of justifying or defending behaviors I fundamentally disagree with, nor do I want to completely shut out the perspectives of those who support him. This means accepting that people I engage with, might see things very differently, and that maintaining those relationships and wishing them well them requires a level of tolerance I'm not sure I possess yet.
The reason it's particularly hard to me that even if I accept that my tribe maybe wrong in parts, I can see the effects that Trump and others already had on individuals. Think of the Muslim travel ban which kept families apart for years, his border family separation policy, the attempted repeal of Section 230. Some of it was not him, but people he aligned with. Things like the overturning of Roe v. Wade and the effects it had on women, the book bans in Florida, etc. Yes, not quite Hitler, but still deeply problematic for personal freedoms. So I can't ignore the harm that some of these policies have caused in the past and even if I take the most favorable view of him, I have that track record to hold against him.
In the end where does that leave me? Listening, understanding, and standing firm in my values. But not kissing the ring. And probably coping by writing more.
Michael Foord: Current Generative AI and the Future
I’ve seen this meme a bunch of times recently. I always reply; what is asserted without evidence may be dismissed without consideration.
Current Gen AI is flawed by hallucination issues, mired in copyright controversy, expensive to run and lacking clear use cases. (Although it’s pretty good at code generation). It’s a massive hype train.
Gen AI, as it is now, was made possible by the invention of “Transformer Architecture” by Google in 2017. We’re seeing fast paced change and development, but all built on that technology.
At some point another quantum breakthrough will change things all over again - and make another step towards AGI. Although it will take several such steps, and order of magnitudes larger models (and multi models), to create anything resembling true AI.
So a huge number of disparate individuals, institutions, governments and companies are pursuing the development of AI. There’s no single cohesive agenda behind it. As new technologies arise we adapt to them, find uses for them, and everyone pursues their agendas with them.
Not particularly special to AI I don’t think.
Michael Foord: Python Metaclasses in Eight Words
Python metaclasses, considered advanced programming and Python “black magick” (*) explained in eight words:
The type of a class is a class.
Here’s what knowledge of Object Oriented theory and type systems permit you to deduce from this:
Using the word “class”, instead of “the type of a class is type” or even “the type of a class is a type, classes are types”, implies that a user defined class can be a metaclass. This is indeed the case, and the point of metaclasses in Python.
The type is responsible for creating new instances. So if the type of a class is a class then we can write classes that create classes. Indeed this is the primary usecase for metaclasses.
(Deeper knowledge of Python, and the two phase object creation protocol, may lead you to deduce that this is done by overriding the __new__ method. If you’re familiar with “type” as a class factory you can probably even guess the signature and that you must inherit from type.)
If the type of a class is a class then the type system will permit a type check for the class against its class. And indeed isinstance(klass, metaclass) returns true.
(And deeper knowledge of Python will tell you that the magic methods, the protocol methods, are always looked up on the type. So we can implement behaviour for class objects by providing magic methods on the metaclass.)
All of this implies that classes are themselves objects. Which is true in Python for everything is an object in Python (and everything is a reference).
And so on…
- Type and class are synonyms in Python.
- type(type) is type
And to further round out the type system, these are also Python invariants:
- isinstance(object, object) is True # object is an object
- isinstance(object, type) is True # but also a type
- isinstance(type, object) is True # type is an object
- isinstance(type, type) is True # but also a type
(*) Like all black magick it is useful for understanding the world but never for actual use. Well, except perhaps in very rare circumstances if you know what you’re doing.
Michael Foord: Some Personal History with Python
📘 Written in 2021.
IronPython in Action was published on the 7th April 2009 and we sold a little over 7000 copies.
Royalties for last quarter amounted to $25.
It took me two years to write thirteen chapters and a couple of appendices, and took Christian Muirhead about the same to write two chapters and an appendix. Jonathan Hartley did the diagrams and illustrations and the worst part was compiling the index.
It took so long because IronPython was still in alpha (!) when we started and it changed several times (including a Silverlight version being released) whilst writing!
After leaving Resolver Systems in 2010 I spent a year contracting on Line of Business apps that ran in Silverlight (Django on the server): Python code running in the browser on the client side. It was glorious.
We even had functional tests on unittest built in to the app.
Work on mock accelerated massively once IronPython in Action was complete. MagickMock was born not long afterwards.
I was also helping maintain the python.org website and adding test discovery to unittest at the time, and speaking at every conference I could find.
It felt like the glory days of the Python community. It’s almost time for PyCon (online) and I’m nostalgic once again.
My first PyCon, the second Dallas PyCon and my first time in the US, there were about 600 attendees. You could almost know everyone.
I shaved my beard to enter Dallas and wore my hair in a pony tail. All I knew was they didn’t like hippies there. It was the nicest greeting at a US airport I’ve ever had.
I went on a road trip with Andrzej Krzywda afterwards trying to find mountains. We found the Ouchita mountains in Oaklahoma and drove back through Arkansas to visit friends of mine in Houston. Along the peaks of the mountains, which are hills really, we found a view called Dead Man’s Vista and we I laughed together at Microsoft.
Not long after this the web explosion happened and Django happened, google adopted Python as an official language and the community started to explode and grow.
That was even before Python became huge as a teaching language and before Python exploded in data science too.
I once paired with Jacob Kaplan Moss at a PyCon sprint and fixed some issue by adding a metaclass to the Django codebase. Which he never committed and found a better way.
That’s the closest I’ve come to deploying a metaclass I think, although I’ve removed a few in my time.
I knew Python had “made it” as a language when one bag stuffing pre-PyCon I met someone who didn’t want to be there. He’d been sent by work. Before that Python was obscure, and only people who really loved it went to PyCon. Which I’m convinced is the secret of Python’s success.
It was built by passion not by money. For the sheer love and the joy of building something beautiful with other people.
I was a Mac user then and had a running joke with Jonathan Hartley about Linux and projectors.
One time he plugged his laptop into the projector prior to his PyCon talk (Testing is a Silver Bullet), tried to fix the x-config from the terminal and rendered his laptop unusable. He did the presentation on mine. The next year Mark Shuttleworth did a keynote talk at PyCon and running some bleeding edge version of Ubuntu also couldn’t plug it into the projector system. Hilarity on my part.
The biggest conference I ever spoke at was a Microsoft one in Brighton where they demoed Silverlight and I demoed IronPython on Silverlight. They didn’t tell me I would be on main stage in front of a few thousand Microsoft devs. I was used to talking to a few hundred at a time!
I had a slide deck built from S5 with reStructured Text markup and a Far Side slide mocking static typing. Which went down a bomb to an audience of C# devs. I still managed, by coincidence, to demo almost the same features of Silverlight as Microsoft bigwig Scott Hanselman who did the keynote.
It was an “interesting experience”, evangelising Python and dynamic languages in “the heart of the beast” as it were. Microsoft went on to step up their involvement with Python and sincere Open Source commitments which they’ve maintained since.
Since I first wrote this Python has finally made it, ranked as the most widely used programming language in the world by TIOBE and PyPL. World number one.
I joined Twitter fourteen years ago and have tweeted over fifty-two thousand times. I follow 1,636 accounts, which is too many, and have 8,670 followers. I use Tweetdeck which is run by Twitter and doesn’t show ads or promoted tweets or mess with tweet order and it lets me use two different accounts.
I use twitter a lot less than I did during my social media and community frenzy whilst I delighted to learn Python, but I still enjoy it.
During that time (2006-2011) I “drank from the firehose”. I read all of slashdot (scanned every headline and read relevant articles), read all of comp.lang.python (every message title - read and replied to many), read all of python-dev (similarly) and all of testing-in-python, blogged almost daily and worked full time as a software engineer commuting to London four times a week and developed mock in my spare time and worked on unittest in the Python standard library. And wrote a book and worked part time doing community liaison and service development for a local charity working with the homeless and disadvantaged. I was Microsoft MVP for three years for my work with IronPython, I spoke at countless conferences and received the Python Software Foundation Community Award for my work running Planet Python and helping out with the Python.org website and mailing infrastructure.
Then in 2011 my first child was born and I started working for Canonical. Three years of large Django web applications then three years of Go and MongoDB and then a year with Red Hat testing Ansible Tower and now four years self employed.
During that time I remembered that the primary drive in my life was spiritual and I started meditating again. One hour a day of mindfulness of breathing. That transformed my life all over again.
I once rode in the back of a beaten up station wagon owned and operated by the creator of the Python programming language whilst sat alongside the creator of Bitorrent, which was written in Python.
I also once had a pub lunch in Oxford with the creator of the Erlang programming language and the creator of the Haskell programming language. We were all three speaking at the ACCU conference. I was speaking on IronPython.
It’s been a fun journey.
Desktop icons are surprisingly hard!
I spent past three weeks working on refactoring and fixing legacy code (the oldest of which was from 2013) that handled positioning Plasma desktop icons, and how this data was saved and loaded.
Here's the merge request if you're curious: plasma-desktop: Refactor icon positioner saving and loading
The existing code worked sometimes, but there were some oddities like race conditions (icon positioning happens in weird order) and backend code mixed in with frontend code.
Now I am not blaming anyone for this. Code has tendency to get a bit weird, especially over long periods of time, and especially in open source projects where anyone can tinker with it.
You know how wired earbuds always, always get tangled when you place them in a drawer or your pocket or something for few seconds? Codebases do the exact same thing, when there are multiple people writing on things, fixing each others' bugs. Everyone has a different way of thinking, so it's only natural that things over time get a bit tangled up.
So sometimes you need someone to look at the tangled codebase and try to clear it up a bit.
Reading code is the hardest partWhen going through old code, especially some that has barely any comments, it can take a very long time to understand what is actually going on. I honestly spent most of my time trying to understand how the thing even works, what is called when, where the icons positions are updated, and so on.
When I finally had some understanding of what was happening, I could start cleaning things up. I renamed a lot of the old methods to be hopefully more descriptive, and moved backend code — like saving icon positions — from the frontend back to backend.
Screens and iconsEvery screen (PC monitor, TV…) tends to have it's own quirks. Some, when connected with display-port adapter, tell your PC it's disconnected if your PC goes to screen saving mode. Some stay connected, but show a blank screen.
One big issue with the icon positions was that when screen got turned off, it thought there was no screen anymore and started removing items from the desktop.
That's fair. Why show desktop icons on a screen that is non-existent? But when you have a monitor that tells your PC, "Okay I'm disconnecting now!" when the PC says it's time to sleep, wrong things would happen.
This condition is now handled by having a check that if the screen is in use or not. Now when screen is not in use, we just do nothing with the icons. No need to touch them at all.
Stripes and screen resolutionOur icon positioning algorithm uses something called "stripes."
Every resolution has it's amount of stripes. Stripes contain an array of icons, or blank spots.
So if your screen resolution is, let's say, 1920x1080, we calculate how many stripes and how many items per stripe will fit on that screen.
Stripe1: 1 2 3 4 5 6 7 Stripe2: 1 2 3 4 5 6 7 Stripe3: 1 2 3 4 5 6 7 And so on..But when you change your screen resolution or scale factor, how many icon stripes you have and how many icons fit on each stripe will change.
So if you have one of those screens that looks to the system like it's been unplugged when it goes into sleep mode, previously the stripe amount would change to 1 row, 1 column. And the icon positioner would panics and shove all icons in that 1,1 slot.
Then when you'd turn the screen back on, the icon positioner would wonder what just happened and restore the proper stripe number and size. But by that point it would have lost all our positioning coordinate data during the shoving of icons in that one miniscule place, so instead it would reset the icon positions… and this leaves users wondering why their desktop icon arrangement is now gone.
Here we have to also check for the screen being in use or not. But there were other problems.
Saving icon positionsThe prior code saved the icon positions every time the positions changed. Makes sense.
But it didn't account for the screen being off… so the icon positions would get saved while the desktop was in a faulty state. This also causes frustration because someone arranges the icons how they wish, but then screen does something weird and they're now saved in wrong places again.
Our icon positions were updated after almost every draw call, if the positions changed. So this would mean the saving would happen rather often and no matter what moved them.
We had to separate the user action from computer action. If computer moves the icons, we ideally do not save their positions, unless something drastic has happened like resolution change.
The icon positions are saved per resolution, so if you move icons around while they're displayed on a 3440x1440 screen and then change the resolution to 1920x1080, both will have their own arrangements. This part of the codebase did not previously work, and it would always override the old configuration, which caused headache.
So now we only save icon positions when:
- The user adds or removes a desktop icon
- The user moves a desktop icon
- The user changes the desktop resolution
This makes the icon position saving much less random, since it's done only after explicit user actions.
Margin errorsThe last thing that caused headaches with the icon positioning was that the area available on the desktop for icons was determined before panels were loaded. When the panels loaded, they would reduce the amount of space for desktop icons, and that area would constantly resize until everything is ready.
In previous code, this would cause icons to move, which updates positions, which then saves their positions.
So let's say you arrange your icons nicely, but the next time you boot into plasma, your panels start shoving the poor icon area around and the icons have to move out of the way… and now they're all in the wrong places.
This was already partially fixed by not saving when the computer moves the icons around: we just load the icon positions when the screen is in use and we are done with listing the icons on the desktop. Part of the margin changes happen when screen is off.
We still need to fix the loading part; ideally we load the icon area last, so that it gets the margins it expects and doesn't shuffle around while panels are still appearing. But it was out of scope for this merge request.
ConclusionsIt may not sound like much, but this was a lot of work. I spent days just thinking about this problem, trying to understand what is happening now and how to improve it.
Luckily with a lot of help from reviewers and testers I got things to work much better than it used to. I am quite "all-over-the-place" when I solve problems so I appreciate the patience they had with me and my questions. :D
What I mostly wished for when working on this were more inline code comments. You don't need to comment the obvious things, but everything else could use something. It's hard to gauge what is obvious and what is not, but that kind of answers the question: If you don't know if it's obvious or not, it's likely not, so add some comment about it.
I do hope that the desktop icons act more reliably after all these changes. If you spot bugs, do report them at https://bugs.kde.org.
Thanks for reading! :)
PS. The funniest thing to me about all of this is that I do not like having any icons on my desktop. :'D
KDE Ships Frameworks 6.8.0
Friday, 8 November 2024
KDE today announces the release of KDE Frameworks 6.8.0.
KDE Frameworks are 72 addon libraries to Qt which provide a wide variety of commonly needed functionality in mature, peer reviewed and well tested libraries with friendly licensing terms. For an introduction see the KDE Frameworks release announcement.
This release is part of a series of planned monthly releases making improvements available to developers in a quick and predictable manner.
New in this version Baloo Bluez Qt- Simplify PendingCallPrivate. Commit.
- Add mimetype icons for text/x-typst. Commit.
- Monochromize not-explicitly-colorized symbolic folder icons. Commit. Fixes bug #494721
- Add CI for static builds on Linux. Commit.
- Unify common parts of index.theme for breeze and breeze-dark. Commit.
- Sync index.theme changes from breeze to breeze-dark. Commit. Fixes bug #494399
- Rename spinbox-* icons to value-*. Commit.
- FindKF6: Print custom message when required components are not found. Commit.
- Add a directory check when appending a module dir to qmlimportscanner. Commit.
- Add Python bindings. Commit.
- Break enums onto multiple lines. Commit.
- Set import paths for QML modules to all CMake search paths. Commit.
- Remove the old/unused SIP-based Python binding generation infrastructure. Commit.
- ECMGeneratePkgConfigFile: try to deduce additional include dirs. Commit.
- Fix custom definitions for generated pkgconfig files. Commit.
- Fix QM loader unit tests with a static Qt. Commit.
- Don't fall back to qmlplugin dump on static Qt builds. Commit.
- Retire Qt5 Android CI. Commit.
- Automatically install dependent targets of QML modules in static builds. Commit.
- Allow to specify an export set for targets installed by finalize_qml_module. Commit.
- Don't check websites in Appstream tests. Commit.
- Fix Duration's operator- accidentally adding instead of subtracting. Commit.
- Add CI for static builds on Linux. Commit.
- Fix compilation with Qt 6.9 (dev). Commit.
- Add test for passing unknown codec to codecForName. Commit.
- Fix buffer overflow in Codec::codecForName. Commit.
- Reset palette to default-constructed one when scheme is unset. Commit.
- Don't call activateSchemeInternal in init unless really needed. Commit.
- Add CI for static builds on Linux. Commit.
- Add linux-qt6-static CI. Commit.
- Kwindowconfig: If sizes are same as default, revert them to default when saving. Commit. See bug #494377
- Add CI for static builds on Linux. Commit.
- Correctly install QML module in a static build. Commit.
- Add CI for static builds on Linux. Commit.
- Fix IM protocol resource data initialization in static builds. Commit.
- Make KJob::elapsedTime const. Commit.
- Fix absolute path generation into (not installed) header. Commit.
- KPluginMetaData: reduce string allocation. Commit.
- Update git blame ignore file. Commit.
- Reformat code with clang-format. Commit.
- Kjob: add elapsedTime() returns the ms the job ran. Commit.
- Add CI for static builds on Linux. Commit.
- Install QML module correctly when building statically. Commit.
- ExportUrlsToPortal: use QScopeGuard::dismiss for the success code path. Commit.
- Upload new file sq.xml. Commit.
- UserMetadata: complete Windows implementation. Commit.
- Add WITH_X11 option to re-enable X11 code after runtime cleanup. Commit.
- Add CI for static builds on Linux. Commit.
- Add namespace for Android as required by newer gradle versions. Commit.
- Add CI for static builds on Linux. Commit.
- Correctly install static QML modules. Commit.
- Fix misunderstanding of All Saints Day in Swedish calendar. Commit.
- Add CI for static builds on Linux. Commit.
- Allow explicit setting of Python3 fallback executible path. Commit.
- Use raw pointer for some pimpl'd public classes. Commit.
- Add missing include. Commit.
- Trigger binding reevaluation on language change. Commit.
- Propagate QML dependency for a static build with KTranscript enabled. Commit.
- Add CI for static builds on Linux. Commit.
- Reduce temporary allocations. Commit.
- Modernize member initialization. Commit.
- Fix container size type narrowing warnings. Commit.
- Remove commented-out KLocale leftovers. Commit.
- Align argument names between definition and declaration. Commit.
- Re-evaluate the languages we translate to on QEvent::LanguageChange. Commit.
- Cleanup KLocalizedContext d-ptr handling. Commit.
- Special-case the language fallback for country-less English. Commit.
- Use QStringView for locale splitting. Commit.
- Port to KStandardActions. Commit.
- Postpone spawning KColorSchemeManager instance. Commit.
- Add CI for static builds on Linux. Commit.
- Init mimeType icons on demand. Commit.
- Set up KColorSchemeManager on Android as well. Commit.
- Reduce temporary allocations. Commit.
- TGA: Fixed GrayA image loading error. Commit.
- Exr: Fix read/write with openexr 3.3. Commit. Fixes bug #494571
- JXL improvements. Commit.
- JXR: Fixed image reading on sequential devices. Commit.
- Simplified read/verify header process. Commit.
- Minor: use existing variables which contain these strings. Commit.
- Fix crash from HTTPProtocol::del() which calls with inputData=nullptr. Commit.
- Port away from Qt::Core5Compat when using Qt 6.7 or newer. Commit.
- Remove unused KConfigWidgets dependency. Commit.
- Port to KStandardActions. Commit.
- Add missing KColorScheme link. Commit.
- Add missing include. Commit.
- Include DBus error in log when communication with kpasswdserver fails. Commit.
- Update git blame ignore file. Commit.
- Reformat code with clang-format. Commit.
- Copyjob/transferjob: use KJob::startElapsedTimer. Commit.
- Http worker: handle dav[s] protocol. Commit. Fixes bug #365356
- [KFileFilterCombo] Fix setting 'All' filter as default. Commit.
- KNewFileMenu: Prevent using home directory as template directory. Commit. Fixes bug #494679
- [KFileFilter] Ignore label when comparing filters. Commit.
- [KFileFilter] Remove excess spaces in logging. Commit.
- [KFileFilterCombo] More verbose logging when not finding a filter. Commit.
- [http] Inline handleRedirection into the metaDataChanged slot. Commit.
- [webdav] Handle redirections which add trailing slashes. Commit. See bug #484580
- Copyjob: prefer custom struct over std::pair. Commit.
- PreviewJob: use standard thumbnailer caching is disabled. Commit.
- KDirListerTest: improve test stability. Commit.
- Tests: Make sure KIO::UDSEntryList can be compared. Commit.
- Expose UDSEntry equal operator to KIO namespace. Commit.
- Core/copyjob: report speed when copying multiple files. Commit. See bug #391199
- KPreview: store standard thumbnails in /tmp subfolder. Commit.
- Preview: better clean after standard thumbnailer. Commit. Fixes bug #493274
- Openurljob.cpp: Avoid opening files in endless loop if mimetype is set to open with xdg-open. Commit. Fixes bug #494335
- [KFilePlacesView] Improve automatic resize heuristic. Commit. Fixes bug #449544
- Workerinterface: remove unused #include. Commit.
- Add translation context to admin security warning. Commit.
- Kfileitem: linkDest prevent readlink error when file is not a symlink. Commit.
- Check that admin worker was installed by root. Commit.
- Clean up Properties dialog to follow HIG, improve UX, remove frames and fix padding regression. Commit. Fixes bug #484789
- TrashSizeCache: Use correct flags for QDirIterator. Commit. See bug #479283
- TitleSubtitle: Don't explicit set renderType. Commit.
- Upper mound for overlaysheet width. Commit.
- SelectableLabel: fix a11y properties. Commit.
- Fix Kirigami Application (Qt6) template. Commit. Fixes bug #494478
- SelectableLabel: Use onPressedChanged. Commit. See bug #481293
- Reformat code with clang-format. Commit.
- Icon: Always respect the animated property. Commit. Fixes bug #466357
- Adjust tst_qicon for desktop theme. Commit.
- Fix loading desktop theme. Commit. Fixes bug #491294
- Fix presumable typos confusing background and foreground colors. Commit. See bug #491294
- Always print Theme file loading errors. Commit. See bug #491294
- SelectableLabel: override default padding values more completely. Commit. Fixes bug #495256
- Fix icon for positive state of InlineMessage. Commit.
- SelectableLabel: fix binding loop warning on cursorShape. Commit.
- ScrollablePage: Add properties to set if the scrollbars are interactive. Commit.
- SelectableLabel: use property alias instead of direct binding, expose more through aliases. Commit.
- Dialog: fix multiple binding loops (again). Commit.
- Make the close button actually close. Commit.
- Layout: Reverse the stacking order of items inserted into ToolBarLayout. Commit. See bug #490929
- Modify SelectableLabel to use TextEdit instead. Commit. See bug #493581
- Cleanup and fix static QML module installation. Commit.
- Disable PageRow gesture on android. Commit.
- Make OverlaySheet look exactly like Dialog. Commit. Fixes bug #489357
- Top align icon in multiline InlineMessage. Commit.
- Install QML module correctly when building statically. Commit.
- Fix QML unit tests when building against a static Qt. Commit.
- Make unit tests independent of QtWidgets. Commit.
- Don't hardcode library type. Commit.
- Kbihash: adapt to source incompatible change in Qt. Commit.
- Hide arrowButton in KWidgetJobTracker on startup. Commit.
- Add dedicated WITH_X11 option to avoid automagic. Commit.
- Make sure the action's dialog closes. Commit. Fixes bug #492998
- Put qnetworkreplys in a self-aborting unique_ptr. Commit. See bug #492998
- Parent the xml loader's httpjob. Commit. See bug #492998
- Filecopyworker: try to gracefully quit the thread. then terminate it. Commit. See bug #492998
- Typo--. Commit.
- Add namespace for Android as required by newer gradle. Commit.
- Add CI for static builds on Linux. Commit.
- Define undeprecated Capabilities key in JSON metadata, define JSON schema, remove obsolete key. Commit.
- Vi mode: Don't infinite loop in searcher. Commit.
- Remove unused var. Commit.
- Fix ignores. Commit.
- Less deprecated stuff used. Commit.
- Don't temporarily clear document URL during openUrl(). Commit.
- Only discard completion if the cursor was at the end of line. Commit.
- Update git blame ignore file. Commit.
- Reformat code with clang-format. Commit.
- Fix implicit conversion of Qt::Key in Qt 6.9. Commit.
- Try to avoid unwanted completions. Commit.
- Fix session restore of file type. Commit. Fixes bug #492201
- Make ViewPrivate::displayRangeChanged public. Commit.
- Set DocumentPrivate::m_reloading to false only if loading. Commit.
- Give a more proper name to the test. Commit.
- Fix multiblock range handling when unwrapping line. Commit. Fixes bug #494826
- Fix line removal not handled properly in KateTemplateHandler. Commit. Fixes bug #434093
- Inline blocksize into buffer. Commit.
- Improve MovingRangeTest::benchCheckValidity. Commit.
- Improve TextRange::checkValidity performance. Commit.
- Do all testing in clean temp dirs. Commit.
- Add a swap file test. Commit.
- Add benchmarks for moving stuff. Commit.
- Use std::vector for cursor storage. Commit.
- Allow disabling editorconfig. Commit. Fixes bug #471008
- Import i18n scripts from grantlee. Commit. Fixes bug #492237
- Fix "now" tag to allow single quoted strings. Commit.
- Add CI for static builds on Linux. Commit.
- Fix time entry in locales with mixed-case AM/PM suffixes. Commit.
- Add CI for static builds on Linux. Commit.
- Don't use Oxygen style in KSeparator. Commit.
- KMessageWidget: Improve accessibility. Commit.
- Simplify code: use erase remove. Commit.
- Fix window position not being restored. Commit. Fixes bug #493401
- Add CI for static builds on Linux. Commit.
- TextArea: Make placeholder wrap. Commit.
- Restore MediaChanged handling for Audio CDs. Commit.
- Support reproducible builds by omitting host paths in bison/yacc outputs. Commit.
- [udisks] Don't add/remove devices in slotMediaChanged. Commit. See bug #464149
- Port implicit QByteArray, QChar and QString conversions in iokit. Commit.
- Drop unfinished Power API. Commit.
- Fstabwatcher: use libmount monitor on Linux. Commit.
- Fstabhandling: use libmount in Linux. Commit.
- Add linux-qt6-static CI. Commit.
- Remove ASPELL runtime dependency from plugin building check. Commit.
- Provide SONNET_NO_BACKENDS option to deactivate build failures with no backends. Commit.
- Add CI for static builds on Linux. Commit.
Kdenlive 24.08.3 released
The last maintenance release of the 24.08 series is out.
- Fix crash caused by incorrect codec passed on opening subtitle. Commit. Fixes bug #495410.
- Fix shadowed variable causing incorrect clip removal on project opening, fix crash opening project with timeline clip missing in bin. Commit. See bug #493486.
- Fix qml crash building timeline with Qt 6.8 – ensure context property exists before setting source. Commit. See bug #495335.
- Fix generate proxy when frame size is above a value not using the current project setting. Commit.
- Fix shadow variable causing clip removal on project opening. Commit.
- Fix monitor seek to prev/next keyframe not working in rotoscoping. Commit.
- Fix missing build-in LUT files not correctly fixed on project open. Commit. See bug #494726.
- Fix clip jobs like stabilize creating invalid folders. Commit.
- Fix freeze loading project with invalid folder id. Commit.
- Don’t invalidate timeline preview when replacing an audio clip in bin. Commit.
- Ensure monitor is cleared and ruler hidden when no clip or a folder is selected in bin. Commit.
The post Kdenlive 24.08.3 released appeared first on Kdenlive.
Drupal life hack's: Configuring a Custom Permission Provider Service in Drupal 9/10 Modules
Python Software Foundation: PSF Grants Program Updates: Workgroup Charter, Future, & Refresh (Part 2)
Building on Part 1 of this PSF Grants Program Update, we are pleased to share updates to the Grants Workgroup (workgroup) Charter. We have outlined all the changes below in a chart, but there are a couple of changes that we’d like to highlight to grant applicants. These updates in particular will change how and when you apply, and hopefully reduce blockers to getting those applications in and ready for review. Because we are just sharing these updates, we are happy to be flexible on these changes but hope to see all applicants adhere to the changes starting around January 2025.
- Increase overall process time frame to 8 weeks (formerly 6 weeks). We want to be realistic about how long the process takes and we know that going over our projection can cause pain for applicants. We hope to turn around applications in 6 weeks in most cases, but planning for the extra two weeks can make a big difference for everyone involved!
- Our application form requires that you set the event date out to 6 weeks in advance. We will wait to update that to 8 weeks in advance until January 2025.
- It’s important to note that this time frame begins only once all required information has been received, not exactly from the day the application is submitted. Make sure to check the email you provided on the application to see if the workgroup Chair has any questions regarding your request!
- Add a statement of support for accessibility services. In line with the PSF’s mission to support and facilitate the growth of a diverse community, we are explicitly stating in the charter that we will consider funding accessibility services. For established events (have 2 or more events in the past with more than 200 participants at the last event), we are open to considering accessibility-related requests such as live captioning, sign language interpretation, or certified child care.
- To review these types of requests, we will need sufficient documentation such as quotes, certifications, or any other relevant information.
- Add guidelines around program/schedule review. Previously undocumented, we were checking event programs/schedules to ensure a Python focus as well as a diversity of speakers. Because of event organizing time frames, we often received grant requests before the schedule was available. Moving forward we are accepting 1 of 3 options:
- The program/schedule for the event
- A tentative schedule or list of accepted speakers/sessions for the event
- Programs from previous editions of the event if available, a link to the event’s call for proposals, which should state a required Python focus for the event as well as a statement in support of a diverse speaker group, and a description of the efforts that are being made to ensure a diversity of speakers.
Still on our Grants Program refresh to-do list is:
- Mapping Board-mandated priorities for the Grants Program to policy
- Charter adjustments as needed, based on the priority mapping
- Main documentation page re-write
- Budget template update
- Application form overhaul
- Transparency report for 2024
- Exploration and development of other resources that our grant applicants would find useful
Our community is ever-changing and growing, and we plan to be there every step of the way and continue crafting the Grants Program to serve Pythonistas worldwide. If you have questions or comments, we welcome and encourage you to join us at our monthly Grants Program Office Hour sessions on the PSF Discord.
Python Software Foundation: PSF Grants Program Updates: Workgroup Charter, Future, & Refresh (Part 1)
Time has flown by since we received the community call last December for greater transparency and better processes around our Grants Program. PSF staff have produced a Grants Program Transparency Report and begun holding monthly Grants Program Office Hours. The PSF Board also invested in a third-party retrospective and launched a major refresh of all areas of our Grants program.
To provide the Grants Program more support, we assigned Marie Nordin, PSF Community Communications Manager, to support the Grants Program alongside Laura Graves, Senior Accountant. Marie has stepped into the Grants Workgroup Chair role to relieve Laura after 3+ years– thank you, Laura! Marie has been leading the initiatives and work related to the Grants Program in collaboration with Laura.
Behind the scenes, PSF staff has been working with the PSF Board and the Grants Workgroup (workgroup) to translate the feedback we’ve received and the analysis we’ve performed into action, starting with the Grants Workgroup Charter. A full breakdown of updates to the charter can be found in Part 2 of this update.
The PSF Board spent time on their recent retreat to explore priorities for the program going forward. We also ran a more thorough workgroup membership renewal process based on the updated charter to support quicker grant reviews and votes through active workgroup engagement. We’re excited to share refresh progress, updates, and plans for the future of the program later on in this post!
Meanwhile, the attention our Grants Program has received in the past year has resulted in something wonderful: we’re getting more requests than ever. Our call to historically underrepresented regions to request funds has been answered in some areas- and we are thrilled! For example, in the African region, we granted around 65K in 2023 and over 140K already this year! And, year to date in 2024 we have awarded more grant funding than we did in all of 2023. The other side of this coin presents us with a new issue– the budget for the program.
Up until this year, we’ve been able to grant at least partial funding to the majority of requests we’ve received while staying within our guidelines and maintaining a feasible annual budget. With more eligible requests incoming, every “yes” brings us closer to the ceiling of our grant budget. In addition to the increased quantity of requests, we are receiving requests for higher amounts. Inflation and the tech crunch have been hitting event organizers everywhere (this includes the PSF-produced PyCon US), and we are seeing that reflected in the number and size of the grant requests we are receiving.
Moving forward, with the increased quantity and amount of eligible grant requests, we will need to take steps to ensure we are balancing grant awards with sustainability for our Grants Program, and the Foundation overall. We know that the most important part of any changes to the Grants Program is awareness and two-way communications with the community. We aim to do that as early and transparently as we possibly can. That means we aren’t changing anything about how we award grants today or even next week– but within the next couple of months. Please keep an eye on our blog and social accounts (Mastodon, X, LinkedIn) for news about upcoming changes, and make sure to share this post with your fellow Python event and initiative organizers.
The purpose of the PSF Grants Workgroup (workgroup) is to review, approve, and deny grant funding proposals for Python conferences, training workshops, Meetups, development projects, and other related Python initiatives. The workgroup charter outlines processes, guidelines, and membership requirements for the workgroup. Small changes have been made to the charter over the years, but it’s been some time since any significant changes were implemented.
During the summer of 2024, Marie, workgroup chair (hi 👋 it’s me writing this!), and Laura worked on updates for the charter. The updates focused on how to make the Grants Program processes and guidelines work better for the workgroup, the PSF Board, and most especially, the community we serve.
After many hours of discussing pain points, running scenarios, exploring possible guidelines, and drafting the actual wording, Marie and Laura introduced proposed updates for the charter to the Board in July. After a month of review and 1:1 meetings with the PSF Board and workgroup members, the updated charter went to a vote with the PSF Board on August 14th and was approved unanimously.
The workgroup has been operating under its new charter for a couple of months. Before we shared broadly with the community, we wanted to make sure the updates didn’t cause unintended consequences, and we were ready to walk back anything that didn’t make sense. Turns out, our hard work paid off, and the updates have been mostly working as we hoped. We will continue to monitor the impact of the changes and make any adjustments in the next Charter update. Read up on the Grants Workgroup Charter updates in Part 2 of this blog post!
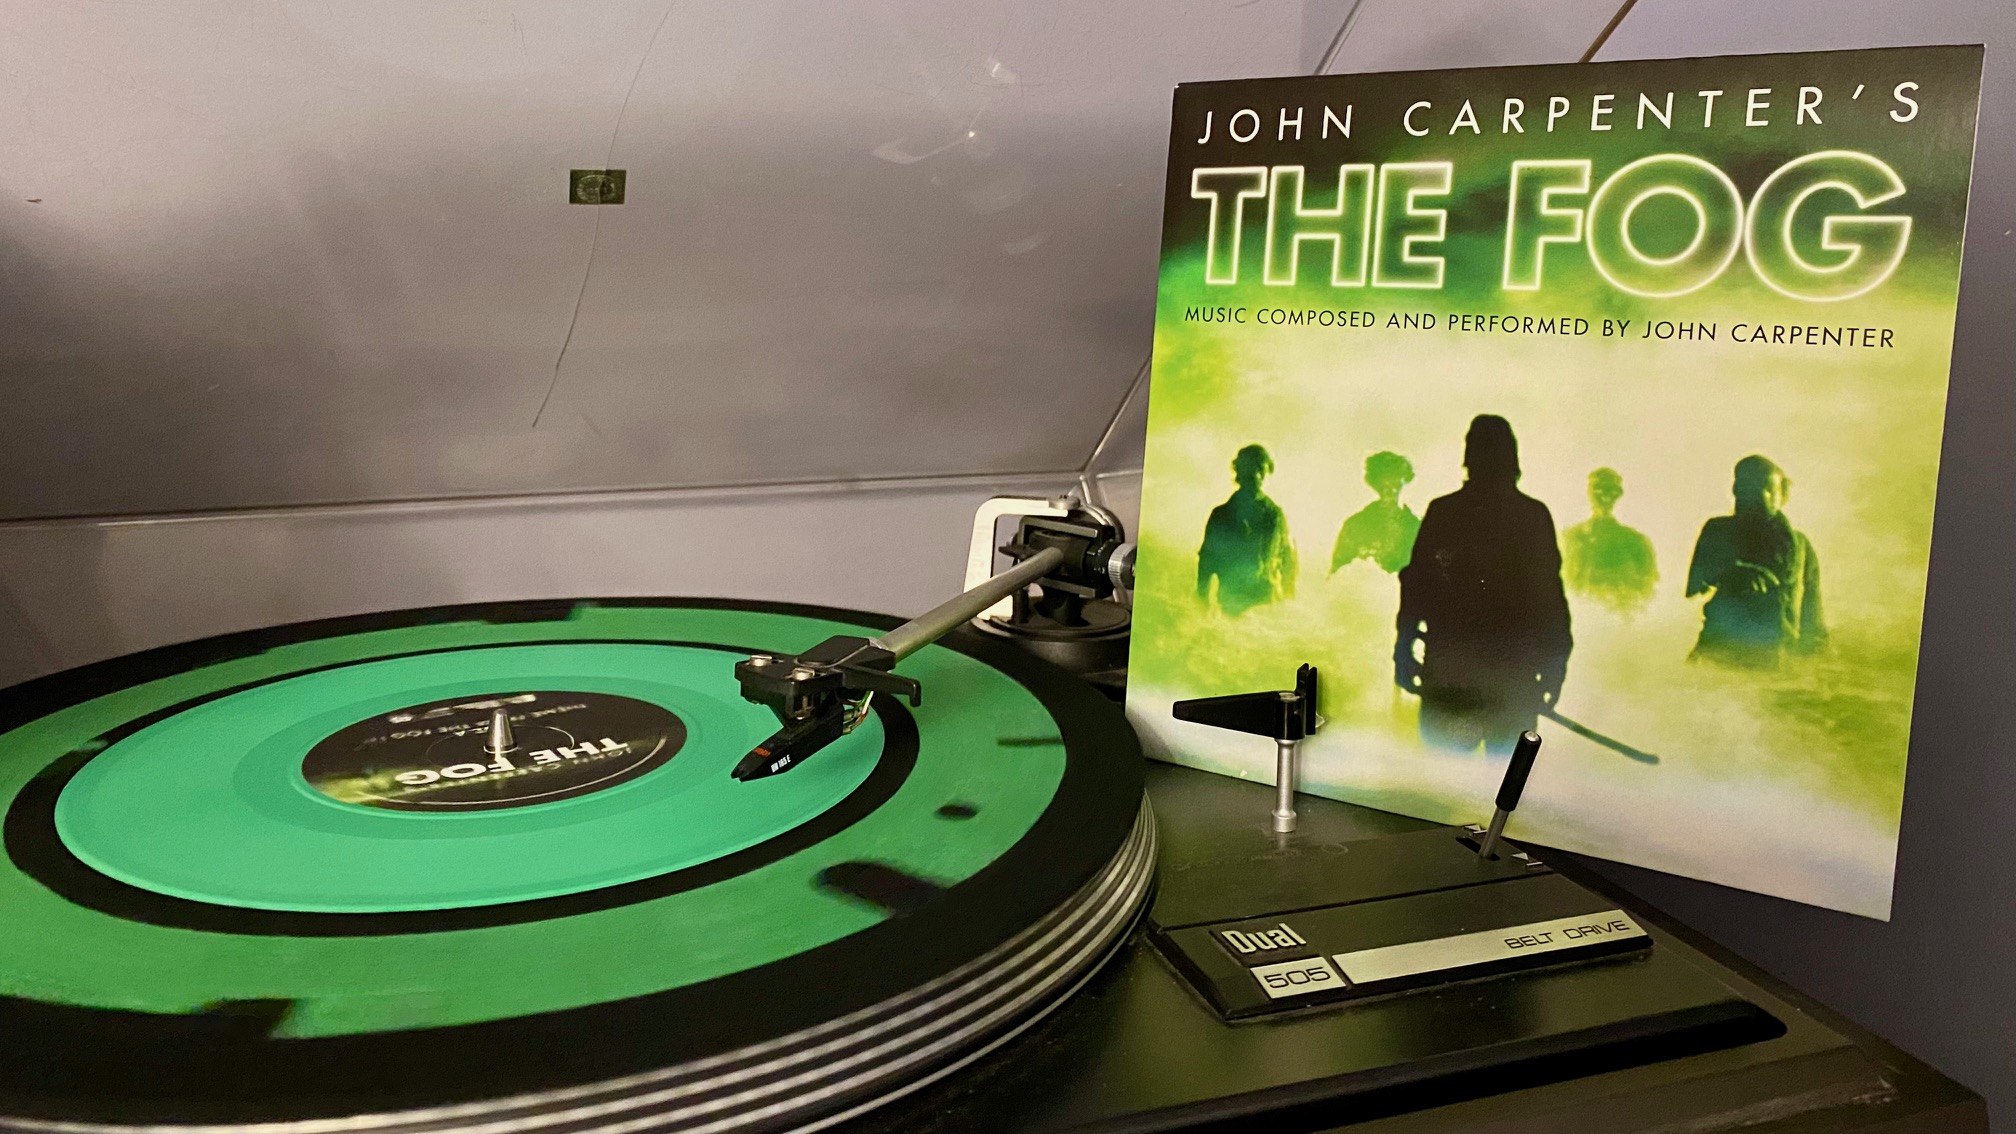
Jonathan Dowland: John Carpenter's "The Fog"
A gift from my brother. Coincidentally I’ve had John Carpenter’s “Halloween” echoing around my my head for weeks: I’ve been deconstructing it and trying to learn to play it.
Oliver Davies' daily list: Should Drush be in Drupal core?
I've used Drush - the Drupal shell - to interact with my Drupal applications on the command line since I started around 2008.
It's always been part of my Drush experience.
From installing Drupal and performing routine actions such as enabling modules and clearing caches to, in newer Drupal versions, performing migrations and generating Storybook stories.
Many projects I work on have custom Drush commands to perform tasks from the command line.
This week, I created a new Drupal 11 project for a client using the drupal/core-recommended package and initially forgot to install Drush so I could install Drupal.
I'm surprised Drush isn't in Drupal core or a dependency of the recommended package.
There is a basic Drupal CLI at core/scripts/drupal, but I wonder if we'll see a fully-featured CLI tool like Drush included with Drupal core, similar to Symfony's console or Laravel's artisan commands.
For me, including Drush would be an obvious choice.
KDE Gear 24.08.3
Over 180 individual programs plus dozens of programmer libraries and feature plugins are released simultaneously as part of KDE Gear.
Today they all get new bugfix source releases with updated translations, including:
- neochat: Adjustments to make it work with the newly released libquotient 0.9 (Commit)
- kdevelop: MesonManager: remove test suites when a project is closing, (Commit, fixes bug #427157)
- kdevelop: Fix a qml crash building timeline with Qt 6.8 (Commit, fixes bug #495335)
Distro and app store packagers should update their application packages.
- 24.08 release notes for information on tarballs and known issues.
- Package download wiki page
- 24.08.3 source info page
- 24.08.3 full changelog
Pages
Recent Publications
- Managing Hidden Dependencies in OO Software: a Study Based on Open Source Projects
- Open Source Communities as Liminal Ecosystems
- Investigating developers' email discussions during decision-making in Python language evolution
- Developers, Quality Control and Download Volume in Open Source Software (OSS) Projects
FLOSS Project Planets
- Trey Hunner: Python Black Friday & Cyber Monday sales (2024)
- Real Python: NumPy Practical Examples: Useful Techniques
- Russell Coker: Solving Spam and Phishing for Corporations
- Julien Tayon: The advantages of HTML as a data model over basic declarative ORM approach
- Seth Michael Larson: SEGA Genesis & Mega Drive games and ROMs from Steam
FLOSS Research
- Give Your Input on the State of Open Source Survey
- Open Data and Open Source AI: Charting a course to get more of both
- The Open Source Initiative and the Eclipse Foundation to Collaborate on Shaping Open Source AI (OSAI) Public Policy
- ClearlyDefined v2.0 adds support for LicenseRefs
- ClearlyDefined at SOSS Fusion 2024: a collaborative solution to Open Source license compliance