
FLOSS Project Planets
PyCharm: Python 3.13 and the Latest Trends: A Developer’s Guide to 2025
We invite you to join us in just two days time, on October 3 at 5:00 pm CEST (11:00 am EDT), for a livestream shining a spotlight on Python 3.13 and the trends shaping its development.
Our speakers:
- Łukasz Langa, CPython Developer in Residence, release manager for Python 3.8–3.9, and creator of Black.
- Tania Allard, Vice-chair of the PSF board, PSF fellow, and Director at Quansight Labs.
They will discuss the most notable features of Python 3.13 and examine the industry trends likely to influence its future. This is a great opportunity to get ahead of the release and ask your questions directly to the experts.
Don’t forget to enable YouTube notifications and mark your calendar.
PyCharm: PyCharm’s Interactive Tables for Data Science
Data cleaning, exploration, and visualization are some of the most time-consuming tasks for data scientists. Nearly 50% of data specialists dedicate 30% or more of their time to data preparation. The pandas and Polars libraries are widely used for these purposes, each offering unique advantages. PyCharm supports both libraries, enabling users to efficiently explore, clean, and visualize data, even with large datasets.
In this blog post, you’ll discover how PyCharm’s interactive tables can enhance your productivity when working with either Polars or pandas. You will also learn how to perform many different data exploration tasks without writing any code and how to use JetBrains AI Assistant for data analysis.
Getting startedTo start using pandas for data analysis, import the library and load data from a file using pd.read_csv(“FileName”), or drag and drop a CSV file into a Jupyter notebook. If you’re using Polars, import the library and use pl.read_csv(“FileName/path to the file”) to load data into a DataFrame. Then, print the dataset just by using the name of the variable.
PyCharm’s interactive tables – key features and uses Browse, sort, and view datasetsInteractive tables offer a wide range of features that allow you to easily explore your data. For example, you can navigate through your data with infinite horizontal and vertical scrolling, use single and multiple column sorting, and many other features.
This feature allows you to sort columns alphabetically or maintain the existing column order. You can also find specific columns by typing the column name in the Column List menu. Through the context menu or Column List, you can selectively hide or display columns. For deeper analysis, you can hide all but the essential columns or use the Hide Other Columns option to focus on a single column.
Finally, you can open your dataframe in a separate window for even more in-depth analysis.
Explore your dataYou can easily understand data types directly from column headers. For example, is used for a data type object, while indicates numeric data.
Additionally, you can access descriptive statistics by hovering over column headers in Compact mode or view them directly in Detailed mode, where distribution histograms are also available.
Create code-free data visualizationsInteractive tables also offer several features available in the Chart view section.
- No-code chart creation, allowing you to visualize data effortlessly.
- Ability to compare graphs.
- Ability to save your charts with one click.
You can access the AI Assistant in the upper-left corner of the tables for the following purposes:
- To access insights about your data quickly with AI Assistant.
- Use AI Assistant to visualize your data.
Exploratory Data Analysis (EDA) is a crucial step in data science, as it allows data scientists to understand the underlying structure and patterns within a dataset before applying any modeling techniques. EDA helps you identify anomalies, detect outliers, and uncover relationships among variables – all of which are essential for making informed decisions.
Interactive tables offer many features that allow you to explore your data faster and get reliable results.
Spotting statistics, patterns, and outliers Viewing the dataset informationLet’s look at a real-life example of how the tables could boost the productivity of your EDA. For this example, we will use the Bengaluru House Dataset. Normally we start with an overview of our data. This includes just viewing it to understand the size of the dataset, data types of the columns, and so on. While you can certainly do this with the help of code, using interactive tables allows you to get this data without code. So, in our example, the size of the dataset is 13,320 rows and 9 columns, as you can see in the table header.
Our dataset also contains different data types, including numeric and string data. This means we can use different techniques for working with data, including correlation analysis and others.
And of course you can take a look at the data with the help of infinite scrolling and other features we mentioned above.
Performing statistical analysisAfter getting acquainted with the data, the next step might be more in-depth analysis of the statistics. PyCharm provides a lot of important information about the columns in the table headers, including missing data, mode, mean, median, and so on.
For example, here we see that many columns have missing data. In the “bath” column, we obviously have an outlier, as the max value significantly exceeds the 95th percentile.
Additionally, data type mismatches, such as “total_sqft” not being a float or integer, indicate inconsistencies that could impact data processing and analysis.
After sorting, we notice one possible reason for the problem: the use of text values in data and ranges instead of normal numerical values.
Analyzing the data using AIAdditionally, if our dataset doesn’t have hundreds of columns, we can use the help of AI Assistant and ask it to explain the DataFrame. From there, we can prompt it with any important questions, such as “What data problems in the dataset should be addressed and how?”
Visualizing data with built-in chartingIn some cases, data visualization can help you understand your data. PyCharm interactive tables provide two options for that. The first is Chart View and the second is Generate Visualizations in Chat.
Let’s say my hypothesis is that the price of a house should be correlated with its total floor area. In other words, the bigger a house is, the more expensive it should be. In this case, I can use a scatter plot in Chart View and discover that my hypothesis is likely correct.
Wrapping upPyCharm Professional’s interactive tables offer numerous benefits that significantly boost your productivity in data exploration and data cleaning. The tables allow you to work with the most popular data science library, pandas, and the fast-growing framework Polars, without writing any code. This is because the tables provide features like browsing, sorting, and viewing datasets; code-free visualizations; and AI-assisted insights.
Interactive tables in PyCharm not only save your time but also reduce the complexity of data manipulation tasks, allowing you to focus on deriving meaningful insights instead of writing boilerplate code for basic tasks.
Download PyCharm Professional and get an extended 60-day trial by using the promo code “PyCharmNotebooks”. The free subscription is available for individual users only.
Activate your 60-day trialFor more information on interactive tables in PyCharm, check out our related blogs, guides, and documentation:
Ravi Dwivedi: State of the Map Conference in Kenya
Last month, I traveled to Kenya to attend a conference called State of the Map 2024 (“SotM” for short), which is an annual meetup of OpenStreetMap contributors from all over the world. It was held at the University of Nairobi Towers in Nairobi, from the 6th to the 8th of September.
University of Nairobi.I have been contributing to OpenStreetMap for the last three years, and this conference seemed like a great opportunity to network with others in the community. As soon as I came across the travel grant announcement, I jumped in and filled the form immediately. I was elated when I was selected for the grant and couldn’t wait to attend. The grant had an upper limit of €1200 and covered food, accommodation, travel and miscellaneous expenses such as visa fee.
Pre-travel tasks included obtaining Kenya’s eTA and getting a yellow fever vaccine. Before the conference, Mikko from the Humanitarian OpenStreetMap Team introduced me to Rabina and Pragya from Nepal, Ibtehal from Bangladesh, and Sajeevini from Sri Lanka. We all booked the Nairobi Transit Hotel, which was within walking distance of the conference venue. Pragya, Rabina, and I traveled together from Delhi to Nairobi, while Ibtehal was my roommate in the hotel.
Our group at the conference.The venue, University of Nairobi Towers, was a tall building and the conference was held on the fourth, fifth and sixth floors. The open area on the fifth floor of the building had a nice view of Nairobi’s skyline and was a perfect spot for taking pictures. Interestingly, the university had a wing dedicated to Mahatma Gandhi, who is regarded in India as the Father of the Nation.
View of Nairobi's skyline from the open area on the fifth floor. A library in Mahatma Gandhi wing of the University of Nairobi.The diversity of the participants was mind-blowing, with people coming from a whopping 54 countries. I was surprised to notice that I was the only participant traveling from India, despite India having a large OpenStreetMap community. That said, there were two other Indian participants who traveled from other countries. I finally got to meet Arnalie (from the Phillipines) and Letwin (from Zimbabwe), both of whom I had only met online before. I had met Anisa (from Albania) earlier during DebConf 2023. But I missed Mikko and Honey from the Humanitarian OpenStreetMap Team, whom I knew from the Open Mapping Guru program.
I learned about the extent of OSM use through Pragya and Rabina’s talk; about the logistics of running the OSM Board, in the OSMF (OpenStreetMap Foundation) session; about the Youth Mappers from Sajeevini, about the OSM activities in Malawi from Priscilla Kapolo, and about mapping in Zimbabwe from Letwin. However, I missed Ibtehal’s lightning session. The ratio of women speakers and participants at the conference was impressive, and I hope we can get such gender representation in our Delhi/NCR mapping parties.
One of the conference halls where talks took place.Outside of talks, the conference also had lunch and snack breaks, giving ample time for networking with others. In the food department, there were many options for a lacto-ovo vegetarian like myself, including potatoes, rice, beans, chips etc. I found out that the milk tea in Kenya (referred to as “white tea”) is usually not as strong compared to India, so I switched to coffee (which is also called “white coffee” when taken with milk). The food wasn’t spicy, but I can’t complain :) Fruit juices served as a nice addition to lunch.
One of the lunch meals served during the conference.At the end of the second day of the conference, there was a surprise in store for us — a bus ride to the Bao Box restaurant. The ride gave us the experience of a typical Kenyan matatu (privately-owned minibuses used as share taxis), complete with loud rap music. I remember one of the songs being Kraff’s Nursery Rhymes. That day, I was wearing an original Kenyan cricket jersey - one that belonged to Dominic Wesonga, who represented Kenya in four ODIs. This confused Priscilla Kapolo, who asked if I was from Kenya! Anyway, while it served as a good conversation starter, it didn’t attract as much attention as I expected :) I had some pizza and chips there, and later some drinks with Ibtehal. After the party, Piyush went with us to our hotel and we played a few games of UNO.
Minibus which took us from the university to Bao Box restaurant. This minibus in the picture gave a sense of a real matatu.I am grateful to the organizers Laura and Dorothea for introducing me to Nikhil when I was searching for a companion for my post-conference trip. Nikhil was one of the aforementioned Indian participants, and a wildlife lover. We had some nice conversations; he wanted to go to the Masai Maara Natural Reserve, but it was too expensive for me. In addition, all the safaris were multi-day affairs, and I wasn’t keen on being around wildlife for that long. Eventually I chose to go my own way, exploring the coastal side and visiting Mombasa.
While most of the work regarding the conference was done using free software (including the reimbursement form and Mastodon announcements), I was disappointed by the use of WhatsApp for coordination with the participants. I don’t use WhatsApp and so was left out. WhatsApp is proprietary software (they do not provide the source code) and users don’t control it. It is common to highlight that OpenStreetMap is controlled by users and the community, rather than a company - this should apply to WhatsApp as well.
My suggestion is to use XMPP, which shares similar principles with OpenStreetMap, as it is privacy-respecting, controlled by users, and powered by free software. I understand the concern that there might not be many participants using XMPP already. Although it is a good idea to onboard people to free software like XMPP, we can also create a Matrix group, and bridge it with both the XMPP group and the Telegram group. In fact, using Matrix and bridging it with Telegram is how I communicated with the South Asian participants. While it’s not ideal - as Telegram’s servers are proprietary and centralized - but it’s certainly much better than creating a WhatsApp-only group. The setup can be bridged with IRC as well. On the other hand, self-hosted mailing lists for participants is also a good idea.
Finally, I would like to thank SotM for the generous grant, enabling me to attend this conference, meet the diverse community behind OSM and visit the beautiful country of Kenya. Stay tuned for the blog post on Kenya trip.
Thanks to Sahilister, Contrapunctus, Snehal and Badri for reviewing the draft of this blog post before publishing.
Real Python: Differences Between Python's Mutable and Immutable Types
As a Python developer, you’ll have to deal with mutable and immutable objects sooner or later. Mutable objects are those that allow you to change their value or data in place without affecting the object’s identity. In contrast, immutable objects don’t allow this kind of operation. You’ll just have the option of creating new objects of the same type with different values.
In Python, mutability is a characteristic that may profoundly influence your decision when choosing which data type to use in solving a given programming problem. Therefore, you need to know how mutable and immutable objects work in Python.
In this video course, you’ll:
- Understand how mutability and immutability work under the hood in Python
- Explore immutable and mutable built-in data types in Python
- Identify and avoid some common mutability-related gotchas
- Understand and control how mutability affects your custom classes
[ Improve Your Python With 🐍 Python Tricks 💌 – Get a short & sweet Python Trick delivered to your inbox every couple of days. >> Click here to learn more and see examples ]
The Drop Times: Unlock Advanced Drupal Content Editing: Join Our CKEditor Webinar
Colin Watson: Free software activity in September 2024
Almost all of my Debian contributions this month were sponsored by Freexian.
You can also support my work directly via Liberapay.
PydanticMy main Debian project for the month turned out to be getting Pydantic back into a good state in Debian testing. I’ve used Pydantic quite a bit in various projects, most recently in Debusine, so I have an interest in making sure it works well in Debian. However, it had been stalled on 1.10.17 for quite a while due to the complexities of getting 2.x packaged. This was partly making sure everything else could cope with the transition, but in practice mostly sorting out packaging of its new Rust dependencies. Several other people (notably Alexandre Detiste, Andreas Tille, Drew Parsons, and Timo Röhling) had made some good progress on this, but nobody had quite got it over the line and it seemed a bit stuck.
Learning Rust is on my to-do list, but merely not knowing a language hasn’t stopped me before. So I learned how the Debian Rust team’s packaging works, upgraded a few packages to new upstream versions (including rust-half and upstream rust-idna test fixes), and packaged rust-jiter. After a lot of waiting around for various things and chasing some failures in other packages I was eventually able to get current versions of both pydantic-core and pydantic into testing.
I’m looking forward to being able to drop our clunky v1 compatibility code once debusine can rely on running on trixie!
OpenSSHI upgraded the Debian packaging to OpenSSH 9.9p1.
YubiHSMI upgraded python-yubihsm, yubihsm-connector, and yubihsm-shell to new upstream versions.
I noticed that I could enable some tests in python-yubihsm and yubihsm-shell; I’d previously thought the whole test suite required a real YubiHSM device, but when I looked closer it turned out that this was only true for some tests.
I fixed yubihsm-shell build failures on some 32-bit architectures (upstream PRs #431, #432), and also made it build reproducibly.
Thanks to Helmut Grohne, I fixed yubihsm-connector to apply udev rules to existing devices when the package is installed.
As usual, bookworm-backports is up to date with all these changes.
Python teamsetuptools 72.0.0 removed the venerable setup.py test command. This caused some fallout in Debian, some of which was quite non-obvious as packaging helpers sometimes fell back to different ways of running test suites that didn’t quite work. I fixed django-guardian, manuel, python-autopage, python-flask-seeder, python-pgpdump, python-potr, python-precis-i18n, python-stopit, serpent, straight.plugin, supervisor, and zope.i18nmessageid.
As usual for new language versions, the addition of Python 3.13 caused some problems. I fixed psycopg2, python-time-machine, and python-traits.
I fixed build/autopkgtest failures in keymapper, python-django-test-migrations, python-rosettasciio, routes, transmissionrpc, and twisted.
buildbot was in a bit of a mess due to being incompatible with SQLAlchemy 2.0. Fortunately by the time I got to it upstream had committed a workable set of patches, and the main difficulty was figuring out what to cherry-pick since they haven’t made a new upstream release with all of that yet. I figured this out and got us up to 4.0.3.
Adrian Bunk asked whether python-zipp should be removed from trixie. I spent some time investigating this and concluded that the answer was no, but looking into it was an interesting exercise anyway.
On the other hand, I looked into flask-appbuilder, concluded that it should be removed, and filed a removal request.
I upgraded some embedded CSS files in nbconvert.
I upgraded importlib-resources, ipywidgets, jsonpickle, pydantic-settings, pylint (fixing a test failure), python-aiohttp-session, python-apptools, python-asyncssh, python-django-celery-beat, python-django-rules, python-limits, python-multidict, python-persistent, python-pkginfo, python-rt, python-spur, python-zipp, stravalib, transmissionrpc, vulture, zodbpickle, zope.exceptions (adopting it), zope.i18nmessageid, zope.proxy, and zope.security to new upstream versions.
debmirrorThe experimental and *-proposed-updates suites used to not have Contents-* files, and a long time ago debmirror was changed to just skip those files in those suites. They were added to the Debian archive some time ago, but debmirror carried on skipping them anyway. Once I realized what was going on, I removed these unnecessary special cases (#819925, #1080168).
Robin Wilson: I won two British Cartographic Society awards!
It’s been a while since I posted here – I kind of lost momentum over the summer (which is a busy time with a school-aged child) and never really picked it up again.
Anyway, I wanted to write a quick post to tell people that I won two awards at the British Cartographic Society awards ceremony a few weeks ago.
They were both for my British Placename Mapper web app, which is described in more detail in this blog post. If you haven’t seen it already, I strongly recommend you check it out.
I won a Highly Commended certificate in the Avenza Award for Electronic Mapping, and the First Prize trophy for the Ordnance Survey Award (for any map using OS data).
The certificates came in a lovely frame, and the trophy is enormous – about 30cm high and weighing over 3kg!
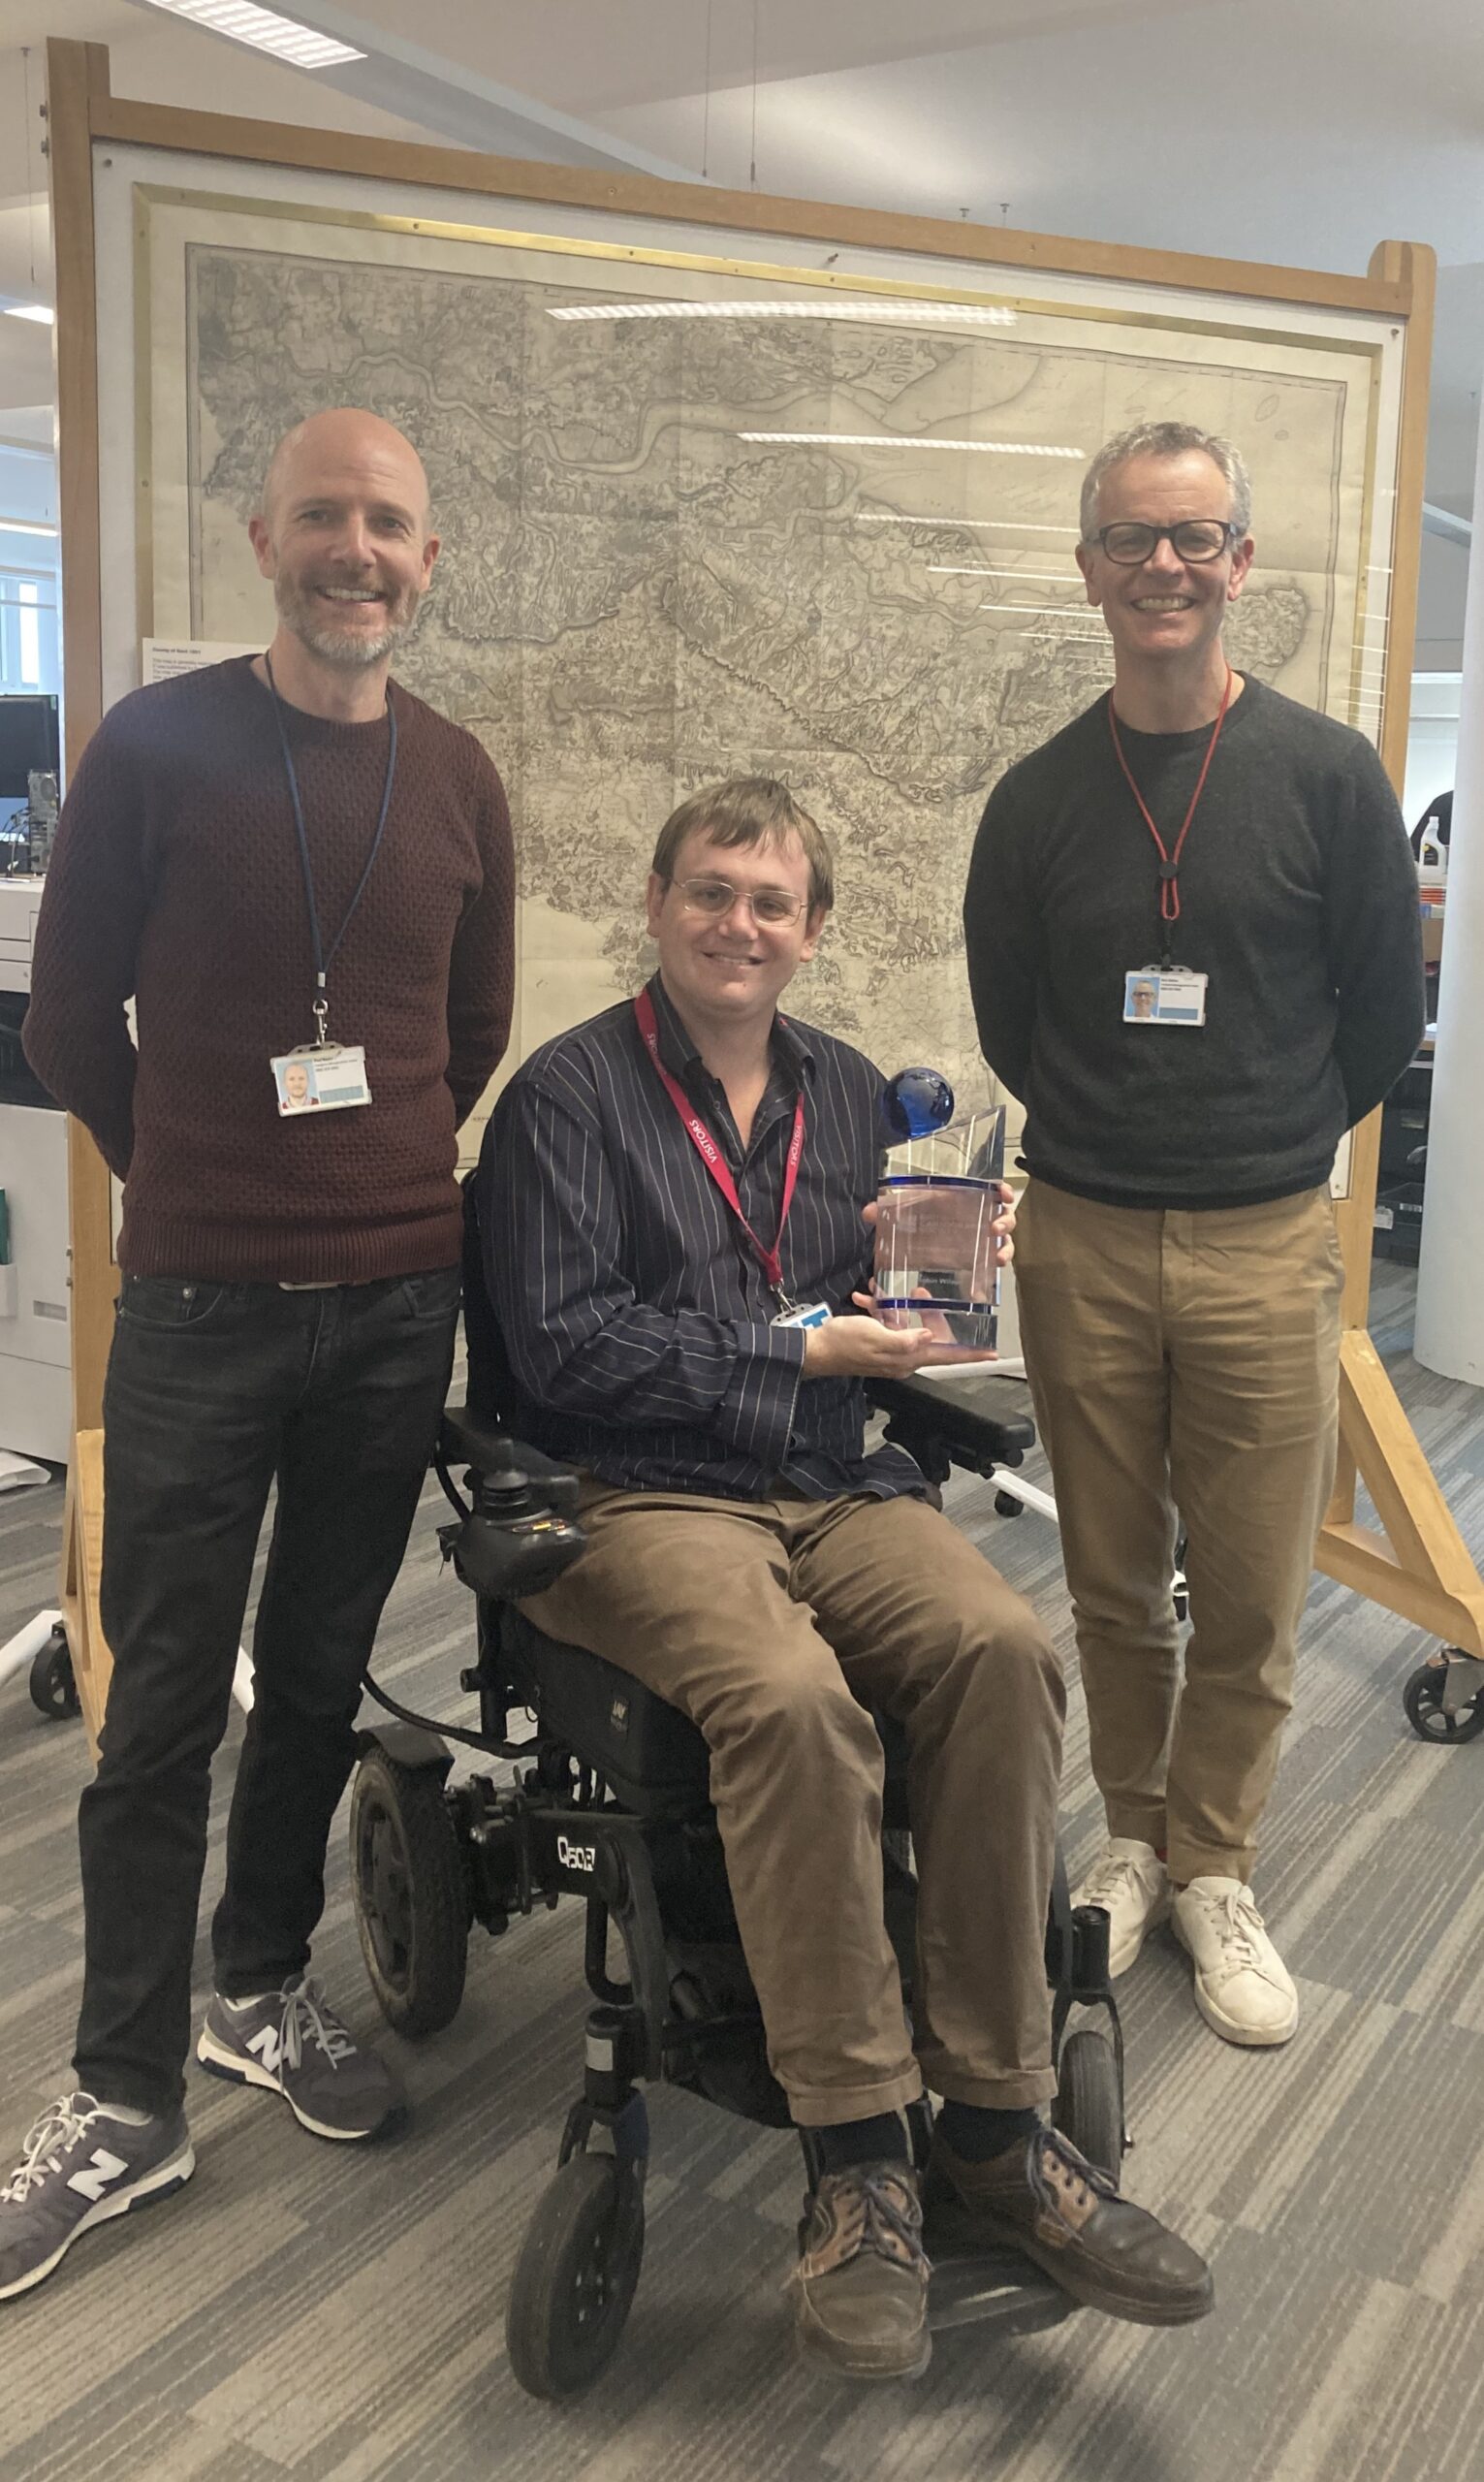
I was presented with the trophy at the BCS Annual Conference in London, but they very kindly offered to keep the trophy to save me carrying it across London on my wheelchair and back on the train, so they invited me to Ordnance Survey last week to be presented with it again. I had a lovely time at OS – including 30 minutes with their Director General/CEO and was formally presented with my trophy again (standing in front of the first ever Ordnance Survey map!):
Full information on the BCS awards are available on their website and I strongly recommend submitting any appropriate maps you’ve made for next year’s awards. I need to get my thinking cap on for next year’s entry…
Junichi Uekawa: Hello October.
The Drop Times: A Note of Gratitude for all the Support!
Python Insider: Python 3.12.7 released
I'm pleased to announce the release of Python 3.12.7:
https://www.python.org/downloads/release/python-3127/
Python 3.12 is the newest major release of the Python programming language, and it contains many new features and optimizations. 3.12.7 is the latest maintenance release, containing more than 100 bugfixes, build improvements and documentation changes since 3.12.6.
Major new features of the 3.12 series, compared to 3.11 New features- More flexible f-string parsing, allowing many things previously disallowed (PEP 701).
- Support for the buffer protocol in Python code (PEP 688).
- A new debugging/profiling API (PEP 669).
- Support for isolated subinterpreters with separate Global Interpreter Locks (PEP 684).
- Even more improved error messages. More exceptions potentially caused by typos now make suggestions to the user.
- Support for the Linux perf profiler to report Python function names in traces.
- Many large and small performance improvements (like PEP 709 and support for the BOLT binary optimizer), delivering an estimated 5% overall performance improvement.
- New type annotation syntax for generic classes (PEP 695).
- New override decorator for methods (PEP 698).
- The deprecated wstr and wstr_length members of the C implementation of unicode objects were removed, per PEP 623.
- In the unittest module, a number of long deprecated methods and classes were removed. (They had been deprecated since Python 3.1 or 3.2).
- The deprecated smtpd and distutils modules have been removed (see PEP 594 and PEP 632. The setuptools package continues to provide the distutils module.
- A number of other old, broken and deprecated functions, classes and methods have been removed.
- Invalid backslash escape sequences in strings now warn with SyntaxWarning instead of DeprecationWarning, making them more visible. (They will become syntax errors in the future.)
- The internal representation of integers has changed in preparation for performance enhancements. (This should not affect most users as it is an internal detail, but it may cause problems for Cython-generated code.)
For more details on the changes to Python 3.12, see What’s new in Python 3.12.
More resources- Online Documentation.
- PEP 693, the Python 3.12 Release Schedule.
- Report bugs via GitHub Issues.
- Help fund Python directly or via GitHub Sponsors, and support the Python community.
Thanks to all of the many volunteers who help make Python Development and these releases possible! Please consider supporting our efforts by volunteering yourself or through organization contributions to the Python Software Foundation.
Your release team,
Thomas Wouters
Łukasz Langa
Ned Deily
Steve Dower
GSOC: Week 8 to Week 16
The End is here!
The long journey of GSoC (which got streched into 16 weeks) is nearing to an end. And in this blog, I will share a few of the things I have done, and some of the things I have left to do. Let’s start with the main works.
Snap KCM! It’s here!I have finally succeeded to create a KCM for snaps. This is written using C++, Qt (Qml), Kirigami, Snapd-Glib Api. The flow is something like this
Python Insider: Python 3.13.0 release candidate 3 released
I'm pleased to announce the release of Python 3.13 release candidate 3 (instead of the expected final release).
https://www.python.org/downloads/release/python-3130rc3/
This is the final release candidate of Python 3.13.0
This release, 3.13.0rc3, is the final release preview (no really) of 3.13. This release is expected to become the final 3.13.0 release, barring any critical bugs being discovered. The official release of 3.13.0 is now scheduled for Monday, 2024-10-07.
This extra, unplanned release candidate exists because of a couple of last minute issues, primarily a significant performance regression in specific workloads due to the incremental cyclic garbage collector (introduced in the alpha releases). We decided to roll back the garbage collector change in 3.13 (and continuing work in 3.14 to improve it), apply a number of other important bug fixes, and roll out a new release candidate.
There will be no ABI changes from this point forward in the 3.13 series (and there haven't been any since the beta releases).
Call to actionWe strongly encourage maintainers of Python projects to prepare their projects for 3.13 compatibilities during this phase, and where necessary publish Python 3.13 wheels on PyPI to be ready for the final release of 3.13.0. Any binary wheels built against Python 3.13.0rc1 and later will work with future versions of Python 3.13. As always, report any issues to the Python bug tracker.
Please keep in mind that this is a preview release and while it’s as close to the final release as we can get it, its use is not recommended for production environments.
Core developers: time to work on documentation now- Are all your changes properly documented?
- Are they mentioned in What’s New?
- Did you notice other changes you know of to have insufficient documentation?
Some of the new major new features and changes in Python 3.13 are:
New features- A new and improved interactive interpreter, based on PyPy’s, featuring multi-line editing and color support, as well as colorized exception tracebacks.
- An experimental free-threaded build mode, which disables the Global Interpreter Lock, allowing threads to run more concurrently. The build mode is available as an experimental feature in the Windows and macOS installers as well.
- A preliminary, experimental JIT, providing the ground work for significant performance improvements.
- The locals() builtin function (and its C equivalent) now has well-defined semantics when mutating the returned mapping, which allows debuggers to operate more consistently.
- A modified version of mimalloc is now included, optional but enabled by default if supported by the platform, and required for the free-threaded build mode.
- Docstrings now have their leading indentation stripped, reducing memory use and the size of .pyc files. (Most tools handling docstrings already strip leading indentation.)
- The dbm module has a new dbm.sqlite3 backend that is used by default when creating new files.
- The minimum supported macOS version was changed from 10.9 to 10.13 (High Sierra). Older macOS versions will not be supported going forward.
- WASI is now a Tier 2 supported platform. Emscripten is no longer an officially supported platform (but Pyodide continues to support Emscripten).
- iOS is now a Tier 3 supported platform
- Android is now a Tier 3 supported platform as well.
- Support for type defaults in type parameters.
- A new type narrowing annotation, typing.TypeIs.
- A new annotation for read-only items in TypeDicts.
- A new annotation for marking deprecations in the type system.
- PEP 594 (Removing dead batteries from the standard library) scheduled removals of many deprecated modules: aifc, audioop, chunk, cgi, cgitb, crypt, imghdr, mailcap, msilib, nis, nntplib, ossaudiodev, pipes, sndhdr, spwd, sunau, telnetlib, uu, xdrlib, lib2to3.
- Many other removals of deprecated classes, functions and methods in various standard library modules.
- C API removals and deprecations. (Some removals present in alpha 1 were reverted in alpha 2, as the removals were deemed too disruptive at this time.)
- New deprecations, most of which are scheduled for removal from Python 3.15 or 3.16.
(Hey, fellow core developer, if a feature you find important is missing from this list, let Thomas know.)
For more details on the changes to Python 3.13, see What’s new in Python 3.13. The next release of Python 3.13 will be the official 3.13.0 release, currently scheduled for Monday, 2024-10-07.
More resources- Online Documentation
- PEP 719, 3.13 Release Schedule
- Report bugs at Issues · python/cpython · GitHub.
- Help fund Python directly (or via GitHub Sponsors), and support the Python community.
Thanks to all of the many volunteers who help make Python Development and these releases possible! Please consider supporting our efforts by volunteering yourself or through organization contributions to the Python Software Foundation.
Your release team,
Thomas Wouters
Łukasz Langa
Ned Deily
Steve Dower
Real Python: Quiz: When to Use a List Comprehension in Python
In this quiz, you’ll test your understanding of List Comprehension in Python.
By working through this quiz, you’ll revisit how to rewrite loops as list comprehensions, how to choose when to use list comprehensions, how you can use conditional logic in your comprehensions, and how to profile your code to resolve performance questions.
[ Improve Your Python With 🐍 Python Tricks 💌 – Get a short & sweet Python Trick delivered to your inbox every couple of days. >> Click here to learn more and see examples ]
1xINTERNET blog: DrupalCon Barcelona - A seminal moment in Drupal’s history
DrupalCon is the biannual conference where leaders in Drupal gather to coordinate, collaborate and present the latest developments in digital and web technologies. This week 1xINTERNET attended DrupalCon Barcelona in full force. But this conference was like none before it, this was Starshots World Premier and it exceeded all expectations.
Guido Günther: Free Software Activities September 2024
Another short status update of what happened on my side last month. Besides the usual amount of housekeeping last month was a lot about getting old issues resolved by finishing some stale merge requests and work in pogress MRs. I also pushed out the Phosh 0.42.0 Release
phosh- Mark mobile-data quick setting as insensitive when modem is off (MR)
- Document handler naming (MR)
- Phosh 0.41.1 (MR)
- Phosh 0.42~rc1 (MR)
- Phosh 0.42.0 (MR)
- Handle per app notification enable setting (MR) (a 3y old MR cleaned up and out of the way)
- Use parent's icon if child doesn't have one (MR (another 1y old MR moved out of draft status)
- Fix Rust build and upcoming events .plugin file (MR)
- Lint markdown (MR)
- Sanitize versions as this otherwise breaks the libphosh-rs build (MR)
- lockscreen: Swap deck and carousel to avoid triggering the plugins page when entering pin and let the lockscreen shrink to smaller sizes (MR) (two more year old usability issues out of the way)
- Let bitfield values end up in the docs again (MR)
- Don't focus incorrect app on launch (MR). This could happen with apps like calls that run a daemon (and needs more work for a clean solution).
- Continue with wallpaper MR (MR) (still draft)
- Brush up and land an old MR to avoid crashes on scale changes (MR). Another five month old MR out of the way.
- API version the shared library (MR)
- Ensure we send enough feedback when phone is blanked/locked (MR). This should be way easier now for apps as they don't need to do anything and we can avoid duplicate feedback sent from e.g. Chatty.
- Fix possible use after free when activating notifications on the lock screen (MR)
- Simplify layer-surface creation / destruction (MR)
- Don't lose preedit when switching applications, opening menus, etc (MR). This fixes the case (e.g. with word completion in phosh-osk-stub enabled) where it looks to the user as if the last typed word would get lost when switching from a text editor to another app or when opening a menu
- Ease focus debugging (MR)
- Release 0.42~rc1 (MR)
- Release 0.42.0 (MR)
- Mention examples in docs and check more things (MR)
- Update Phosh-0.gir with above phosh fixes to unbreak the build (MR)
- Rework to work with API versioned libphosh (MR)
- Add paste button to easy pasting text (MR)
- Add copy button (draft) (MR)
- Fix word salad with presage completer when entering cursor navigation mode (and in some other cases) (MR 1). Presage has the best completion but was marked experimental due to that.
- Submit preedit on changes to terminal and emoji layout (MR)
- Enable hint based completion by default (MR)
- Release 0.42~r1 (MR)
- Release 0.42.0 (MR)
- Weekly image builds of nightly packages are now built in CI and uploaded.
- Handle Fixes: tag in git commit messages as well (MR)
- Let release prep handle non-RC versions as well (MR)
- Add common markdown linter job (MR)
- Update wlr-randr (MR)
- Upload libqmi developement snapshot (MR) (Helps eSIM and CellBroadcast)
- Update phosh to not crash with GSD from GNOME 47 (MR)
- Fix systemd unit path in calls (MR)
- Package wikietractor (MR)
- More work on Cell Broadcast so we can finally undraft (MR)
- Check consistency when building releases (MR
- Object life cycle fixes (MR)
- Use DBus activation (MR). This ensures it spawns quickly rather than phosh's splash screen timing out.
- Add user unit for mpris proxy so it works out of the box (Patch) and one can skip e.g. songs in a cars media unit
- Wrap info-bar more (MR) to fit smalls screens
- Forward metainfo/desktop file updates from Mobian (MR) (patch originally by Arnaud Ferraris)
- Add udev rule to support haptic on Oneplus Fajita / Enchilada's (non-mailine driver) (MR)
- Support alert-slider on OnePlus 6/6T (MR. Based on a script by "isyourbrain foss".
- Release 0.5.0 (MR)
- Improve spec a bit regarding notification events (MR)
- Don't send feedback for notifications (MR). The notification daemon does this already.
- Add event for cellbroadcast messages (MR)
- Switch to DBus activation (MR). This ensures the compositor sees the activation token and is will be useful for unified push.
- Don't let scroll_down button take focus (MR). This prevents the OSK from folding when the text view is focused and ones scrolls to the bottom.
- Use revealer to show/hide scroll_down button (MR) - just to make the visual more appealing
- Unbreak messge display (MR)
- Unbreak application icon (MR)
- Drop special preedit handling (MR).
- Drop margin so we can fit on smaller screens (MR). This helps phosh on lower effective resolutions.
- Backport margin patch (MR)
- Fix doc formatting for g_input_stream_read_all* (MR)
- Add toplevel responsiveness state (MR) so phosh can inform about unresponsive apps
- Modernize docs to use debian/latest instead of debian/sid (commit, commit).
- Use pytest instead of nose as test runner (MR)
- Release 0.9.35
- Unbreak and modernize CI a bit (MR). A passing CI is so much more motivating for contributers and reviewers.
- Fix app-id and hence the icon shown in Phosh's overview (MR)
If you want to support my work see donations. This includes a list of hardware we want to improve support for. Thanks a lot to all current and past donors.
Qt Creator 14.0.2 released
We are happy to announce the release of Qt Creator 14.0.2!
Google Summer of Code 2024
Programmes like Season of KDE (SoK) and Google Summer of Code (GSoC) provide a great opportunity for young talent to become part of the open source community and contribute to open source projects. LabPlot, and KDE in general, has a long history and experience in managing GSoC projects and has benefited from various contributions. In recent years we have taken a break from GSoC, mostly due to personal reasons and time constraints. After a successful SoK 2024 programme this year we decided to participate in GSoC2024 again.
This year we had Israel Gladima and Kuntal Bar who spent 3 months with us working on quite challenging projects aimed at addressing two major feature gaps in LabPlot, namely Python scripting and visualisation of 3D data. These two development topics had already been the subject of several discussions and even initial implementations on our part, but we never managed to finalise them and make these features available to our users. Based on the already available results of the last years’ work, we decided to re-initiate these projects and work on them during GSoC2024. Despite the technical challenges and complexity of these projects, Kuntal and Israel did a very good job this summer and delivered amazing results.
We refer you to their blog posts here and here for more details of the work that has been done. In the coming weeks and months we’ll continue to work to finalise these features and get them ready for the first release. The LabPlot team would like to thank Israel and Kuntal and we’re looking forward to your contributions in the future!
Translating Qt Applications
Translating a Qt application, can be a daunting task. This is an overview from Qt 5 to Qt 6 and what new functionality Qt 6.7 brings.
Continue reading Translating Qt Applications at basysKom GmbH.
Tryton News: Newsletter September 2024
During the last month we mainly focus on bug fixes, behaviour improvements of several things and speeding-up performance issues stepping forward to our next release 7.4 scheduled to the 4th of November. We also added some new features which we would like to introduce to you in this newsletter.
For an in depth overview of the Tryton issues please take a look at our issue tracker or see the issues and merge requests filtered by label.
Changes for the User Sales, Purchases and ProjectsWe add a new sale reporting per promotion.
We add now a relate from promotions to their sales.
We improved the exception handling wizards on sales and purchases. We added two fields to let the user explicitly fill with the records to ignore or to re-create.
Any cancelled record that is not added to one of the fields, will stay in exception state to be proceeded later. Also we changed the view between a MultiSelection to a Many2Many field depending on the number of records in the exception state.
Now, Tryton doesn’t add extra lines on sale orders for inactive products. Also Tryton does no longer recommend inactive products.
We removed the Menu: Parties → Parties → Parties Associated to Sales/Purchases entries, because the result is not limited to sales or purchases in state validated or processing. A draft, quotation or cancelled order doesn’t qualify a party as a customer or supplier. The functionality is already replaced by the reports in Menu: Sales → Reporting → Sales, Sales per Customer and Menu: Purchases → Reporting → Purchases, Purchases per Supplier which adds the ability to filter per state and per period.
Accounting, Invoicing and PaymentsNow we re-launch the update of the payment customer for Stripe and Braintree in case it failed. Also the users can manually initiate the update process.
Stock, Production and ShipmentsNow we round up weights and the other measurements to two decimals for the shipping carriers DPD, Sendcloud and UPS.
We make package measurements read-only once they are closed.
User InterfaceWe remove the favourite management from the favourite menu, because of
several issues [1] [2] and duplicated functionality.
Now we group links with a similar functional scope together.
In Menu: Administration → User Interface the entries
- View Tree Widths,
- View Tree Optionals,
- View Tree States and
- View Searches
are moved to the Open related records toolbar-menu of Menu: Administration → Models → Models.
We improve the widget for MultiSelection fields in the Tryton clients by adding checkboxes which display the selection state of the row. If the users clicks on a row, the selection state will be changed.
Now we visually remove records from Many2Many fields used in Wizard instead of greying them out.
We keep the CSV export dialogue now opened after exporting, to have a better user experience when fixing bugs, export and again fixing bugs.
Since we moved the functionality from product_price_list_dates to product_price_list, you can open price list lines in a new tab to be able to filtering, search or import import them.
New Documentation or NamingWe improved and unified the stock action naming and re-worked documentation:
- Rename “Product Quantities By Warehouse” into “Stock Quantities By Warehouse.”
- Remove “Lots By Warehouse” relate as the same view can be opened from the stock location relate.
- Rename prefix “Locations Quantity” to “Stock Locations”.
- Document viewing stock levels of lots.
- Rename “Products by Locations” into “Products”, as the locations are added to the tab name, there is no need to specify.
We released bug fixes for the currently maintained long term support series
7.0 and 6.0, and for the penultimate series 7.2.
Please update your systems to take care of a security related bug we found last month: trytond allows to execute reports for records for which the user has no read access and also for reports limited to a set of groups that the user is not member of.
Changes for the System AdministratorNow we use a random value for cron next call field when no value is defined.
Now we log the last cron scheduler runs and their durations. A new cron task periodically cleans the log entries. The new cron-section configuration variable clean_days (default 30) sets this period.
Changes for Implementers and DevelopersThe Tryton view-tests now check for some more attributes like sequence and on_write in tree-views or dtstart and dtend in calendar-views.
Now we unify the term “email”, as it is now the most common and recommended form.
We add to all “cost”-terms a “sale”-suffix in sale shipment cost fields to improve the naming convention and to avoid collisions or misinterpretations.
1 post - 1 participant
Specbee: Simplifying Drupal and Salesforce integration: A how-to guide
Pages
Recent Publications
- Managing Hidden Dependencies in OO Software: a Study Based on Open Source Projects
- Open Source Communities as Liminal Ecosystems
- Investigating developers' email discussions during decision-making in Python language evolution
- Developers, Quality Control and Download Volume in Open Source Software (OSS) Projects
FLOSS Project Planets
- mark.ie: My LocalGov Drupal contributions for week-ending November 22nd, 2024
- ImageX: Instantly Enhance Your Website with Drupal Recipes for Exciting Features
- FSF Events: Free Software Directory meeting on IRC: Friday, November 22, starting at 12:00 EST (17:00 UTC)
- Metadrop: Artisan Drupal SDC theme: What you need to know
- Django Weblog: 2024 Django Developers Survey
FLOSS Research
- Give Your Input on the State of Open Source Survey
- Open Data and Open Source AI: Charting a course to get more of both
- The Open Source Initiative and the Eclipse Foundation to Collaborate on Shaping Open Source AI (OSAI) Public Policy
- ClearlyDefined v2.0 adds support for LicenseRefs
- ClearlyDefined at SOSS Fusion 2024: a collaborative solution to Open Source license compliance