
Planet Python
Python GUIs: Drag & Drop Widgets with PySide6 — Sort widgets visually with drag and drop in a container
I had an interesting question from a reader of my PySide6 book, about how to handle dragging and dropping of widgets in a container showing the dragged widget as it is moved.
I'm interested in managing movement of a QWidget with mouse in a container. I've implemented the application with drag & drop, exchanging the position of buttons, but I want to show the motion of QPushButton, like what you see in Qt Designer. Dragging a widget should show the widget itself, not just the mouse pointer.
First, we'll implement the simple case which drags widgets without showing anything extra. Then we can extend it to answer the question. By the end of this quick tutorial we'll have a generic drag drop implementation which looks like the following.
Table of Contents Drag & Drop Widgets
We'll start with a simple application which creates a window using QWidget and places a series of QPushButton widgets into it.
You can substitute QPushButton for any other widget you like, e.g. QLabel. Any widget can have drag behavior implemented on it, although some input widgets will not work well as we capture the mouse events for the drag.
python from PySide6.QtWidgets import QApplication, QHBoxLayout, QPushButton, QWidget class Window(QWidget): def __init__(self): super().__init__() self.blayout = QHBoxLayout() for l in ["A", "B", "C", "D"]: btn = QPushButton(l) self.blayout.addWidget(btn) self.setLayout(self.blayout) app = QApplication([]) w = Window() w.show() app.exec()If you run this you should see something like this.
The series of QPushButton widgets in a horizontal layout.
Here we're creating a window, but the Window widget is subclassed from QWidget, meaning you can add this widget to any other layout. See later for an example of a generic object sorting widget.
QPushButton objects aren't usually draggable, so to handle the mouse movements and initiate a drag we need to implement a subclass. We can add the following to the top of the file.
python from PySide6.QtCore import QMimeData, Qt from PySide6.QtGui import QDrag from PySide6.QtWidgets import QApplication, QHBoxLayout, QPushButton, QWidget class DragButton(QPushButton): def mouseMoveEvent(self, e): if e.buttons() == Qt.MouseButton.LeftButton: drag = QDrag(self) mime = QMimeData() drag.setMimeData(mime) drag.exec(Qt.DropAction.MoveAction)We implement a mouseMoveEvent which accepts the single e parameter of the event. We check to see if the left mouse button is pressed on this event -- as it would be when dragging -- and then initiate a drag. To start a drag, we create a QDrag object, passing in self to give us access later to the widget that was dragged. We also must pass in mime data. This is used for including information about what is dragged, particularly for passing data between applications. However, as here, it is fine to leave this empty.
Finally, we initiate a drag by calling drag.exec_(Qt.MoveAction). As with dialogs exec_() starts a new event loop, blocking the main loop until the drag is complete. The parameter Qt.MoveAction tells the drag handler what type of operation is happening, so it can show the appropriate icon tip to the user.
You can update the main window code to use our new DragButton class as follows.
python class Window(QWidget): def __init__(self): super().__init__() self.setAcceptDrops(True) self.blayout = QHBoxLayout() for l in ["A", "B", "C", "D"]: btn = DragButton(l) self.blayout.addWidget(btn) self.setLayout(self.blayout) def dragEnterEvent(self, e): e.accept()If you run the code now, you can drag the buttons, but you'll notice the drag is forbidden.
Dragging of the widget starts but is forbidden.
What's happening? The mouse movement is being detected by our DragButton object and the drag started, but the main window does not accept drag & drop.
To fix this we need to enable drops on the window and implement dragEnterEvent to actually accept them.
python class Window(QWidget): def __init__(self): super().__init__() self.setAcceptDrops(True) self.blayout = QHBoxLayout() for l in ["A", "B", "C", "D"]: btn = DragButton(l) self.blayout.addWidget(btn) self.setLayout(self.blayout) def dragEnterEvent(self, e): e.accept()If you run this now, you'll see the drag is now accepted and you see the move icon. This indicates that the drag has started and been accepted by the window we're dragging onto. The icon shown is determined by the action we pass when calling drag.exec_().
Dragging of the widget starts and is accepted, showing a move icon.
Releasing the mouse button during a drag drop operation triggers a dropEvent on the widget you're currently hovering the mouse over (if it is configured to accept drops). In our case that's the window. To handle the move we need to implement the code to do this in our dropEvent method.
The drop event contains the position the mouse was at when the button was released & the drop triggered. We can use this to determine where to move the widget to.
To determine where to place the widget, we iterate over all the widgets in the layout, until we find one who's x position is greater than that of the mouse pointer. If so then when insert the widget directly to the left of this widget and exit the loop.
If we get to the end of the loop without finding a match, we must be dropping past the end of the existing items, so we increment n one further (in the else: block below).
python def dropEvent(self, e): pos = e.position() widget = e.source() self.blayout.removeWidget(widget) for n in range(self.blayout.count()): # Get the widget at each index in turn. w = self.blayout.itemAt(n).widget() if pos.x() < w.x(): # We didn't drag past this widget. # insert to the left of it. break else: # We aren't on the left hand side of any widget, # so we're at the end. Increment 1 to insert after. n += 1 self.blayout.insertWidget(n, widget) e.accept()The effect of this is that if you drag 1 pixel past the start of another widget the drop will happen to the right of it, which is a bit confusing. To fix this we can adjust the cut off to use the middle of the widget using if pos.x() < w.x() + w.size().width() // 2: -- that is x + half of the width.
python def dropEvent(self, e): pos = e.position() widget = e.source() self.blayout.removeWidget(widget) for n in range(self.blayout.count()): # Get the widget at each index in turn. w = self.blayout.itemAt(n).widget() if pos.x() < w.x() + w.size().width() // 2: # We didn't drag past this widget. # insert to the left of it. break else: # We aren't on the left hand side of any widget, # so we're at the end. Increment 1 to insert after. n += 1 self.blayout.insertWidget(n, widget) e.accept()The complete working drag-drop code is shown below.
python from PySide6.QtCore import QMimeData, Qt from PySide6.QtGui import QDrag from PySide6.QtWidgets import QApplication, QHBoxLayout, QPushButton, QWidget class DragButton(QPushButton): def mouseMoveEvent(self, e): if e.buttons() == Qt.MouseButton.LeftButton: drag = QDrag(self) mime = QMimeData() drag.setMimeData(mime) drag.exec(Qt.DropAction.MoveAction) class Window(QWidget): def __init__(self): super().__init__() self.setAcceptDrops(True) self.blayout = QHBoxLayout() for l in ["A", "B", "C", "D"]: btn = DragButton(l) self.blayout.addWidget(btn) self.setLayout(self.blayout) def dragEnterEvent(self, e): e.accept() def dropEvent(self, e): pos = e.position() widget = e.source() self.blayout.removeWidget(widget) for n in range(self.blayout.count()): # Get the widget at each index in turn. w = self.blayout.itemAt(n).widget() if pos.x() < w.x() + w.size().width() // 2: # We didn't drag past this widget. # insert to the left of it. break else: # We aren't on the left hand side of any widget, # so we're at the end. Increment 1 to insert after. n += 1 self.blayout.insertWidget(n, widget) e.accept() app = QApplication([]) w = Window() w.show() app.exec() Visual Drag & DropWe now have a working drag & drop implementation. Next we'll move onto improving the UX by showing the drag visually. First we'll add support for showing the button being dragged next to the mouse point as it is dragged. That way the user knows exactly what it is they are dragging.
Qt's QDrag handler natively provides a mechanism for showing dragged objects which we can use. We can update our DragButton class to pass a pixmap image to QDrag and this will be displayed under the mouse pointer as the drag occurs. To show the widget, we just need to get a QPixmap of the widget we're dragging.
python from PySide6.QtCore import QMimeData, Qt from PySide6.QtGui import QDrag from PySide6.QtWidgets import QApplication, QHBoxLayout, QPushButton, QWidget class DragButton(QPushButton): def mouseMoveEvent(self, e): if e.buttons() == Qt.MouseButton.LeftButton: drag = QDrag(self) mime = QMimeData() drag.setMimeData(mime) drag.exec(Qt.DropAction.MoveAction)To create the pixmap we create a QPixmap object passing in the size of the widget this event is fired on with self.size(). This creates an empty pixmap which we can then pass into self.render to render -- or draw -- the current widget onto it. That's it. Then we set the resulting pixmap on the drag object.
If you run the code with this modification you'll see something like the following --
Dragging of the widget showing the dragged widget.
Generic Drag & Drop ContainerWe now have a working drag and drop behavior implemented on our window. We can take this a step further and implement a generic drag drop widget which allows us to sort arbitrary objects. In the code below we've created a new widget DragWidget which can be added to any window.
You can add items -- instances of DragItem -- which you want to be sorted, as well as setting data on them. When items are re-ordered the new order is emitted as a signal orderChanged.
python from PySide6.QtCore import QMimeData, Qt, Signal from PySide6.QtGui import QDrag, QPixmap from PySide6.QtWidgets import ( QApplication, QHBoxLayout, QLabel, QMainWindow, QVBoxLayout, QWidget, ) class DragItem(QLabel): def __init__(self, *args, **kwargs): super().__init__(*args, **kwargs) self.setContentsMargins(25, 5, 25, 5) self.setAlignment(Qt.AlignmentFlag.AlignCenter) self.setStyleSheet("border: 1px solid black;") # Store data separately from display label, but use label for default. self.data = self.text() def set_data(self, data): self.data = data def mouseMoveEvent(self, e): if e.buttons() == Qt.MouseButton.LeftButton: drag = QDrag(self) mime = QMimeData() drag.setMimeData(mime) pixmap = QPixmap(self.size()) self.render(pixmap) drag.setPixmap(pixmap) drag.exec(Qt.DropAction.MoveAction) class DragWidget(QWidget): """ Generic list sorting handler. """ orderChanged = Signal(list) def __init__(self, *args, orientation=Qt.Orientation.Vertical, **kwargs): super().__init__() self.setAcceptDrops(True) # Store the orientation for drag checks later. self.orientation = orientation if self.orientation == Qt.Orientation.Vertical: self.blayout = QVBoxLayout() else: self.blayout = QHBoxLayout() self.setLayout(self.blayout) def dragEnterEvent(self, e): e.accept() def dropEvent(self, e): pos = e.position() widget = e.source() self.blayout.removeWidget(widget) for n in range(self.blayout.count()): # Get the widget at each index in turn. w = self.blayout.itemAt(n).widget() if self.orientation == Qt.Orientation.Vertical: # Drag drop vertically. drop_here = pos.y() < w.y() + w.size().height() // 2 else: # Drag drop horizontally. drop_here = pos.x() < w.x() + w.size().width() // 2 if drop_here: break else: # We aren't on the left hand/upper side of any widget, # so we're at the end. Increment 1 to insert after. n += 1 self.blayout.insertWidget(n, widget) self.orderChanged.emit(self.get_item_data()) e.accept() def add_item(self, item): self.blayout.addWidget(item) def get_item_data(self): data = [] for n in range(self.blayout.count()): # Get the widget at each index in turn. w = self.blayout.itemAt(n).widget() data.append(w.data) return data class MainWindow(QMainWindow): def __init__(self): super().__init__() self.drag = DragWidget(orientation=Qt.Orientation.Vertical) for n, l in enumerate(["A", "B", "C", "D"]): item = DragItem(l) item.set_data(n) # Store the data. self.drag.add_item(item) # Print out the changed order. self.drag.orderChanged.connect(print) container = QWidget() layout = QVBoxLayout() layout.addStretch(1) layout.addWidget(self.drag) layout.addStretch(1) container.setLayout(layout) self.setCentralWidget(container) app = QApplication([]) w = MainWindow() w.show() app.exec()Generic drag-drop sorting in horizontal orientation.
You'll notice that when creating the item, you can set the label by passing it in as a parameter (just like for a normal QLabel which we've subclassed from). But you can also set a data value, which is the internal value of this item -- this is what will be emitted when the order changes, or if you call get_item_data yourself. This separates the visual representation from what is actually being sorted, meaning you can use this to sort anything not just strings.
In the example above we're passing in the enumerated index as the data, so dragging will output (via the print connected to orderChanged) something like:
python [1, 0, 2, 3] [1, 2, 0, 3] [1, 0, 2, 3] [1, 2, 0, 3]If you remove the item.set_data(n) you'll see the labels emitted on changes.
python ['B', 'A', 'C', 'D'] ['B', 'C', 'A', 'D']We've also implemented orientation onto the DragWidget using the Qt built in flags Qt.Orientation.Vertical or Qt.Orientation.Horizontal. This setting this allows you sort items either vertically or horizontally -- the calculations are handled for both directions.
Generic drag-drop sorting in vertical orientation.
Adding a Visual Drop TargetIf you experiment with the drag-drop tool above you'll notice that it doesn't feel completely intuitive. When dragging you don't know where an item will be inserted until you drop it. If it ends up in the wrong place, you'll then need to pick it up and re-drop it again, using guesswork to get it right.
With a bit of practice you can get the hang of it, but it would be nicer to make the behavior immediately obvious for users. Many drag-drop interfaces solve this problem by showing a preview of where the item will be dropped while dragging -- either by showing the item in the place where it will be dropped, or showing some kind of placeholder.
In this final section we'll implement this type of drag and drop preview indicator.
The first step is to define our target indicator. This is just another label, which in our example is empty, with custom styles applied to make it have a solid "shadow" like background. This makes it obviously different to the items in the list, so it stands out as something distinct.
python from PySide6.QtCore import QMimeData, Qt, Signal from PySide6.QtGui import QDrag, QPixmap from PySide6.QtWidgets import ( QApplication, QHBoxLayout, QLabel, QMainWindow, QVBoxLayout, QWidget, ) class DragTargetIndicator(QLabel): def __init__(self, parent=None): super().__init__(parent) self.setContentsMargins(25, 5, 25, 5) self.setStyleSheet( "QLabel { background-color: #ccc; border: 1px solid black; }" )We've copied the contents margins from the items in the list. If you change your list items, remember to also update the indicator dimensions to match.
The drag item is unchanged, but we need to implement some additional behavior on our DragWidget to add the target, control showing and moving it.
First we'll add the drag target indicator to the layout on our DragWidget. This is hidden to begin with, but will be shown during the drag.
python class DragWidget(QWidget): """ Generic list sorting handler. """ orderChanged = Signal(list) def __init__(self, *args, orientation=Qt.Orientation.Vertical, **kwargs): super().__init__() self.setAcceptDrops(True) # Store the orientation for drag checks later. self.orientation = orientation if self.orientation == Qt.Orientation.Vertical: self.blayout = QVBoxLayout() else: self.blayout = QHBoxLayout() # Add the drag target indicator. This is invisible by default, # we show it and move it around while the drag is active. self._drag_target_indicator = DragTargetIndicator() self.blayout.addWidget(self._drag_target_indicator) self._drag_target_indicator.hide() self.setLayout(self.blayout)Next we modify the DragWidget.dragMoveEvent to show the drag target indicator. We show it by inserting it into the layout and then calling .show -- inserting a widget which is already in a layout will move it. We also hide the original item which is being dragged.
In the earlier examples we determined the position on drop by removing the widget being dragged, and then iterating over what is left. Because we now need to calculate the drop location before the drop, we take a different approach.
If we wanted to do it the same way, we'd need to remove the item on drag start, hold onto it and implement re-inserting at it's old position on drag fail. That's a lot of work.
Instead, the dragged item is left in place and hidden during move.
python def dragMoveEvent(self, e): # Find the correct location of the drop target, so we can move it there. index = self._find_drop_location(e) if index is not None: # Inserting moves the item if its alreaady in the layout. self.blayout.insertWidget(index, self._drag_target_indicator) # Hide the item being dragged. e.source().hide() # Show the target. self._drag_target_indicator.show() e.accept()The method self._find_drop_location finds the index where the drag target will be shown (or the item dropped when the mouse released). We'll implement that next.
The calculation of the drop location follows the same pattern as before. We iterate over the items in the layout and calculate whether our mouse drop location is to the left of each widget. If it isn't to the left of any widget, we drop on the far right.
python def _find_drop_location(self, e): pos = e.position() spacing = self.blayout.spacing() / 2 for n in range(self.blayout.count()): # Get the widget at each index in turn. w = self.blayout.itemAt(n).widget() if self.orientation == Qt.Orientation.Vertical: # Drag drop vertically. drop_here = ( pos.y() >= w.y() - spacing and pos.y() <= w.y() + w.size().height() + spacing ) else: # Drag drop horizontally. drop_here = ( pos.x() >= w.x() - spacing and pos.x() <= w.x() + w.size().width() + spacing ) if drop_here: # Drop over this target. break return nThe drop location n is returned for use in the dragMoveEvent to place the drop target indicator.
Next wee need to update the get_item_data handler to ignore the drop target indicator. To do this we check w against self._drag_target_indicator and skip if it is the same. With this change the method will work as expected.
python def get_item_data(self): data = [] for n in range(self.blayout.count()): # Get the widget at each index in turn. w = self.blayout.itemAt(n).widget() if w != self._drag_target_indicator: # The target indicator has no data. data.append(w.data) return dataIf you run the code a this point the drag behavior will work as expected. But if you drag the widget outside of the window and drop you'll notice a problem: the target indicator will stay in place, but dropping the item won't drop the item in that position (the drop will be cancelled).
To fix that we need to implement a dragLeaveEvent which hides the indicator.
python def dragLeaveEvent(self, e): self._drag_target_indicator.hide() e.accept()With those changes, the drag-drop behavior should be working as intended. The complete code is shown below.
python from PySide6.QtCore import QMimeData, Qt, Signal from PySide6.QtGui import QDrag, QPixmap from PySide6.QtWidgets import ( QApplication, QHBoxLayout, QLabel, QMainWindow, QVBoxLayout, QWidget, ) class DragTargetIndicator(QLabel): def __init__(self, parent=None): super().__init__(parent) self.setContentsMargins(25, 5, 25, 5) self.setStyleSheet( "QLabel { background-color: #ccc; border: 1px solid black; }" ) class DragItem(QLabel): def __init__(self, *args, **kwargs): super().__init__(*args, **kwargs) self.setContentsMargins(25, 5, 25, 5) self.setAlignment(Qt.AlignmentFlag.AlignCenter) self.setStyleSheet("border: 1px solid black;") # Store data separately from display label, but use label for default. self.data = self.text() def set_data(self, data): self.data = data def mouseMoveEvent(self, e): if e.buttons() == Qt.MouseButton.LeftButton: drag = QDrag(self) mime = QMimeData() drag.setMimeData(mime) pixmap = QPixmap(self.size()) self.render(pixmap) drag.setPixmap(pixmap) drag.exec(Qt.DropAction.MoveAction) class DragWidget(QWidget): """ Generic list sorting handler. """ orderChanged = Signal(list) def __init__(self, *args, orientation=Qt.Orientation.Vertical, **kwargs): super().__init__() self.setAcceptDrops(True) # Store the orientation for drag checks later. self.orientation = orientation if self.orientation == Qt.Orientation.Vertical: self.blayout = QVBoxLayout() else: self.blayout = QHBoxLayout() # Add the drag target indicator. This is invisible by default, # we show it and move it around while the drag is active. self._drag_target_indicator = DragTargetIndicator() self.blayout.addWidget(self._drag_target_indicator) self._drag_target_indicator.hide() self.setLayout(self.blayout) def dragEnterEvent(self, e): e.accept() def dragLeaveEvent(self, e): self._drag_target_indicator.hide() e.accept() def dragMoveEvent(self, e): # Find the correct location of the drop target, so we can move it there. index = self._find_drop_location(e) if index is not None: # Inserting moves the item if its alreaady in the layout. self.blayout.insertWidget(index, self._drag_target_indicator) # Hide the item being dragged. e.source().hide() # Show the target. self._drag_target_indicator.show() e.accept() def dropEvent(self, e): widget = e.source() # Use drop target location for destination, then remove it. self._drag_target_indicator.hide() index = self.blayout.indexOf(self._drag_target_indicator) if index is not None: self.blayout.insertWidget(index, widget) self.orderChanged.emit(self.get_item_data()) widget.show() self.blayout.activate() e.accept() def _find_drop_location(self, e): pos = e.position() spacing = self.blayout.spacing() / 2 for n in range(self.blayout.count()): # Get the widget at each index in turn. w = self.blayout.itemAt(n).widget() if self.orientation == Qt.Orientation.Vertical: # Drag drop vertically. drop_here = ( pos.y() >= w.y() - spacing and pos.y() <= w.y() + w.size().height() + spacing ) else: # Drag drop horizontally. drop_here = ( pos.x() >= w.x() - spacing and pos.x() <= w.x() + w.size().width() + spacing ) if drop_here: # Drop over this target. break return n def add_item(self, item): self.blayout.addWidget(item) def get_item_data(self): data = [] for n in range(self.blayout.count()): # Get the widget at each index in turn. w = self.blayout.itemAt(n).widget() if w != self._drag_target_indicator: # The target indicator has no data. data.append(w.data) return data class MainWindow(QMainWindow): def __init__(self): super().__init__() self.drag = DragWidget(orientation=Qt.Orientation.Vertical) for n, l in enumerate(["A", "B", "C", "D"]): item = DragItem(l) item.set_data(n) # Store the data. self.drag.add_item(item) # Print out the changed order. self.drag.orderChanged.connect(print) container = QWidget() layout = QVBoxLayout() layout.addStretch(1) layout.addWidget(self.drag) layout.addStretch(1) container.setLayout(layout) self.setCentralWidget(container) app = QApplication([]) w = MainWindow() w.show() app.exec()If you run this example on macOS you may notice that the widget drag preview (the QPixmap created on DragItem) is a bit blurry. On high-resolution screens you need to set the device pixel ratio and scale up the pixmap when you create it. Below is a modified DragItem class which does this.
Update DragItem to support high resolution screens.
python class DragItem(QLabel): def __init__(self, *args, **kwargs): super().__init__(*args, **kwargs) self.setContentsMargins(25, 5, 25, 5) self.setAlignment(Qt.AlignmentFlag.AlignCenter) self.setStyleSheet("border: 1px solid black;") # Store data separately from display label, but use label for default. self.data = self.text() def set_data(self, data): self.data = data def mouseMoveEvent(self, e): if e.buttons() == Qt.MouseButton.LeftButton: drag = QDrag(self) mime = QMimeData() drag.setMimeData(mime) # Render at x2 pixel ratio to avoid blur on Retina screens. pixmap = QPixmap(self.size().width() * 2, self.size().height() * 2) pixmap.setDevicePixelRatio(2) self.render(pixmap) drag.setPixmap(pixmap) drag.exec(Qt.DropAction.MoveAction)That's it! We've created a generic drag-drop handled which can be added to any projects where you need to be able to reposition items within a list. You should feel free to experiment with the styling of the drag items and targets as this won't affect the behavior.
PyCoder’s Weekly: Issue #619 (March 5, 2024)
#619 – MARCH 5, 2024
View in Browser »
In this tutorial, you’ll learn about duck typing in Python. It’s a typing system based on objects’ behaviors rather than on inheritance. By taking advantage of duck typing, you can create flexible and decoupled sets of Python classes that you can use together or individually.
REAL PYTHON
“IPython Jupyter Magic commands (e.g. lines in notebook cells starting with % or %%) can decorate a notebook cell, or line, to modify its behavior.” This article shows you how to define them and where they can be useful.
STEFAN KRAWCZYK
Data scientists use Posit Connect to securely share insights. Automate time-consuming tasks & distribute custom-built tools & solutions across teams. Publish data apps, docs, notebooks, & dashboards. Deploy models as APIs, & configure reports to run & get distributed on a custom schedule →
POSIT sponsor
Monkey patching is the practice of modifying live code. This article shows you how its done and why and when to use the practice.
KARISHMA SHUKLA
One of the oldest active maintainers of the popular requests libraries reflects on the project’s good and bad parts over the last several years. He posits things that would improve the project and maintenance thereof. He also talks about what’s holding the project back right now. Associated Hacker News discussion.
IAN STAPLETON CORDASCO • Shared by nah
For large Python projects, managing dependency relationships between modules can be challenging. Using import-linter, this task can be made easier. This article provides a simple introduction to the import-linter tool and presents 6 practical ways to fix inappropriate dependencies.
PIGLEI • Shared by piglei
Today, you can build AI & data apps using only Python! This open-source Python end-to-end app builder helps you with it. Similar to Steamlit but designed to build production-ready apps, it offers some differences: scales as more users hit the app, can work with huge datasets, and is multi-user →
TAIPY sponsor
Reading user input from the keyboard is a valuable skill for a Python programmer, and you can create interactive and advanced programs that run on the terminal. In this tutorial, you’ll learn how to create robust user input programs, integrating error handling and multiple entries.
REAL PYTHON
This article shows you how to trace the system calls made when you run your Python program. It includes how you can use the Perfetto trace viewer to visualize the interactions.
MATT STUCHLIK
Vita has put together a site using data from the PyCoder’s newsletter. The site itself is built using Python tools. If you missed something in 2023, you might find it here.
VITA MIDORI • Shared by Vita Midori
Learn how to implement a complete user authentication system in Django from scratch, consisting of login, logout, signup, password change, and password reset.
WILL VINCENT • Shared by Will Vincent
This article on the Python History blog talks about why the decision was made to have integer division use floors, instead of truncation like C.
GUIDO VAN ROSSUM
This opinion piece by Vadim discusses how newer developers perceive what it means to be a senior developer, and how they’re often wrong.
VADIM KRAVCENKO
An article about names in Python, and why they’re not the same as objects. The article discusses reference counts and namespaces.
STEPHEN GRUPPETTA • Shared by Stephen Gruppetta
This post on McDonald’s technology blog talks about how they take advantage of reusable workflows with GitHub Actions.
MICHAEL GORELIK
This post covers some of the more popular options you can use when configuring git, and why you might choose them.
JULIA EVANS
GITHUB.COM/POMPONCHIK • Shared by Evgeniy Blinov
xonsh: Python-Powered, Cross-Platform, Unix-Gazing Shell django-queryhunter: Find Your Expensive QueriesGITHUB.COM/PAULGILMARTIN • Shared by Paul
Events Eclipse Insights: How AI Is Transforming Solar Astronomy March 5, 2024
MEETUP.COM • Shared by Laura Stephens
March 6, 2024
REALPYTHON.COM
March 7, 2024
MEETUP.COM
March 7, 2024
SYPY.ORG
March 9 to March 11, 2024
PYCON.PK
March 9 to March 10, 2024
DJANGOGIRLS.ORG
March 15 to March 18, 2024
PYCON.SK
Happy Pythoning!
This was PyCoder’s Weekly Issue #619.
View in Browser »
[ Subscribe to 🐍 PyCoder’s Weekly 💌 – Get the best Python news, articles, and tutorials delivered to your inbox once a week >> Click here to learn more ]
Real Python: Creating Asynchronous Tasks With Celery and Django
You’ve built a shiny Django app and want to release it to the public, but you’re worried about time-intensive tasks that are part of your app’s workflow. You don’t want your users to have a negative experience navigating your app. You can integrate Celery to help with that.
Celery is a distributed task queue for UNIX systems. It allows you to offload work from your Python app. Once you integrate Celery into your app, you can send time-intensive tasks to Celery’s task queue. That way, your web app can continue to respond quickly to users while Celery completes expensive operations asynchronously in the background.
In this video course, you’ll learn how to:
- Recognize effective use cases for Celery
- Differentiate between Celery beat and Celery workers
- Integrate Celery and Redis in a Django project
- Set up asynchronous tasks that run independently of your Django app
- Refactor Django code to run a task with Celery instead
[ Improve Your Python With 🐍 Python Tricks 💌 – Get a short & sweet Python Trick delivered to your inbox every couple of days. >> Click here to learn more and see examples ]
PyCharm: Deploying Django Apps in Kubernetes
As an open-source container orchestration platform that automates deployment, scaling, and load balancing, Kubernetes offers unparalleled resilience and flexibility in the management of your Django applications.
Whether you’re launching a small-scale project or managing a complex application, Kubernetes provides a robust environment to enhance your Django application, ensuring it’s ready to meet the demands of modern web development.
By automating the deployment, scaling, and operation of containerized applications, Kubernetes (or K8s) provides numerous benefits for organizations in the fast-paced tech industry.
Whether you’re a Django developer looking to enhance your deployment skills or a Kubernetes enthusiast eager to explore Django integration, this guide has something for everyone.
The introduction to this tutorial explores the symbiotic relationship between Django and Kubernetes, enabling you to seamlessly containerize your web application, distribute workloads across clusters, and ensure high availability.
DjangoThe Django framework, a high-level Python web framework, stands as a beacon of efficiency and simplicity in the world of web development. Born out of the need to create rapid, robust, and maintainable web applications, Django has become a go-to choice for developers and organizations.
At its core, Django embraces the “batteries-included” philosophy, offering an extensive array of built-in tools, libraries, and conventions that facilitate the development process. It simplifies complex tasks like URL routing, database integration, and user authentication, allowing developers to focus on building their applications.
One of Django’s foremost benefits is its adherence to the “Don’t repeat yourself” (DRY) principle, reducing redundancy and enhancing code maintainability. It also follows the model-view-controller (MVC) architectural pattern, making applications structured and easy to manage.
Django also prioritizes security, making it less prone to common web vulnerabilities. It includes features like cross-site scripting (XSS) and cross-site request forgery (CSRF) protection out of the box. Offering a potent combination of speed, simplicity, and security, Django is an ideal choice for developers looking to create robust, feature-rich web applications with minimal effort.
Container orchestratorsContainer orchestrators are essential tools for managing and automating the deployment, scaling, and operation of containerized applications. There are several container orchestrators available on the market, the most popular of which include:
1. Kubernetes, the top open-source container orchestration platform, offers a robust and adaptable environment for handling containerized applications. It automates tasks such as scaling, load balancing, and container health checks, with a broad extension ecosystem.
2. Docker Swarm is a container orchestration solution provided by Docker. Designed to be simple to set up and use, it’s a good choice for smaller applications or organizations already using Docker as it uses the same command-line interface and API as Docker.
3. OpenShift is an enterprise Kubernetes platform developed by Red Hat. It adds developer and operational tools on top of Kubernetes, simplifying the deployment and management of containerized applications.
4. Nomad, developed by HashiCorp, is a lightweight and user-friendly orchestrator capable of managing containers and non-containerized applications.
5. Apache Mesos is an open-source distributed system kernel, and DC/OS (data center operating system) is an enterprise-grade platform built on Mesos. DC/OS extends Mesos with additional features for managing and scaling containerized applications.
Software teams primarily work with managed platforms offered by well-known cloud providers such as AWS, Google Cloud Platform, and Azure. These cloud providers offer services like Amazon EKS, Google GKE, and Azure AKS, all of which are managed Kubernetes solutions. These services streamline the setup, expansion, and administration of Kubernetes clusters and seamlessly integrate with the respective cloud environments, ensuring efficient container orchestration and application deployment.
Creating a Django Application in PyCharmIn this tutorial, we’ll start by generating a minimal Django application. We’ll then containerize the application and, in the final step, deploy it to a local Kubernetes cluster using Docker Desktop.
If you’re new to working with the Django framework but are eager to create a Django application from scratch, read this blog post.
You can access the source code used in this tutorial here.
Let’s begin by creating a new Django application in PyCharm.
To create your project, launch PyCharm and click New Project. If PyCharm is already running, select File | New Project from the main menu.
Furnish essential details such as project name, location, and interpreter type, utilizing either venv or a custom environment.
Then, click Create.
PyCharm will do the heavy lifting by setting up your project and creating the virtual environment.
GunicornOnce the project has been created, install Gunicorn – a popular Python web server gateway interface (WSGI) HTTP server. A pre-fork worker model web server used to serve Python web applications, Gunicorn is often used in combination with web frameworks like Django, Flask, and others to deploy web applications and make them accessible over the internet.
The Python Packages tool window provides the quickest and easiest way to preview and install packages for the currently selected Python interpreter.
You can open the tool window via View | Tool Windows | Python Packages.
Psycopg 2Psycopg 2 is a Python library used to connect to and interact with PostgreSQL databases. It provides a Python interface for working with PostgreSQL, one of the most popular open-source relational database management systems. Psycopg 2 allows Python developers to perform various database operations, such as inserting, updating, and retrieving data, as well as executing SQL queries, and managing database connections from within Python programs.
Before installing psycopg2, you need to install the system-level dependencies, brew install libpq for macOS, and apt-get install libpq-dev for Linux.
Reference: postgresql.org/docs/16/libpq.html
libpq is the client library for PostgreSQL. It’s a C library that provides the necessary functionality for client applications to connect to, interact with, and manage PostgreSQL database servers.
After completing the particular modifications, update the section within settings.py related to DATABASES.
Always make sure to pass your secret credentials through environment variables.
STATIC_ROOTIn Django, STATIC_ROOT is a configuration setting used to specify the absolute file system path where collected static files will be stored when you run the collectstatic management command. Static files typically include CSS, JavaScript, images, and other assets used by your web application. The STATIC_ROOT setting is an essential part of serving static files in a production environment.
Set an environment variable for STATIC_ROOT at line 127. This variable will point to a file path that leads to a Kubernetes persistent volume. I’ll explain later how to configure this setup.
To collect static files, run the following command:
python manage.py collectstatic
This command will gather the static files and place them in the STATIC_ROOT directory. You can then serve these assets directly through an NGINX or Apache web server – a more efficient approach for production environments.
DockerfileA Dockerfile is a straightforward textual document containing directives for constructing Docker images.
1. FROM python:3.11: This line specifies the base image for the Docker image using the official Python 3.11 image from Docker Hub. The application will be built and run on top of this base image, which already has Python pre-installed.
2. ENV PYTHONUNBUFFERED 1: This line sets an environment variable PYTHONUNBUFFERED to 1. It’s often recommended to set this environment variable when running Python within Docker containers to ensure that Python doesn’t buffer the output. This helps in getting real-time logs and debugging information from the application.
3. WORKDIR /app: This line sets the working directory within the Docker container to /app. All subsequent commands will be executed in this directory.
4. COPY . /app: This line copies the contents of the current directory (the directory where the Dockerfile is located) to the /app directory within the container. This includes your application code and any files needed for the Docker image.
5. RUN pip install -r requirements.txt: This line runs the pip install command to install the Python dependencies listed in a requirements.txt file located in the /app directory. This is a common practice for Python applications as it allows you to manage the application’s dependencies.
6. EXPOSE 8000: This line informs Docker that the container listens on port 8000. It doesn’t actually publish the port. It’s a metadata declaration to indicate which ports the container may use.
7. CMD ["gunicorn", "django_kubernetes_tutorial.wsgi:application", "--bind", "0.0.0.0:8000"]: This line specifies the default command to run when the container starts. It uses Gunicorn to serve the Django application and binds Gunicorn to listen on all network interfaces (0.0.0.0) on port 8000 using the WSGI application defined in django_kubernetes_tutorial.wsgi:application.
DockerHubVisit hub.docker.com and proceed to either log in or sign up on the platform.
Click on Create repository.
Next, provide the repository name and make the visibility public. If you’re working with sensitive or confidential information, set the visibility to Private.
Once the repository has been created, you need to build the docker image and then push the image to the registry.
Before executing the command, ensure that your requirements.txt file is current by running the following command:
pip freeze > requirements.txt
To construct an image, execute the following command:
docker build -t mukulmantosh/django-kubernetes:1.0 .
docker build -t <USERNAME>/django-kubernetes:1.0 .
This command will vary depending on your specific circumstances, and you will need to utilize your personal username.
You then need to authenticate with Docker Hub to push the image to the registry.
Type the following command in the terminal:
docker login
Enter your username and password. Once they have been successfully authenticated, you can push the image by running:
docker push mukulmantosh/django-kubernetes:1.0
docker push <USERNAME>/django-kubernetes:1.0
Once the image has been successfully pushed, you can observe changes in Docker Hub.
If you don’t plan to push any more images to the registry, you can log out by running the following command:
docker logout
If you want to pull this image locally, visit hub.docker.com/r/mukulmantosh/django-kubernetes.
Kubernetes Configuration: Writing YAML FilesThis section of the tutorial describes the deployment of applications to local Kubernetes clusters.
For this tutorial, we will be using Docker Desktop, but you could also use minkube or kind.
NamespacesIn Kubernetes, namespaces is a virtual partition within a cluster that is used to group and isolate resources and objects. It’s a way to create multiple virtual clusters within a single physical cluster.
You can create and manage namespaces using kubectl, the Kubernetes command-line tool, or by defining them in YAML manifests when deploying resources.
- If you’ve chosen Docker Desktop as your preferred platform for running Kubernetes, be sure to enable Kubernetes in the settings by clicking the Enable Kubernetes checkbox.
Run the following command in the terminal to create namespace:
kubectl create ns django-app
Deploying databases with K8sTo begin, let’s establish a PostgreSQL instance in our Kubernetes cluster on the local environment.
PersistentVolumeIn Kubernetes, a persistent volume (PV) is a piece of storage in the cluster that an administrator has provisioned. By storing data in a way that is independent of a pod’s life cycle, PVs allow for a more decoupled and flexible management and abstraction of storage resources. This means data can persist even if the pod that uses it is deleted or rescheduled to a different node in the cluster.
Let’s create a persistent volume and name it pv.yml.
This YAML configuration defines a PersistentVolume resource named postgres-pv with a capacity of 1 gigabyte, mounted using the ReadWriteOnce access mode, and provided by a local path on the node’s file system located at /data/db. This PV can be used to provide persistent storage for pods that need access to a directory on the node’s file system and is suitable for applications like PostgreSQL or other stateful services that need persistent storage.
For production, we recommend either using cloud solutions like AWS RDS or Google CloudSQL, or use Kubernetes StatefulSets.
PersistentVolumeClaimIn Kubernetes, a PersistentVolumeClaim (PVC) is a resource object used by a pod to request a specific amount of storage with certain properties from a PV. PVCs act as a way for applications to claim storage resources without needing to know the details of the underlying storage infrastructure.
By creating and using PVCs, Kubernetes provides a way to dynamically allocate and manage storage resources for applications while abstracting the underlying storage infrastructure, making it easier to work with and manage stateful applications in containerized environments.
Let’s create a PVC and name it pvc.yml.
A PVC requests storage resources and is bound to a PV that provides the actual storage.
This YAML configuration defines a PersistentVolumeClaim named postgres-pvc within the django-app namespace. It requests a gigabyte of storage with the ReadWriteOnce access mode, and it explicitly specifies the manual StorageClass. This PVC is intended to be bound to an existing PV with the name postgres-pv, effectively reserving that volume for use by pods within the django-app namespace that reference this PVC.
ConfigMapIn Kubernetes, a ConfigMap is an API object that is used to store configuration data in key-value pairs. ConfigMaps provides a way to decouple configuration data from the application code, making it easier to manage and update configurations without modifying and redeploying containers. They are especially useful for configuring applications, microservices, and other components within a Kubernetes cluster.
Let’s create a ConfigMap and name it cm.yml.
Although this tutorial uses ConfigMaps, for security considerations, it’s recommended to store sensitive credentials in Kubernetes Secrets or explore alternatives like Bitnami Sealed Secrets, AWS Parameter Store, or HashiCorp Vault.
DeploymentIn Kubernetes, a Deployment is a resource object used to manage the deployment and scaling of applications. It’s part of the Kubernetes API group and provides a declarative way to define and manage the desired state of your application.
A Deployment is a higher-level Kubernetes resource used for managing and scaling application pods.
This YAML configuration defines a Deployment named postgres in the django-app namespace. It deploys a single replica of a PostgreSQL database (version 16.0) with persistent storage. The database pod is labeled as app: postgresdb, and the storage is provided by a PVC named postgres-pvc. Configuration and credentials for the PostgreSQL container are provided via a ConfigMap named db-secret-credentials.
ServiceIn Kubernetes, a Service is a resource object used to expose a set of pods as a network service. Services enable network communication between different parts of your application running in a Kubernetes cluster and provide a stable endpoint for clients to access those parts. Services abstract the underlying network infrastructure, making it easier to connect and discover the components of your application.
This YAML configuration defines a NodePort Service named postgres-service within the django-app namespace. It exposes the PostgreSQL service running in pods labeled with “app: postgresdb” on port 5432 within the cluster. External clients can access the Service on any node’s IP address using port 30004. This Service provides a way to make the PostgreSQL database accessible from outside the Kubernetes cluster.
Creating YAML configurations for a Django application PersistentVolumeThis YAML defines a PersistentVolume named staticfiles-pv with a 1 GB storage capacity, allowing multiple pods to read and write to it simultaneously. The storage is provided by a local host path located at /data/static. The Django static files will be stored at this location.
PersistentVolumeClaimThis YAML defines a PVC named staticfiles-pvc in the django-app namespace. It requests storage with a capacity of at least 1 GB from a PV with the “manual” StorageClass, and it specifies that it needs ReadWriteMany access. The claim explicitly binds to an existing PV named staticfiles-pv to satisfy its storage needs. This allows pods in the django-app namespace to use this PVC to access and use the storage provided by the associated PV.
ConfigMapThis YAML defines a ConfigMap named app-cm in the django-app namespace, and it contains various key-value pairs that store configuration data. This ConfigMap can be used by pods or other resources within the django-app namespace to access configuration settings, such as database connection information and static file paths.
DeploymentThis YAML defines a Deployment named django-app-deploy in the django-app namespace. It creates one replica (pod) running a container with a specific Docker image and configuration. The pod is associated with two volumes, postgres-db-storage and staticfiles, which are backed by PVCs. The container is configured to use environment variables from a ConfigMap named app-cm and listens on port 8000. The volumes are mounted at specific paths within the container to provide access to database storage and static files. This Deployment is a common way to run a Django application using Kubernetes.
If you are interested in pulling images from a private registry, then read here.
ServiceThe Service listens on port 8000 and directs incoming traffic to pods labeled with app: django-application. This is a common configuration for exposing and load-balancing web applications in a Kubernetes cluster where multiple instances of the same application are running. The Service ensures that traffic is distributed evenly among them.
NGINXNGINX is a high-performance web and reverse proxy server known for its speed, reliability, and scalability. It efficiently handles web traffic, load balancing, and content delivery, making it a popular choice for serving websites and applications.
ConfigMapThis YAML defines a Kubernetes ConfigMap named nginx-cm in the django-app namespace, and it contains a key-value pair where the key is default.conf and the value is a multiline NGINX configuration file that proxies the request to the backend server.
DeploymentThis YAML defines a Deployment that creates and manages pods running an NGINX container with specific volumes and configurations. The Deployment ensures that one replica of this pod is always running in the django-app namespace. It also overrides the default NGINX configuration by replacing it with the nginx-cm ConfigMap.
ServiceThis YAML configuration creates a Kubernetes Service named nginx-service in the django-app namespace. It exposes pods with the label app:nginx on port 80 within the cluster and also makes the Service accessible on NodePort 30005 on each cluster node. This allows external traffic to reach the pods running the NGINX application via the NodePort service.
Managing batch workloads with Kubernetes jobsIn Kubernetes, a Job is a resource object that represents a single unit of work or a finite task. Jobs are designed to run tasks to completion, with a specified number of successful completions.
Database migrationThis YAML configuration defines a Kubernetes Job named django-db-migrations in the django-app namespace. The Job runs a container using a custom Docker image for Django migrations and mounts a PVC to provide storage for database-related files. If the Job fails, it can be retried up to 15 times, and it will retain its pod for 100 seconds after completion. This Job will create new tables in PostgreSQL.
Static filesThis YAML configuration defines a Kubernetes Job named django-staticfiles in the django-app namespace. The Job runs a container using a custom Docker image for collecting static files for a Django application and mounts a PVC to provide storage for the static files. If the Job fails, it can be retried up to three times, and it will retain its pod for 100 seconds after completion for debugging purposes. This Job will copy the static files to the mountPath, which is /data/static.
Launching the ApplicationTo launch the application, navigate to the k8s directory and execute the following command:
After deploying the application, use the following command to verify the status of running pods:
kubectl get pods -n django-app -w
Creating a superuser in DjangoOnce all your applications are up and running, create a superuser to login into the Django admin.
Run the following command to get the list of running pods:
kubectl get pods -n django-app
To get inside the container shell, run:
kubectl exec -it <POD_NAME> -n django-app -- sh
Then, run:
python manage.py createsuperuser
Once you’ve successfully created the superuser, open http://127.0.0.1:30005 in a browser. You will be directed to the default welcome page.
Then, head over to the Django admin via http://127.0.0.1:30005/admin.
Enter the username and password that you’ve just created.
Once authenticated, you will be redirected to the Django administration page.
If you try logging through localhost:30005/admin, you might receive a 403 Forbidden (CSRF) error.
You can resolve this in the settings.py file under CSRF_TRUSTED_ORIGINS.
CSRF_TRUSTED_ORIGINS is a setting in Django that is used to specify a list of trusted origins for cross-site request forgery (CSRF) protection. CSRF is a security vulnerability that can occur when an attacker tricks a user into unknowingly making an unwanted request to a web application. To prevent this, Django includes built-in CSRF protection.
CSRF_TRUSTED_ORIGINS allows you to define a list of origins (websites) from which CSRF-protected requests are accepted. Any request originating from an origin not included in this list will be considered potentially malicious and duly blocked.
This setting can be used to allow certain cross-origin requests to your Django application while maintaining security against CSRF attacks. It’s particularly helpful in scenarios where your application needs to interact with other web services or APIs that are hosted on different domains.
If you are using GUI tools like Kubernetes Dashboard, you can easily visualize your running pods, deployments, persistent volumes, etc.
Kubernetes Support in PyCharmPyCharm offers an enhanced editor and runtime support tailored for Kubernetes, bringing a host of features to streamline your Kubernetes management, including:
- Browsing cluster objects, extracting and editing their configurations, and describing them.
- Viewing events.
- Viewing and downloading pod logs.
- Attaching the pod console.
- Running shell in pods.
- Forwarding ports to a pod.
- Applying resource YAML configurations from the editor.
- Deleting resources from the cluster.
- Completion of ConfigMap and Secret entries from the cluster.
- Configuring paths to kubectl.
- Configuring custom kubeconfig files globally and per project.
- Switching contexts and namespaces.
- Using API schema (including CRD) from the active cluster to edit resource manifests.
Watch this video to learn more about working with Kubernetes in PyCharm Professional.
Try PyCharm for your Kubernetes tasks for free!
DOWNLOAD PYCHARM ReferencesAlready have a solid understanding of Kubernetes? Then, take the next step in your programming journey by exploring cloud solutions, and check out our tutorials on AWS EKS and Google Kubernetes Engine.
Python Bytes: #373 Changing Directories
CodersLegacy: Exploring Data Tables in Tkinter with PandasTable
In this tutorial, we will delve into the powerful combination of Pandas and Tkinter through the PandasTable library. PandasTable provides a convenient way to display and interact with pandas DataFrames in a Tkinter GUI.
Prerequisites:- Basic knowledge of Python and Tkinter.
- Some Familiarity with Pandas and DataFrames.
You will also need to install the pandas and pandastable libraries. Run the following commands to do so:
pip install pandas pip install pandastable Creating Interactive Data Tables with PandasTable in TkinterLet’s start by importing the required libraries for our tutorial.
import tkinter as tk from pandastable import Table, TableModel import pandas as pdCreate a class for your application and initialize the main Tkinter window.
class PandasTableApp: def __init__(self, root): self.frame = tk.Frame(root) self.frame.pack(padx=10, pady=10)Next, we need to define a DataFrame with some sample data, which we will feature in our PandasTable.
# Create a sample DataFrame data = {'Name': ['John', 'Alice', 'Bob'], 'Age': [28, 24, 22], 'City': ['New York', 'San Francisco', 'Los Angeles']} df = pd.DataFrame(data)Now, create a PandasTable widget and display the DataFrame within the Tkinter window. Remember to call the show function, as it is responsible for visually rendering (or updating) the PandasTable.
# Create a PandasTable self.table = Table(self.frame, dataframe=df, showtoolbar=True, showstatusbar=True) self.table.show()Tip: Don’t ever put the root window as the PandasTable object’s parent (first parameter). You must use a container type object, such as a frame as the parent.
Complete the script with the Tkinter main loop.
if __name__ == "__main__": root = tk.Tk() app = PandasTableApp(root) root.mainloop()This gives us the following output:
You can see the Toolbar on the right which comes with a whole bunch of cool features, such as saving the table and loading it. Various mutations you can apply, deleting rows, adding rows, zoom features, even some advanced plotting features, you name it!
Modifying the PandasTable directlyMost the functions are fairly intuitive, so there is little need to explain how to use them. Instead, there is another important aspect we will focus on explaining.
As a programmer, you need to know how to modify this table internally (through code). In the previous example, we initialized the table with a dataframe, but what if we want to make modifications (e.g. load another dataframe, or add a new record).
To do so, you can access the dataframe using the table.model.df attributes. The following code defines a function which modifies the table by adding a new row:
import tkinter as tk from pandastable import Table, TableModel import pandas as pd class PandasTableApp: def __init__(self, root): self.frame = tk.Frame(root) self.frame.pack(padx=10, pady=10) # Create a sample DataFrame data = {'Name': ['John', 'Alice', 'Bob'], 'Age': [28, 24, 22], 'City': ['New York', 'San Francisco', 'Los Angeles']} self.df = pd.DataFrame(data) # Create a PandasTable self.table = Table(self.frame, dataframe=self.df, showtoolbar=True, showstatusbar=True) self.table.show() self.modify_table() def modify_table(self): new_row = {'Name': 'Eve', 'Age': 25, 'City': 'Paris'} self.df = self.df._append(new_row, ignore_index=True) self.table.model.df = self.df self.table.redraw() if __name__ == "__main__": root = tk.Tk() app = PandasTableApp(root) root.mainloop()Note that we used the redraw function after making the changes. This function is required for the changes to visually update.
As you can see, our new row has been added:
This marks the end of the Tkinter with PandasTable tutorial. Any suggestions or contributions for CodersLegacy are more than welcome. Questions regarding the tutorial content can be asked in the comments section below.
The post Exploring Data Tables in Tkinter with PandasTable appeared first on CodersLegacy.
TechBeamers Python: Generate Random IP Address (IPv4/IPv6) in Python
This tutorial dives into the world of generating random IP addresses in Python. It’ll first walk you through the concept of IP addresses and describe the two main versions (IPv4 and IPv6). After that, it’ll equip you with the knowledge and code to create your random IP address generator. Side by side, it’ll highlight potential […]
The post Generate Random IP Address (IPv4/IPv6) in Python appeared first on TechBeamers.
EuroPython: EuroPython March 2024 Newsletter
Hey ya 👋 hope you are having a good start to 2024 ❤️
It&aposs been a dog’s age since we last spoke. In case you don’t know the reason for our hiatus: we took Elmo’s question of “How is everybody doing?” to its core and had to face the inner truths of our existence.
Luckily, soon the days got longer and the word news got worse so we had to unlock our doors and come out to organise the bestest of conferences!
We are now pumped to get things rolling and ready to cook up an awesome experience for EuroPython 2024 🚀
🇨🇿EuroPython 2024 - Prague Congress Centre 08-14 July
We are coming back to Prague! We loved last year so much that we decided to have EuroPython 2024 at the Prague Congress Centre again between the 8th and 14th of July, 2024. To stay up to date with the latest news, please visit our website.
We also encourage you to sign up to our monthly community newsletter.
Mr. Bean knows thingsCall for Proposals 🐍The call for proposals for EuroPython 2024 is OPEN! 🎉
This year we’re aiming for a similar schedule as last year, i.e. around 120 talks, more or less 16 tutorials, posters and special events.
- Tutorials/Workshops (8-9 July): will be hands-on 180 min sessions with 40-100 participants
- Talks (10-12 July) : 30 or 45 min length presentations of specific and general interest to the European Python community (including a dedicated PyData track).
We are looking for sessions of all levels: beginner, intermediate, and advanced.
You are also welcome to submit posters! They will be printed in large formats. This is a graphical way to showcase your research, project or technology. Posters are exhibited at the conference, can be read at any time by participants, and can be discussed face-to-face with their authors during the Poster Sessions (between July 10th and 12th).
No matter your level of Python or public speaking experience, EuroPython&aposs job is to help you bring yourself to our community so we all flourish and benefit from each other&aposs experience and contribution. 🏆
The deadline for submission is March 6th, 2024 Anywhere on Earth.We would love to see your proposals bubbling in there. Help us make 2024 the year of another incredible EuroPython!
For more information, have a look at https://ep2024.europython.eu/cfp.
Speaker&aposs Mentorship Programme 🎤The Speaker&aposs Mentorship Programme is back for EuroPython 2024!
We had a call for mentees and mentors last month and it was a huge success 🚀So far, we have managed to match 28 speakers to diligent mentors.
On the 26th of February, we hosted an Ask me Anything session for all the people interested in submitting a proposal. Our programme team was there and answered all the questions raised by interested speakers. We clarified information about the Call for Proposals and shared knowledge about Financial Aid, amongst other info.
If you are curious and would like to see what was discussed, the session recording can be found on YouTube at: https://youtu.be/EiCfmf6QVIA
Call for ContributorsConference Organisers 💪To the wonderful humans who signed up to help organise the EuroPython Conference itself, thank you! We are late in replying to everyone and we are thankful for your patience. We got caught between dengue fevers 🦟 and carnivals 🎊.
The good news is that we are now back on track and will reach out to everyone this week.We had a lot of applications this year, so a selection process was required. But fear nothing! In case you don’t get to work with the most fun team of all time, there is always next year. 🌟
We look forward to working together to make this conference an unforgettable experience for everyone involved 💼✨
Speaker’s mentors 🎏For everyone who signed up to either mentor on the Speaker’s Mentorship Programme, a HUGE thank you! This would not be possible without your collaboration and work. We are so very proud to have you around learning and sharing and strengthening the community.
We truly hope you take advantage of the opportunity and develop the skills you’re looking for. After all, we believe the best way to learn is to teach. 📚✨
Proposal Reviewers 📔We also announced the Call for Proposal Reviewers. These awesome volunteers are the people who review the proposal’s submissions and vote on the ones which they think are more suitable for making up the conference&aposs programme.
This is very crucial work as it plays a significant part in shaping the EuroPython 2024 schedule!
A massive thank you to everyone who has filled the form to help. You will get a cucumber lollipop as a sign of our affection. 🍭
We will contact you by the end of the Call for Proposals to coordinate all the fun stuff. Please, keep an eye out for our email this month so we can start the labour. ⚒️
Fáilte Ireland Award 🏆The 2022 edition of the EuroPython Conference (EPC) was in Dublin, Ireland. More old news? You bet! But this time it is relevant because in November 2023, the 21st edition of the EPC was awarded a Conference Ambassador Recognition Award from Fáilte Ireland, the National Tourism Development Authority for the country.
The evening was fantastic and a delightful way to acknowledge the people and businesses who have hosted conference events on the little Emerald Island. This is our first prize. We’re feeling proud and happy and wanted to share the news! 🥇
One of our members wrote more about the experience on LinkedIn.
Laís Carvalho (EuroPython) and Nicolas Laurance (Python Ireland) hold the Irish-sized whiskey glass awarded 🥃 from Failte IrelandEPS BoardWe have a new Board for 2023-2024.
If you want to learn the names of the new board members, head over to the article on our website: https://www.europython-society.org/eps-board-2023-2024/
TL;DR: We hope to do a fine job this year and help the European Python community thrive even more!If you want to talk to us about anything, give feedback, or ask for a partner to count the stars beside you, shoot us an email at board@europython.eu.
Upcoming Events in EuropeHere are some Python events happening in Europe in the near future.
PyCon Slovakia: March 15-17 2024PyCon SK will happen in the wonderful city of Bratislava! The conference is organised by the civic association SPy, which focuses on the promotion and dissemination of the Python programming language and other open-source technologies and ideas.
Check out their programme here: https://2024.pycon.sk/en/speakers/index.html. More information can be found on their website: https://2024.pycon.sk/en/index.html
PyCon DE & PyData Berlin: April 22-24 2024Immerse yourself in three days of Python and PyData excellence at our community-driven conference in the vibrant heart of Berlin. From workshops to live keynote sessions, connect with fellow enthusiasts and experts alike! Join fellow Pythonistas at the iconic BCC venue at Alexanderplatz where we actually hosted EuroPython 2014! Check out their website for more info: https://2024.pycon.de/
PyCon Italy: May 22-25 2024PyCon Italia 2024 will happen in Florence. The birthplace of Renaissance will receive a wave of Pythonistas looking to geek out this year. The schedule is online and you can check it out at their cutely animated website ( https://2024.pycon.it/). Beginners will have a special treat by having a full day of activities on May 22nd. Starting with Workshops about Python, Data Science, and Public Speaking.
It’s time to get tickets!
GeoPython: May 27-29 2024GeoPython 2024 will happen in Basel, Switzerland. Focused on exploring the fascinating fusion of Python programming and the boundless world of Geo, the 9th edition of GeoPython has already published a preliminary schedule (here: https://2024.geopython.net/schedule).
For more information about GeoPython 2024, you can visit their website here: https://2024.geopython.net/
Djangocon.eu: June 5-9 2024DjangoCon Europe 2024 will happen in Vigo, Spain. Organized by Django practitioners from all levels, the 16th edition of the Conference will be hosted in the beautiful Galician city, famous for its amazing food & the Illas Atlanticas.
You can check more information about Django Con Europe at their lovely website: https://2024.djangocon.eu/
Py.Jokespip install pyjokesimport pyjokesprint(pyjokes.get_joke()) Child: Dad, why does the Sun rise in the East and set in the West? Dad: Son, it&aposs working, don&apost touch it! That&aposs all, folks! 🏁Thanks for reading along.
We will have a regular monthly appearance in your inbox from now on. We are happy to tailor our future editions to accommodate what you&aposd like to see here. Influence what gets to your inbox by dropping us a line at communications@europython.eu
With joy and excitement,
EuroPython 2024 Team 🤗
Real Python: Python's __all__: Packages, Modules, and Wildcard Imports
Python has something called wildcard imports, which look like from module import *. This type of import allows you to quickly get all the objects from a module into your namespace. However, using this import on a package can be confusing because it’s not clear what you want to import: subpackages, modules, objects? Python has the __all__ variable to work around this issue.
The __all__ variable is a list of strings where each string represents the name of a variable, function, class, or module that you want to expose to wildcard imports.
In this tutorial, you’ll:
- Understand wildcard imports in Python
- Use __all__ to control the modules that you expose to wildcard imports
- Control the names that you expose in modules and packages
- Explore other use cases of the __all__ variable
- Learn some benefits and best practices of using __all__
To get the most out of this tutorial, you should be familiar with a few Python concepts, including modules and packages, and the import system.
Get Your Code: Click here to download the free sample code that shows you how to use Python’s __all__ attribute.
Importing Objects in PythonWhen creating a Python project or application, you’ll need a way to access code from the standard library or third-party libraries. You’ll also need to access your own code from the multiple files that may make up your project. Python’s import system is the mechanism that allows you to do this.
The import system lets you get objects in different ways. You can use:
- Explicit imports
- Wildcard imports
In the following sections, you’ll learn the basics of both strategies. You’ll learn about the different syntax that you can use in each case and the result of running an import statement.
Explicit ImportsIn Python, when you need to get a specific object from a module or a particular module from a package, you can use an explicit import statement. This type of statement allows you to bring the target object to your current namespace so that you can use the object in your code.
To import a module by its name, you can use the following syntax:
Python import module [as name] Copied!This statement allows you to import a module by its name. The module must be listed in Python’s import path, which is a list of locations where the path based finder searches when you run an import.
The part of the syntax that’s enclosed in square brackets is optional and allows you to create an alias of the imported name. This practice can help you avoid name collisions in your code.
As an example, say that you have the following module:
Python calculations.py def add(a, b): return float(a + b) def subtract(a, b): return float(a - b) def multiply(a, b): return float(a * b) def divide(a, b): return float(a / b) Copied!This sample module provides functions that allow you to perform basic calculations. The containing module is called calculations.py. To import this module and use the functions in your code, go ahead and start a REPL session in the same directory where you saved the file.
Then run the following code:
Python >>> import calculations >>> calculations.add(2, 4) 6.0 >>> calculations.subtract(8, 4) 4.0 >>> calculations.multiply(5, 2) 10.0 >>> calculations.divide(12, 2) 6.0 Copied!The import statement at the beginning of this code snippet brings the module name to your current namespace. To use the functions or any other object from calculations, you need to use fully qualified names with the dot notation.
Note: You can create an alias of calculations using the following syntax:
Python import calculations as calc Copied!This practice allows you to avoid name clashes in your code. In some contexts, it’s also common practice to reduce the number of characters to type when using qualified names.
For example, if you’re familiar with libraries like NumPy and pandas, then you’ll know that it’s common to use the following imports:
Python import numpy as np import pandas as pd Copied!Using shorter aliases when you import modules facilitates using their content by taking advantage of qualified names.
You can also use a similar syntax to import a Python package:
Read the full article at https://realpython.com/python-all-attribute/ »[ Improve Your Python With 🐍 Python Tricks 💌 – Get a short & sweet Python Trick delivered to your inbox every couple of days. >> Click here to learn more and see examples ]
PyCharm: Best PyCharm Plugins 2024
PyCharm is designed to be used straight out of the box, but you can customize it further by installing the right plugins.
In this article, we’ll be highlighting the top PyCharm plugins that can bring great value to you. They are not available out of the box, but if you’re looking for something to further enhance your productivity, they’re great options.
Every plugin that we mention in this article can be found on JetBrains Marketplace. In sharing our top picks, we offer some plugins that we recommend trying, especially those that are popular with our users. Whether you’re a seasoned developer or just starting out, these plugins are sure to add value to your development process.
Let’s start by covering some basics.
How to install PyCharm pluginsYou can download the plugin from JetBrains Marketplace. Then go to PyCharm, click on Plugins > settings > Install plugin from disk, and select the plugin you just downloaded.
A much more straightforward way is to find the plugin directly in the IDE. Go to settings > Plugins > Marketplace, find the plugin you want to install, and then click the Install button.
After installation, you’ll need to restart PyCharm to activate the new features. You can read more about how to install PyCharm plugins here.
How to disable PyCharm pluginsIf you don’t want to use a plugin anymore, you can easily disable it.
To do so, navigate to File > Settings (or PyCharm on macOS) and select Plugins from the left-hand menu. On the Installed tab, you’ll see a list of your installed plugins. To disable a plugin, simply uncheck its box and apply the changes.
Top AI coding tools 1. JetBrains AI AssistantAI Assistant provides AI-powered features for software development based on the JetBrains AI service (please visit the page to find out more details about AI Assistant). The AI service will not be vendor-exclusive and will transparently connect users to different large language models (LLMs) in the future.
At the moment, the service supports OpenAI’s GPT-3.5 and GPT-4 models and additionally hosts a number of smaller models created by JetBrains.
Its seamless integration with PyCharm means you can access these AI-driven features directly from the IDE.
This plugin is a must-have for developers who want to code smarter and faster while maximizing their code quality. This is only available for paid PyCharm Professional licenses, so student, open source, and educational licenses are excluded.
Features:
- Use AI Assistant’s chat tool to ask questions about your code and get context-aware answers.
- Generate a commit message by clicking the Generate Commit Message with AI Assistant button.
- Generate refactoring suggestions, documentation for declarations, and error explanations from the output.
- AI Assistant creates and maintains a library of user prompts.
- Get suggestions for the names of classes, functions, variables, and more for selected languages.
- Get insights into the code’s functionality and structure.
- Generate unit tests and create test files under the right directory.
- Identify and pinpoint issues within the codebase.
- Easily convert your code to a different programming language.
- Craft personalized prompts using AI Assistant to suit your unique requirements.
The deep integration between AI Assistant and PyCharm means that suggestions can be made using deep contextual information, including the current file, recently used files, programming languages, dependencies, and the structure of the project.
The model prompts are created using embedded ML models. This means that the outputs from AI Assistant are as relevant as possible, as they are able to take the users’ intent and current behavior into account.
2. CoPilotCoPilot, developed by GitHub, was the first LLM-powered coding assistant to be released, and it demonstrated the potential of these powerful tools. This plugin acts as a collaborative partner, providing real-time code suggestions and assistance as you work within PyCharm.
Research suggests that CoPilot enhances developers’ coding productivity by helping them code faster and reducing the number of repetitive tasks.
Features:
- CoPilot writes unit tests where the user can select the test cases they want to run.
- Can’t remember the correct SQL syntax? CoPilot generates the SQL code for you.
- CoPilot encourages collaboration by suggesting code changes and offering insights on best practices.
The Full Line Code Completion plugin by JetBrains is based on a deep-learning model that runs on your local machine. This means that your data won’t be shared anywhere, and you can access the functionalities even when offline.
It goes beyond the standard code suggestion functionality by offering complete lines of code tailored to your current context. This means you can quickly insert code, such as if statements, loops, functions, or class definitions with just a few keystrokes.
This plugin is a productivity booster, especially for those who frequently write boilerplate code.
Features:
- Perform multiple checks before getting code suggestions, ensuring the semantic correctness of the generated code.
- Define custom code templates for frequently used code patterns. You can create your own code snippets and insert them with ease, further improving your coding efficiency.
- Customize completion shortcuts. For example, choose between the right key, tab key, enter key, etc.
- Navigate to the plugin’s settings and information directly from the hover menu for quick navigation.
LLM-IntelliJ by Hugging Face is a plugin that provides code completion powered by machine learning. It suggests code completions in your editor as you type your code.
It is well integrated with the Hugging Face platform, while also allowing you to choose different backends to host models. You can also use many different code models, such as StarCoder and CodeLlama, among others.
Features:
- Benefit from ghost-text code completion.
- Choose any model that supports code completion.
- Works with Hugging Face’s Inference API, TGI, and other backends like Ollama.
Tabnine helps developers write code more efficiently and offers a built-in chat feature for communication with other developers, streamlining the coding process and promoting teamwork and knowledge sharing.
Features:
- Tabnine provides context-aware code completions and can generate tests and documentation for existing code.
- Tabnine’s AI assistant will help you get the right code the first time. It provides code guidance that’s consistent with your team’s best practices, saving costly and frustrating code review iterations.
- It also improves code consistency across your entire project, suggesting completions that align with your best practices for code that’s easier to read, manage, and maintain.
Big Data Tools simplifies the process of working with big data frameworks and technologies, significantly improving the development and debugging experience.
The plugin seamlessly integrates with Apache Spark and Apache Hadoop, two of the most widely used big data frameworks. This integration empowers developers to create, debug, and optimize big data applications right from PyCharm.
The Big Data Tools plugin is only available for PyCharm Professional users.
Features:
- Big Data Tools offers tools for visualizing big data results, which means you can spot trends, anomalies, and patterns in your data more efficiently.
- It provides performance monitoring capabilities, allowing developers to identify and rectify performance bottlenecks, which is critical in the world of big data.
The OpenCV Image Viewer facilitates the manipulation and analysis of images within PyCharm, making it a valuable tool for tasks ranging from image processing to computer vision research.
Whether you’re developing algorithms for image recognition, object detection, or image filtering, the OpenCV Image Viewer simplifies the process by providing real-time image processing capabilities.
Features:
- You can easily load, display, and manipulate images in popular formats for computer vision tasks.
- Perform real-time image processing and display results without stopping the debugger.
This plugin is completely free as of November 2023, but the authors are soon going to shift to a freemium model along with many new functionalities that will be available to paid users.
Check out our blog post entitled ‘How to quickly display OpenCV images during debugging’ for an easy tutorial that will ease you into using this plugin.
3. Lets-Plot in SciViewLets-Plot in SciView is a plugin that combines the power of the Lets-Plot library with the SciView window for data visualization and analysis.
This plugin is only available for PyCharm Professional users.
Features:
- Users can create a wide range of data visualizations, including scatter plots, bar charts, heatmaps, and more using Lets-Plot’s extensive capabilities.
- They can also generate interactive plots and charts that can be customized and explored in real time within PyCharm.
JetBrains plugins utilize the latest technologies so you can streamline data science and coding tasks, eliminate repetitive work, and so much more. They boost your productivity, reduce errors, and allow you to tailor PyCharm to your specific needs.
It’s time to code smarter, not harder, and embrace the endless opportunities that PyCharm and its plugins offer.
Just head over to JetBrains Marketplace and start exploring!
Django Weblog: Django security releases issued: 5.0.3, 4.2.11, and 3.2.25
In accordance with our security release policy, the Django team is issuing Django 5.0.3, Django 4.2.11, and Django 3.2.25. These releases addresses the security issue detailed below. We encourage all users of Django to upgrade as soon as possible.
CVE-2024-27351: Potential regular expression denial-of-service in django.utils.text.Truncator.words()django.utils.text.Truncator.words() method (with html=True) and truncatewords_html template filter were subject to a potential regular expression denial-of-service attack using a suitably crafted string (follow up to CVE-2019-14232 and CVE-2023-43665).
Thanks Seokchan Yoon for the report.
This issue has severity "moderate" according to the Django security policy.
Affected supported versions- Django 5.0
- Django 4.2
- Django 3.2
Patches to resolve the issue have been applied to the 5.0, 4.2, and 3.2 release branches. The patches may be obtained from the following changesets:
- On the 5.0 release branch
- On the 4.2 release branch
- On the 3.2 release branch
The following releases have been issued:
- Django 5.0.3 (download Django 5.0.3 | 5.0.3 checksums)
- Django 4.2.11 (download Django 4.2.11 | 4.2.11 checksums)
- Django 3.2.25 (download Django 3.2.25 | 3.2.25 checksums)
The PGP key ID used for this release is Mariusz Felisiak: 2EF56372BA48CD1B.
General notes regarding security reportingAs always, we ask that potential security issues be reported via private email to security@djangoproject.com, and not via Django's Trac instance or the django-developers list. Please see our security policies for further information.
Python GUIs: Working With Python Virtual Environments — Setting Your Python Working Environment, the Right Way
As Python developers, we often need to add functionality to our applications which isn't provided by the standard library. Rather than implement everything ourselves, we can instead install 3rd party Python packages from the official Python package index at PyPI using pip. The pip tool downloads and installs these 3rd party packages into our Python installation so we can immediately use them in our scripts and applications.
The Python standard library is a set of Python packages that come bundled with Python installers. This library includes modules and packages like math and usually Tkinter.
There is a caveat here though: we can only install a single version of a package at any one time. While this isn't a problem when you create your first project, when you create the second any changes you make to the dependencies will also affect the first project. If any of your dependencies depend on other packages themselves (usually the case!) you may encounter conflicts where fixing the dependencies for one project breaks the dependencies for another.
This is known as dependency hell.
Thankfully, Python has a solution for this: Python virtual environments. Using virtual environments you can manage the packages for each project independently.
In this tutorial, we will learn how to create virtual environments and use them to manage our Python projects and their dependencies. We will also learn why virtual environments are an essential tool in any Python developer's arsenal.
Table of Contents- Understand Why We Need Python Virtual Environments
- Explore How Python Virtual Environments Work
- Install Python On Your System
- Create Python Virtual Environments
- Use Python Virtual Environments
- Manage Your Project's Dependencies With pip
- Conclusion
When working on a project, we often rely on specific external or third-party Python package versions. However, as packages get updated, their way of working may change.
If we update a package, the changes in that package may mean other projects stop functioning. To solve this issue, we have a few different options:
- Continue using the outdated version of the package in all our projects.
- Update all our projects whenever a new version of the package comes out.
- Use Python virtual environments to isolate the projects and their dependencies.
Not updating packages means that we won't be able to take advantage of new features or improvements. It can also affect the security of our project because we're not up-to-date with essential security updates and bug fixes for the Python packages our project relies on.
On the other hand, constantly updating our projects to keep them functional isn't much fun. While not always necessary, it quickly can become tedious and impractical, depending on the scale and the number of projects we have.
The last and best option is to use Python virtual environments. They allow us to manage the Python packages needed for each application separately. So we can choose when to update dependencies without affecting other projects that rely on those packages.
Using virtual environments gives us the benefit of being able to update packages without the risk of breaking all our projects at once. It gives us more time to make sure that each project works properly with the updated package version. It also avoids conflicts between package requirements and dependency requirements in our various projects.
Finally, using Python virtual environments is also recommended to avoid system conflicts because updating a package may break essential system tools or libraries that rely on a particular version of the package.
Explore How Python Virtual Environments WorkA virtual environment is a folder containing a lightweight installation of Python. It creates a stripped-down and isolated copy of the base Python installation on our system without requiring us to install Python again.
Because a virtual environment is an isolated copy of our current system Python, we will find a copy of the python and pip executables inside each virtual environment folder. Once we activate a virtual environment, any python or pip commands will point to these executables instead of the ones in our system installation.
We can check where our system currently points Python commands to by running python -c "import sys; print(sys.executable)". If we are not using a virtual environment, this command will show us where the system Python installation is located. Inside a virtual environment it will point to the environment's executable.
Using a virtual environment also means that pip will install external packages in the environment's site folder rather than in the system's. This way, we can keep different versions of a Python package installed in independent virtual environments. However, we still can only have one version of a given package per virtual environment.
Install Python On Your SystemIn case you haven't done it yet, you need to install Python on your development machine before being able to use it.
Install Python on Windows or macOSYou can install Python by going to its download page and grabbing the specific installer for either Windows or macOS. Then, you have to run the installer and follow the on-screen instructions. Make sure you select the option to Add Python to PATH during the installation process.
Python is also available for installation through Microsoft Store on Windows machines.
Install Python on LinuxIf you are on Linux, you can check if Python is installed on your machine by running the python3 --version command in a terminal. If this command issues an error, you can install Python from your Linux distribution repository.
You will find that the Python version available in most Linux repositories is relatively old. To work around this issue, you can use tools like pyenv, which allows the installation of multiple Python versions.
For example, on Ubuntu and Debian, you can install Python by executing:
sh $ sudo apt install python3You may also need to install pip, the Python package installer, and venv, the module that allows you to create virtual environments. To do this, run the following command:
sh $ sudo apt install python3-pip python3-venvYou only need to install pip and venv separately in some Linux distributions, including Ubuntu and Debian.
Create Python Virtual EnvironmentsThe standard way to create virtual environments in Python is to use the venv module, which is a part of the standard library, so you shouldn't need to install anything additional on most systems.
A virtual environment is a stripped-down and isolated copy of an existing Python installation, so it doesn't require downloading anything.
You'll typically create a virtual environment per project. However, you can also have custom virtual environments with different purposes in your system.
To add a new virtual environment to a project, go to your project folder and run the following command in a terminal:
sh $ python -m venv ./venvIf you check inside your project folder now, you'll see a new subfolder named venv. This folder contains the virtual environment you just made.
Using venv, env, or .venv as the virtual environment name is a common and accepted practice in the Python community.
Use Python Virtual EnvironmentsNow that you've successfully created your Python virtual environment, you can start using it to install whatever packages you need for your project. Note that every new virtual is like a fresh Python installation, with no third-party package available.
Unless you choose to pass the --system-site-packages switch to the venv command when you create the virtual environment, it will only contain the Python standard library and a couple of required packages. For any additional packages, we need to use pip to install them.
In the following sections, you'll learn how to activate your virtual environment for use, install packages, manage dependency, and more.
Activate the Virtual EnvironmentTo start using a virtual environment, you need to activate it. The command to do this depends on your operating system and terminal shell.
On Unix systems, such as macOS and Linux, you can run the following command:
sh $ source venv/bin/activateThis command activates your virtual environment, making it ready for use. You'll know that because your prompt will change from $ to (venv) $. Go ahead and run the following command to check your current Python interpreter:
sh (venv) $ python -c "import sys; print(sys.executable)" /path/to/project/venv/bin/pythonThe output of this command will contain the path to the virtual environment interpreter. This interpreter is different from your system interpreter.
If you're on Windows and using PowerShell, then you can activate your virtual environment by running the following command:
sh PS> venv\Scripts\activateAgain, you'll know the environment is active because your prompt will change from PS> to (venv) PS>.
Great! With these steps completed, we're now ready to start using our Python virtual environment.
Install Packages in the Virtual EnvironmentOnce the virtual environment is active, we can start using pip to install any packages our project requires. For example, say you want to install the PyQt GUI framework to create desktop apps. In this case, you can run the following command:
sh (venv) $ python -m pip install pyqt6This command downloads and installs PyQt from the Python package index directly. Now you can start working on your GUI project.
Once you've activated a virtual environment, you can use pip directly without the python -m prefix. However, best practices recommend using this command format.
You can also install multiple packages in one go:
sh (venv) $ python -m pip install black flake8 mypy pytestTo install multiple packages with a single command, you only have to list the desired packages separated by spaces, as you did in the above command.
Finally, sometimes it's also useful to update a given package to its latest version:
sh (venv) $ python -m pip install --upgrade pyqt6The --upgrade flag tells pip to install the latest available version of an already installed package.
Deactivate a Virtual EnvironmentOnce you are done working on your GUI app, you need to deactivate the virtual environment so you can switch back to your system shell or terminal. Remember that you'll have to reactivate this virtual environment next time you need to work on your project.
Here's how you can deactivate a Python virtual environment:
sh (venv) $ deactivateThis command deactivates your virtual environment and gets you back into your system shell. You can run the python -c "import sys; print(sys.executable)" command to check that your current Python interpreter is your system Python.
Manage the Location of Your Virtual EnvironmentsAlthough you can place your virtual environments anywhere on your computer, there are a few standardized places for them to live. The most common one is inside the relevant project folder. As you already learned, the folder will usually be named venv or .venv.
If you use Git for version control, make sure to ignore the virtual environment folder by adding it to .gitignore.
If you want to have all your virtual environments in a central location, then you can place them in your home folder. Directories like ~/.venvs and ~/.virtualvenvs are commonly used locations.
The Python extension for Visual Studio Code automatically looks for any virtual environments in a couple of places, including inside your current project folder and specific folders in your home folder (if they exist). If you want to specify additional external folders for it to look in, go to Settings and configure python.venvFolders or python.venvPath. To avoid confusion, a good idea is to name each virtual environment in this folder after the relevant project name.
Delete a Python Virtual EnvironmentsIf you are no longer working with a given virtual environment, you can get rid of it and all the related Python packages by simply deleting the virtual environment folder.
If you delete the virtual environment associated with a given project, to run the project again, you'll have to create a new virtual environment and install the required packages.
Manage Your Project's Dependencies With pipYou've already learned how to create Python virtual environments to isolate the dependencies of your projects and avoid package versioning issues across different projects. You also learned how to install external dependencies with pip.
In the following sections, you'll learn how to efficiently manage a project's dependencies using pip and requirement files.
Generate a Requirement FileAn important advantage of using a dedicated virtual environment for each of our Python projects is that the environment will only contain the packages for that specific project. We can use the pip freeze command to get the list of currently installed packages in any active virtual environment:
sh (venv) $ python -m pip freeze PyQt6==6.5.0 PyQt6-Qt6==6.5.0 PyQt6-sip==13.5.1This command allows us to create a text file containing the lists of the packages our project needs for running. To do this, go ahead and run the following command:
sh (venv) $ python -m pip freeze > requirements.txtAfter running the above command, you'll have a new file called requirements.txt in your project's directory.
By convention, the Python community uses the name requirements.txt for those files containing the list of dependencies of a given project. This file typically lives in the project's root directory.
Run the following command to check the content of this new file:
sh $ cat requirements.txt PyQt6==6.5.0 PyQt6-Qt6==6.5.0 PyQt6-sip==13.5.1As you can see, your requirements.txt file lists those packages that you've installed in the active virtual environment. Once you have this file in place, anyone who needs to run your project from its source will know which packages they need to install. More importantly, they can use the file to install all the dependencies automatically, as you'll learn in the following section.
Install Project Dependencies From a Requirement FileBesides of being able to see the list of Python packages our application needs, the requirements file also makes installing those packages in a new virtual environment just one command away:
sh (new_venv) $ python -m pip install -r requirements.txtThe -r option of pip install allows you to provide a requirement file as an argument. Then, pip will read that file and install all the packages listed in it. If you run pip freeze again, you'll note that this new environment has the same packages installed.
Tweak the Requirements FileAlthough using pip freeze is quite convenient, it often creates a lot of unnecessary clutter by populating the requirement file with Python packages that our application may not rely on directly. For example, packages that are dependencies of required packages and also packages that are only needed for development.
The generated file will also include the exact version of each package we have installed. While this may be useful, it is best to keep the requirement file clean. For example, dependencies of dependencies can often be ignored, since managing those is the responsibility of that package. That way, it'll be easy to know which packages are really required.
For example, in a GUI project, the requirements.txt file may only need to include PyQt6. In that case it would look like this:
sh $ cat requirements.txt PyQt6==6.5.0Specifying the highest or lowest version of required packages may also be beneficial. To do this, we can replace the equality operator (==) with the less than (<=) or greater than (>=) operators, depending on your needs. If we completely omit the package version, pip will install the latest version available.
Create a Development Requirement FileWe should consider splitting our project requirement file into two separate files. For example, requirements.txt and requirements_dev.txt. This separation lets other developers know which packages are required for your project and which are solely relevant for development and testing purposes.
For example, you may use Black for formatting, flake8 for linting, mypy for type checking, and pytest for testing your code. In this case, your requirements_dev.txt file should look something like this:
sh $ cat requirements_dev.txt black flake8 mypy pytestWith this file in place, developers who want to contribute to your project can install the required development dependencies easily.
ConclusionBy now, you have a good understanding of how Python virtual environments work. They are straightforward to create and make it easy to manage the Python packages you need for developing your applications and projects.
Avoid installing Python packages outside of a virtual environment whenever possible. Creating a dedicated environment for a small Python script may not make sense. However, it's always a good idea to start any Python project that requires external packages by creating its own virtual environment.
TechBeamers Python: Python Remove Elements from a List
Hi everyone – Today’s tutorial brings you various techniques to remove elements from a Python list. Manipulating lists is a fundamental aspect of programming, and understanding how to efficiently remove elements can significantly enhance your Python coding skills. We will cover a range of methods, from basic and straightforward approaches to more advanced techniques that […]
The post Python Remove Elements from a List appeared first on TechBeamers.
Real Python: The Real Python Podcast – Episode #194: Automate Tasks With Python & Building a Small Search Engine
What are the typical computer tasks you do manually every week? Could you automate those tasks with a Python script? Christopher Trudeau is back on the show this week, bringing another batch of PyCoder's Weekly articles and projects.
[ Improve Your Python With 🐍 Python Tricks 💌 – Get a short & sweet Python Trick delivered to your inbox every couple of days. >> Click here to learn more and see examples ]
PyCharm: PyCharm 2024.1 EAP 7: Support for Flask and FastAPI bigger applications in the Endpoints tool window
PyCharm 2024.1 EAP 7 is now available, providing a sneak peek into some exciting new features planned for the next major release. Notable updates include support for Flask and FastAPI bigger applications in the Endpoints tool window, improvements to the Version Control integrations and support for WireMock.
You can download the new version from our website, update directly from the IDE or via the free Toolbox App, or use snaps for Ubuntu.
User experience Refreshed product iconsThe latest EAP build for PyCharm 2024.1 introduces refreshed product icons, aligning with updates across all JetBrains IDEs and enhancing visual appeal and consistency across the ecosystem.
Endpoints tool window [PyCharm Professional] Support for FastAPI/Flask bigger applications (multiple files)Now, when you are working on your Flask or FastAPI project in PyCharm, the endpoints in the Endpoints tool window are grouped by apps. Also, PyCharm is now able to detect the endpoints declared in libraries, as well as several endpoints per path and endpoints for different HTTP-methods.
WireMock server supportIn PyCharm 2024.1 EAP 7, we’re introducing WireMock support via a plugin that you can get from JetBrains Marketplace or install from inside the IDE. This integration includes schema completion for JSON configurations, the ability to generate WireMock stub files from the Endpoints tool window, and a built-in server run configuration that allows users to spin up the server directly from the editor. This addition enables you to swiftly create test data servers or stubs, simplifying the development of web UIs and microservices.
Version control systems Option to exclude folders and files from comparisonWe’ve enhanced the diff viewer with an option to specify specific folders and files to be ignored during the comparison process so that you can focus solely on relevant changes. Just right-click on any file or folder you don’t want to appear in the comparison results and select Exclude from results from the context menu.
Improved search in the Branches popupWe’ve enhanced the search functionality available in the Branches popup. With this update, you can now filter search results by actions and repositories for quicker and more precise navigation within your version control system.
Support for --update-refs for interactive rebaseThe Rebase dialog now features the --update-refs option, meaning that once it is selected, PyCharm ensures that the Git repository’s history accurately reflects the modifications made during the rebase operation.
Quick fixes for React props and state creationWe’ve introduced several new quick fixes for React. These quick fixes allow you to add props and state on the fly. The Create prop in <CurrentComponent> quick fix allows you to add a prop to the current component from the unresolved symbol. PyCharm will attempt to detect the target props declaration type or interface and add the prop with a correctly inferred type:
The second quick fix has similar mechanics but allows adding props to a component defined in your project directly from the JSX:
These quick fixes are also compatible with class-based React components.
Finally, a very similar mechanism is available for creating state in functional React components:
These are the most notable updates brought by this week’s EAP build. For a comprehensive overview of all the implemented changes, please refer to the release notes.
We highly value your feedback on the new features since your insights play an essential role in molding the final version of the release. Feel free to share your thoughts in the comments below or via X (formerly Twitter). Should you encounter any bugs, please submit a report via our issue tracker.
TechBeamers Python: Selenium Python Extent Report Guide
Automated testing is essential for ensuring that software works reliably. We’ll use two powerful tools, Selenium (for testing websites) and Extent Report (for clear result summaries), to streamline the process. This tutorial will guide you through setting up Selenium automation in Python and integrating Extent Report for thorough and technical reporting. 1. Setup and Installation […]
The post Selenium Python Extent Report Guide appeared first on TechBeamers.
Talk Python to Me: #451: Djangonauts, Ready for Blast-Off
Tryton News: Newsletter March 2024
During the last month we mainly focused on fixing bugs, adjusting how things work, improving performance and adding new features.
Changes for the User Sales, Purchases and ProjectsNow we assume that most businesses will try and deliver to customers as fast as
possible. So we set the default lead time for products to 0.
Statement journals can now be searched for by the bank account number and the currency.
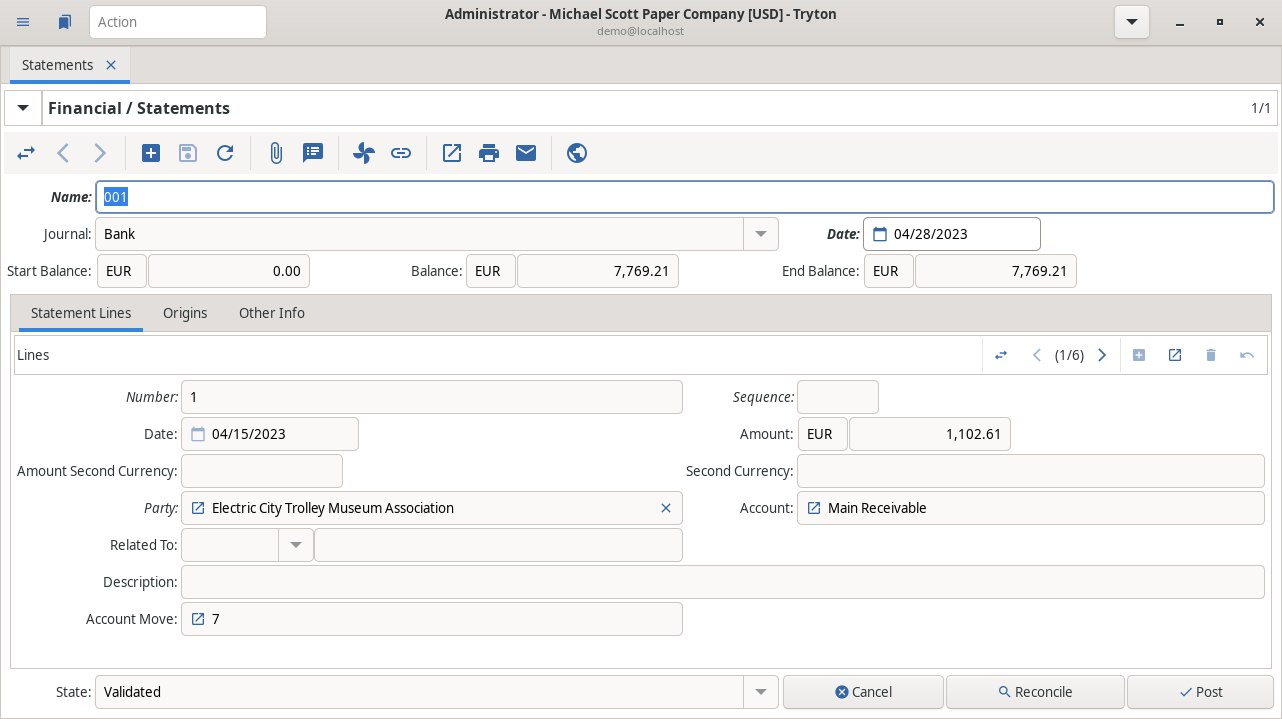
Tryton now supports the payment of invoices using a different currency to the statement’s currency.
Now Tryton only uses the sign of the combined debit and credit to calculate the kind of payment of the move line.
Stock, Production and ShipmentsNow we only set the number on productions and on shipments when they first enter the “waiting” state.
The stock lot trace functionality now shows the stock locations a lot was moved between and also all related stock moves.
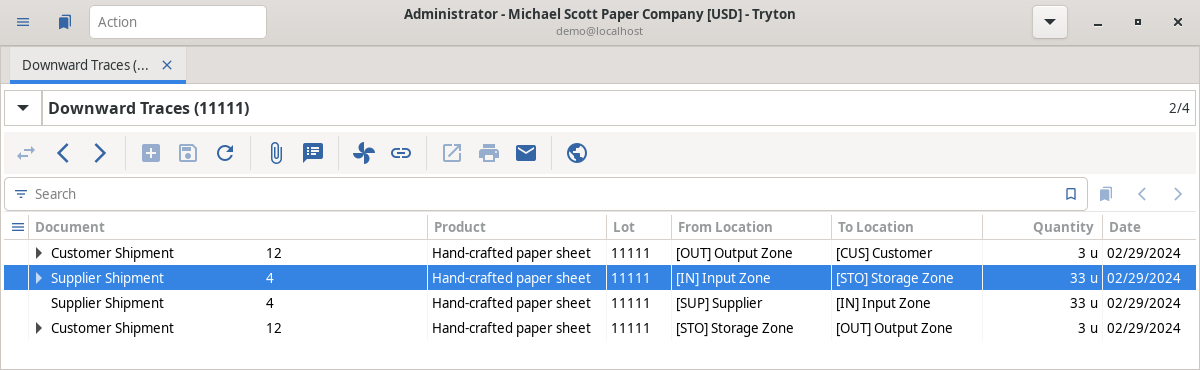
Now Tryton manages the stock assignation for customer shipments even when the picking and output locations are the same to ensure the stock is assigned and not available for use by someone else.
Now we use the warehouse of the corresponding location on the internal shipment, in case the transit location is used.
User InterfaceSao now supports drag and drop on the image widget and binary select button.
Editable lists are now selected on the first first click and become editable on the second.
Sao now provides a contextual menu to copy cells and columns.
System Data and ConfigurationNow we calculate the name of a product for sales, purchase and invoice lines and stock moves. For example, showing the customer product name or the supplier product name instead of product name in reports.
Now you can use template substitutions for the company header and footer fields used in reports.
New DocumentationWe reworked parts of the Tryton documentation.
New ReleasesWe released bug fixes for the currently maintained long term support series
7.0 and 6.0, and for the penultimate series 6.8.
We rewrote the worker using concurrent.futures replacing the former multiprocessing to be able to have a better control of dead child processes which can’t accept further tasks. Also be aware of the new maxtasksperchild option for Python >= 3.11.
Changes for Implementers and DevelopersWe introduced two mix-ins for deactivating products and templates:
- trytond.modules.product.ProductDeactivatableMixin
- trytond.modules.product.TemplateDeactivatableMixin
By default, the copy method no longer copies readonly=True relation fields. But we do keep copying readonly moves on shipments.
The UI now considers the null value as valid empty data for binary fields.
1 post - 1 participant
Pages
Recent Publications
- Managing Hidden Dependencies in OO Software: a Study Based on Open Source Projects
- Open Source Communities as Liminal Ecosystems
- Investigating developers' email discussions during decision-making in Python language evolution
- Developers, Quality Control and Download Volume in Open Source Software (OSS) Projects
FLOSS Project Planets
- Spinning Code: Writing for Developers and Consultants: Know your Documents Types
- Four Kitchens: Managing configuration in Drupal upstreams
- Bounteous.com: A Breakdown of Drupal Innovations
- The Drop Times: Brian Perry Discusses Latest Updates and Future Vision for the API Client Initiative
- Ian Ozsvald: What I’ve been up to since 2022
FLOSS Research
- OSI at PyCon US: engaging with AI practitioners and developers as we reach OSAID’s first release candidate
- Open Source AI Definition – Weekly update May 27
- Exploring openness in AI: Insights from the Columbia Convening
- Open Source AI Definition – Weekly update May 20
- Unveiling ClearlyDefined: this free SBOM service gets cleared for takeoff